Lemon Berry Tart
August 3rd, 2009 | 33 Comments
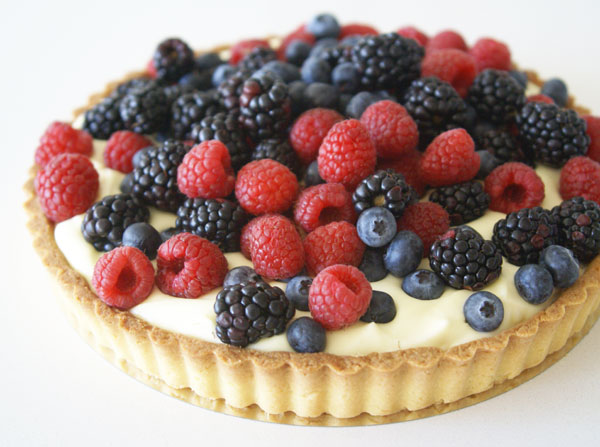
Eating lemons makes me feel like I’m getting a good cleanse on the inside. After a big, fatty dinner, they have the effect of cutting through all the lingering lard that’s coated the tongue. Even just picturing a slice of juicy lemon sets the saliva into overdrive. See what I mean? It’s happening to you, too.
One of my go-to peasant desserts when I was a kid was this: take a lemon, slice it as thinly as possible, with rind, pith and all and toss it with a generous load of sugar. It was like a game of chicken. Me versus the lemon. The first bite would send my face into all sorts of puckers, but soon my palate would get used to it like a nose gets used to an odor. I could then settle into the intensity of this poor man’s version of a Lemon Head.
Short of eating straight lemons, lemon curd is as vividly lemony as a lemon can get, without sending you running for the hills. It’s refined—a lemon that’s been slapped into submission. A lemon that’s been shown the ropes. And man, does it go down easy. It is, after all, so bursting with sun.
I had quite a big jar of curd after I made it here, so what’s a lady with a kitchen full of curd to do? Throw it in a tart shell and call it a day. And use it as an excuse to try out the tart dough recipe Deb posted on smittenkitchen (she got it from Dorie Greenspan). Deb said it didn’t shrink and she was about right. Mine shrank a hair, but it’s nothing compared to what I’m used to.
***
Tools Used For This Recipe
Here’s the type of 9″ tart pan I used. It should have a removable bottom.
World Cuisine Tin Plate Fluted Tart Mold 9 1/2 Inch x 1 Inch
Lemon Berry Tart
makes one 9-inch tart
Tart shell
1 1/2 cups all-purpose flour
1/2 cup confectioner’s sugar
1/4 teaspoon salt
1 stick plus 1 tablespoon (9 tablespoons; 4 1/2 ounces) very cold unsalted butter, chopped up small
1 large egg
Tart filling
about 1/2 cup raspberry preserve
2 cups lemon mousse, as shown here
assorted berries
1. Ingredients for the tart shell.
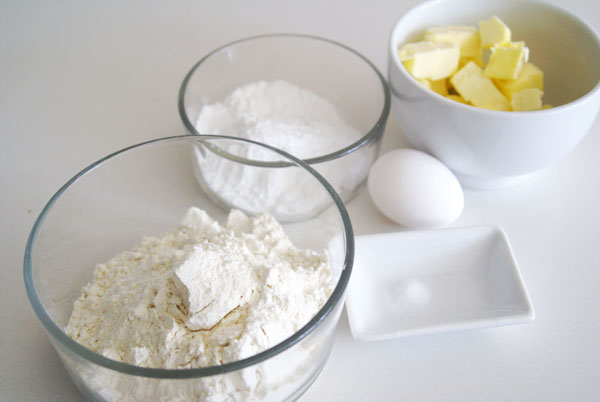
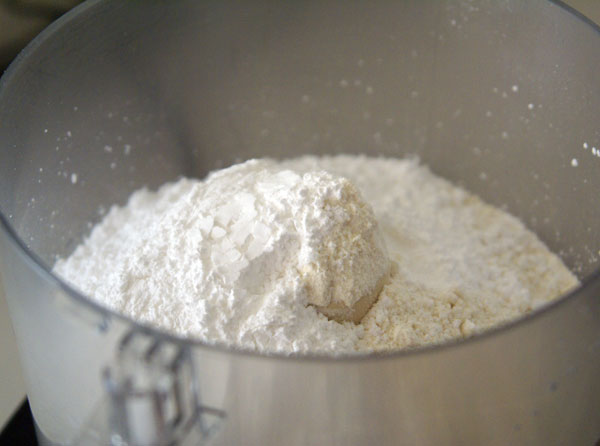
2. Throw the flour, sugar, and salt in a food processor and pulse a couple of times until it’s mixed together.
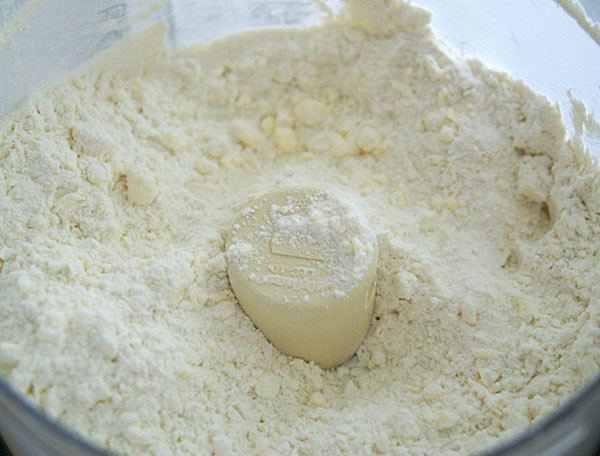
3. Add in COLD butter lumps.
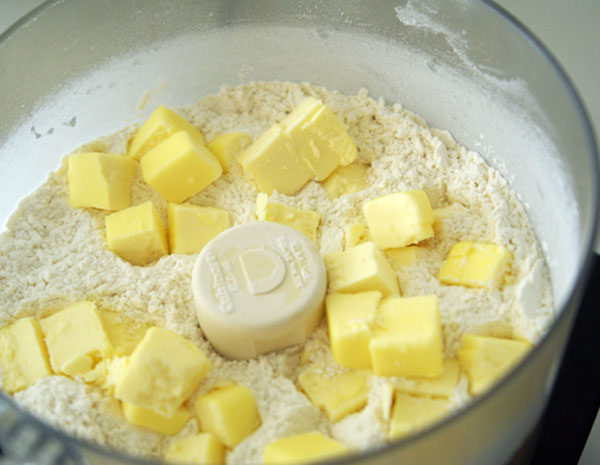
Pulse for a few beats. The mix will look coarse and grainy and a few pea-sized butter bits should remain, like this:
4. Add in egg, pouring it around the whole surface.
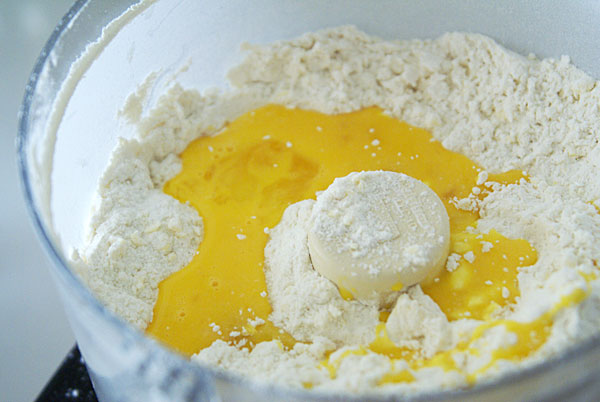
Pulse again, paying close attention to not let the food processor get away from you. I like to let it come almost to a ball of dough but not quite. Then I knead the rest by hand so I can control it myself. Overprocessing the dough can make it tough. Here it is after a few pulses.
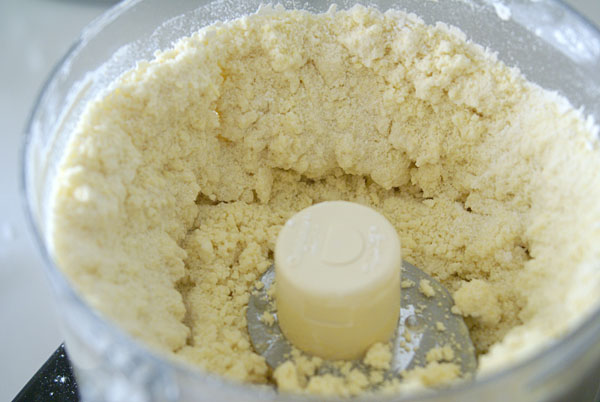
Here it is after a few more pulses. Chunky.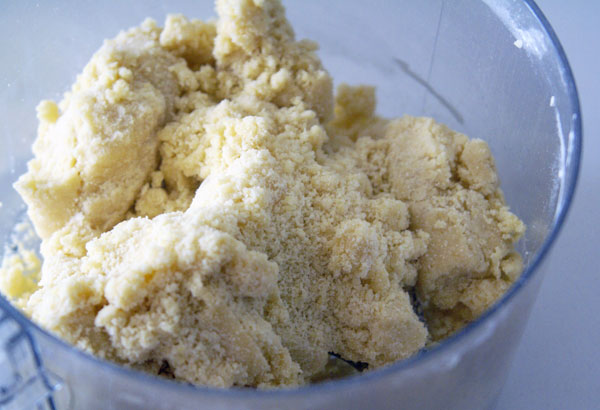
5. I unload it to a work surface and give to a few turns and presses until it just comes together.
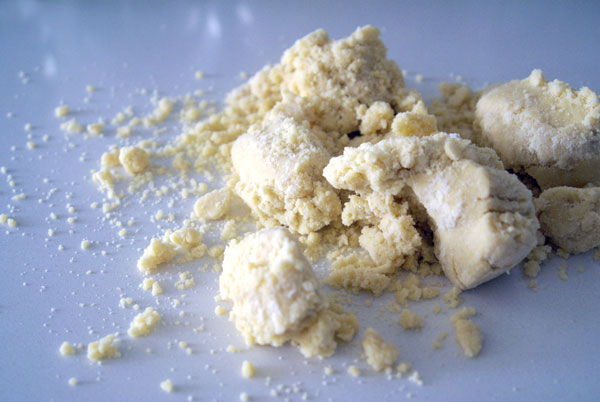
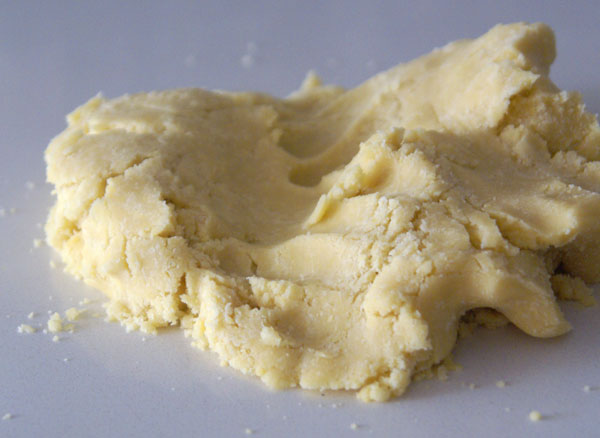
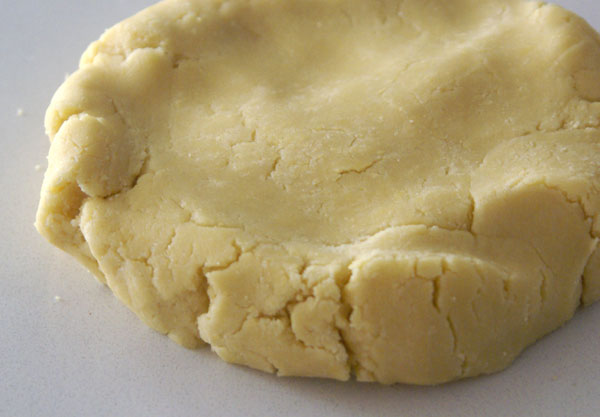
Wrap this disk in plastic and refrigerate for a couple of hours before proceeding.
6. On a lightly floured surface, roll out the dough. It should be about 3 inches larger in diameter that your tart pan. I have it on a piece of parchment to prevent it from sticking to the table. Sparingly sprinkle with flour as needed to keep it from sticking.
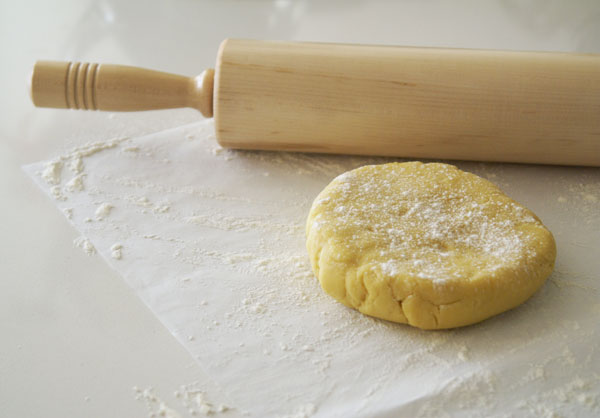
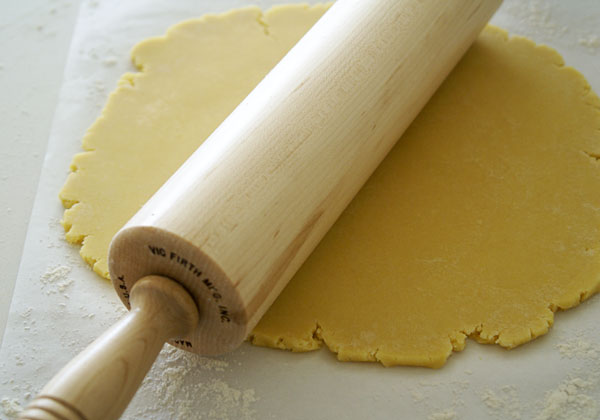
7. Drape it over your rolling pin and transfer it to your tart pan. If some pieces break off, no biggie.
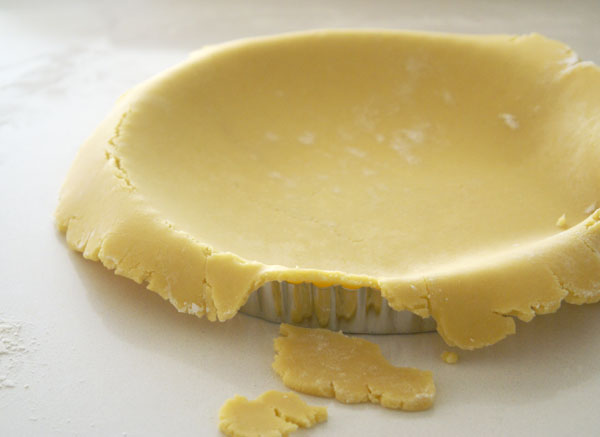
Press it into your tart pan, making sure to get it to butt up against the corner edges of the pan. If you get tears in your dough, patch it with the scraps. The excess can hang over the edge.
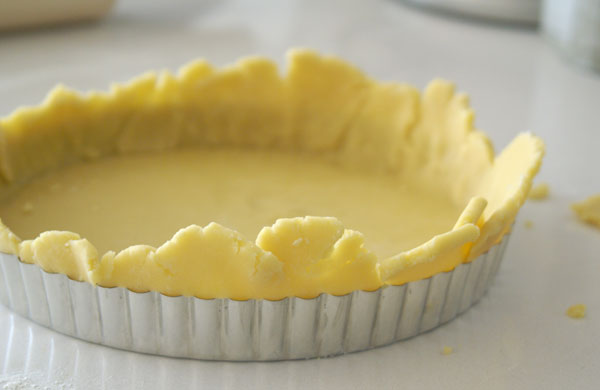
Roll the surface of the pan with your rolling pin, and the excess will fall away.
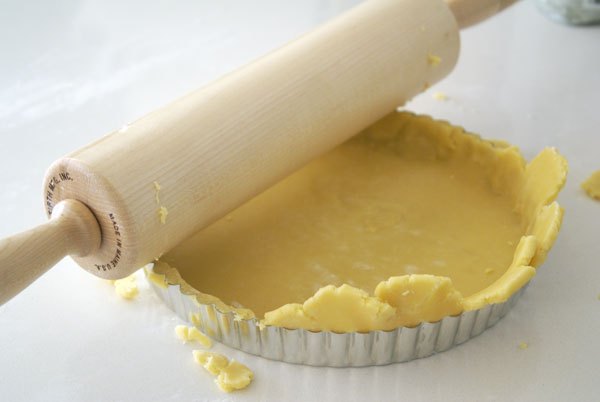
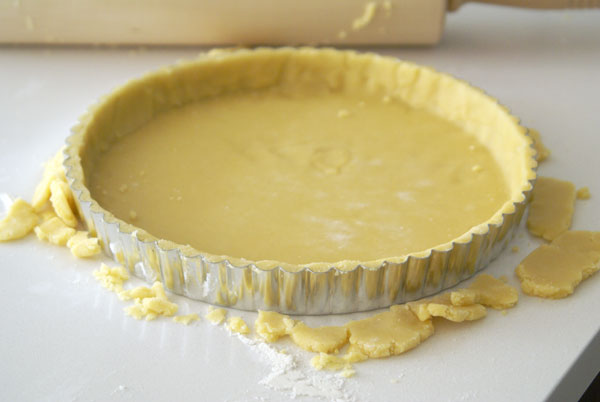
8. Prick the tart all over with a fork. These little holes help release the steam that comes from the moisture in the dough.
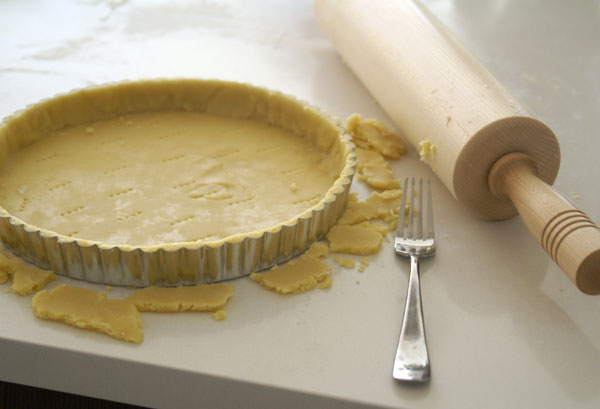
Place the tart shell in the freezer for at least 30 minutes before baking (or longer, if you want to make it the day before). This will help the shell keep its shape when the heat of the oven hits it.
9. Preheat oven to 375 degrees F. Once you’re ready to bake, remove tart shell from freezer and tightly fit a sheet of foil inside the tart shell, taking care to tuck it into the contours. No need to wrap over the whole tart. Let the tart breath. The foil is just to help the shell hold its shape. It can go in the oven just like this.
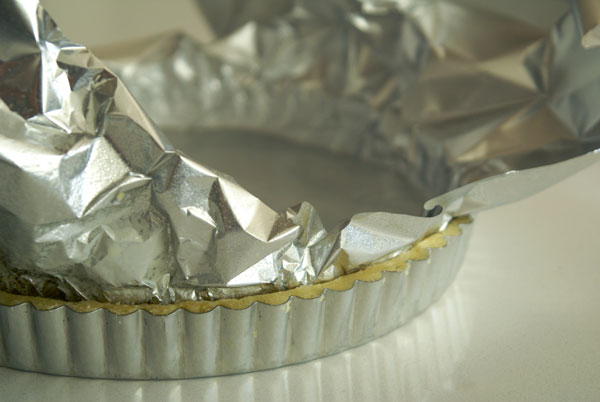
10. Pop the tart on a baking sheet and bake the shell until it’s golden. Pull off the foil after 15 minutes in the oven (the dough is now set) and keep baking, so the center can get golden. Mine took about 25 minutes total, but don’t go by time, go by color. It should look like this:
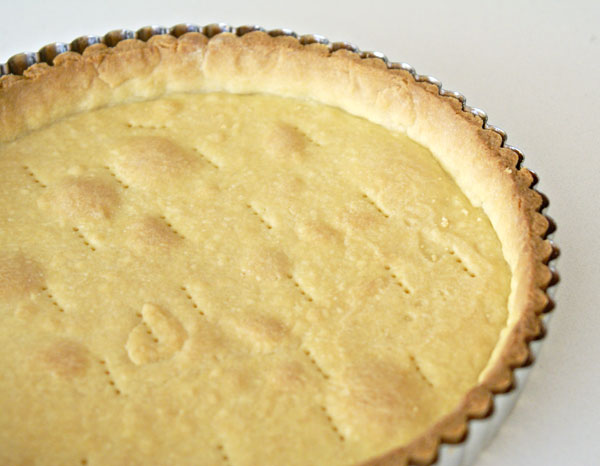
Let cool completely.
11. Ingredients for the filling.
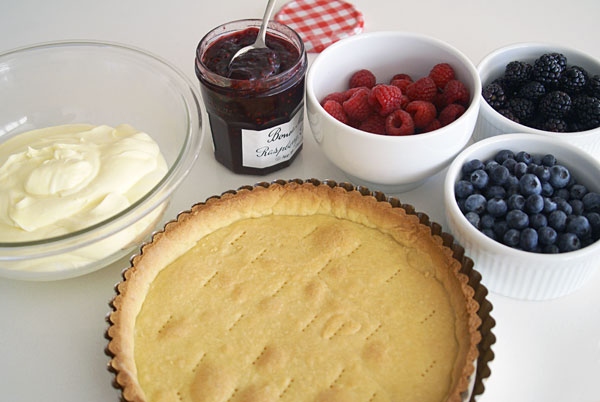
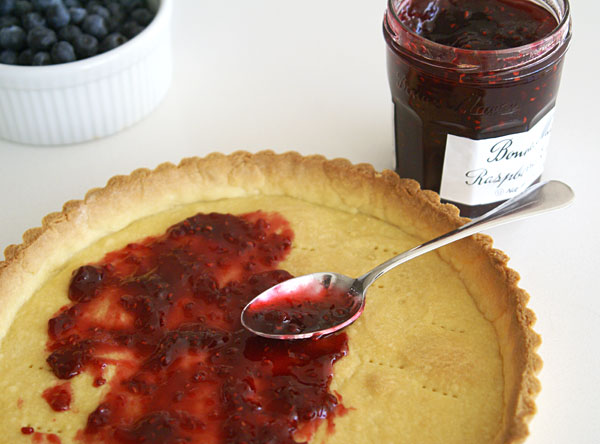
12. Spread a thin layer of preserve across the bottom.
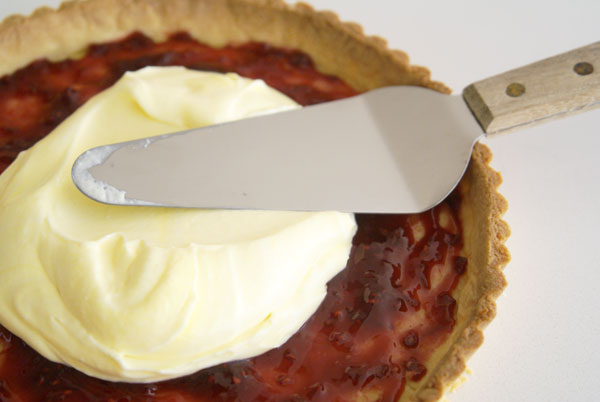
13. Then fill the rest of the tart with the lemon mousse.
Top with your favorite berries, and go to town.

Lemon Berry Tart
makes one 9-inch tart
This tart shell can be made by hand, too.
Tart shell
1 1/2 cups all-purpose flour
1/2 cup confectioner’s sugar
1/4 teaspoon salt
1 stick plus 1 tablespoon (9 tablespoons; 4 1/2 ounces) very cold unsalted butter, chopped up into small dice
1 large egg
Tart filling
about 1/2 cup raspberry preserve
2 cups lemon mousse, recipe below
assorted berries
1. Throw the flour, sugar, and salt in a food processor and pulse a couple of times until they’re mixed together.
2. Add in COLD butter lumps.
3. Pulse for a few beats. The mix will look coarse and grainy and a few pea-sized butter bits should remain.
4. Add in egg, pouring it around the whole surface. Pulse again, paying close attention to not let the food processor get away from you. I like to let it come almost to a ball of dough but not quite. Then I knead the rest by hand so I can control it myself. Overprocessing the dough can make it tough.
5. Unload it to a work surface and give to a few turns and presses until it just comes together. Form the dough into a disk shape.
6. Wrap this disk in plastic and refrigerate for a couple of hours before proceeding.
7. On a lightly floured surface, roll out the dough. It should be about 3 inches larger in diameter that your tart pan. I have it on a piece of parchment to prevent it from sticking to the table. Sparingly sprinkle with flour as needed to keep it from sticking.
8. Once rolled, drape it over your rolling pin and transfer it to your tart pan. If some pieces break off, no biggie. Press it into your tart pan, making sure to get it to butt up against the corner edges of the pan. If you get tears in your dough, patch it with the scraps. The excess can hang over the edge. Cut away to excess.
9. Prick the tart all over with a fork. These little holes help release the steam that comes from the moisture in the dough.
10. Place the tart shell in the freezer for at least 30 minutes before baking (or longer, if you want to make it the day before). This will help the shell keep its shape when the heat of the oven hits it.
11. Preheat the oven to 375 degrees F.
12. Once you’re ready to bake, remove the shell from the freezer and tightly fit a sheet of tin foil inside the tart shell, taking care to tuck it into the contours.
13. Pop the tart on a baking sheet and bake the shell until it’s golden. Mine took about 25 minutes, but don’t go by time, go by color. You’re looking for a lovely golden brown. Let cool completely before filling.
*****
Lemon Mousse (first make the lemon curd)
makes about a pint
3 large eggs
3 large eggs yolks
1/2 cup sugar
zest of 1 lemon (strip the lemon of zest before you juice, or you’ll be desperately trying to scrape zest off lemon peels, like I’ve been caught doing)
1/2 cup lemon juice (if you want this to taste fresh and vibrant, not chemically and processed, you MUST squeeze your own lemons. Five or six lemons should do it. Taking the time is beyond worth it.)
pinch of salt
2 sticks (8 oz) unsalted butter, cut up into small pieces
First, make the curd:
1. First gather all your ingredients.
2. Fill a medium pot with a couple of inches of water and bring to a boil. We’re going to improvise a double boiler.
3. Pour the eggs, sugar, lemon zest, lemon juice and salt into a large bowl. (Keep the butter chilled.) Whisk it up.
4. Set the bowl over the pot with boiling water. This is our faux double boiler.
5. Now whisk like a hurricane, fast and furious. You must whisk the entire time the bowl is over the water. Keep the mixture moving, so the eggs don’t get a chance to scramble. After a few minutes (five?) it starts to get frothy. (If necessary, hold the bowl still by gripping the edge with a kitchen towel.)
6. Keep on whiskin’. After a few more minutes (five more?), it transforms into something creamy. Whisk for another minute just to thicken it up.
7. Take the bowl off the heat. Feed it a handful of butter and whisk it in. The residual heat of the curd will melt it. Keep adding handfuls of butter until it’s all in and fully incorporated. If you still see any little lumps, return to the double boiler for a brief minute, until they disappears, but this is rarely necessary.
8. Push the curd though a fine mesh sieve to remove the stray bits of scrambled egg that didn’t cooperate.
9. Put a piece of plastic wrap directly on its surface to prevent a skin from forming and refrigerate. Once it’s completely cold, wrap the whole container tightly and store. (The curd will firm up considerably as it cools. Give it a good stir to loosen it up again before using.) You can store it in the fridge for up to 5 days or freeze for up to a month. To defrost, let the container thaw in the fridge overnight.
Make it a mousse
1 cup heavy cream
1/4 cup sugar
1 1/2 cups lemon curd (recipe above, in case you missed it)
1. In a medium bowl, whisk together the sugar and heavy cream to soft peak stage.
2. Because we whipped air into the cream and made it light and delicate, and because the curd is heavy and dense, we will fold the cream into the curd gradually, so we don’t completely deflate the cream. Scoop a third of the whipped cream into the bowl with the curd. You can eyeball this. It doesn’t have to be exact. Gently fold it in.
3. Scrape in the rest of the heavy cream and fold it in.
4. Spoon into pretty wares. This can be served right away, or refrigerated for up to 8 hours.
*****
Assembly:
1. Spread a thin layer of preserve across the bottom of the tart shell.
2. Spoon the rest of the tart shell with lemon mousse.
3. Pile as many berries on top as you see fit.
33 Responses to “Lemon Berry Tart”
Post a Comment
Your E-Mail will be kept private. * = required fields.


Gorgeous tart!!!! I love the series of pictures too!
I’ve been scouring the internet all day looking for a lemon berry tart. You’re looks so delicious and super straightforward. I will definitely link back to your recipe when i get around to posting!!
Thanks!
once again, great isntructional photos. I’m not a huge fan of lemon desserts, but when I do get it, I definitely feel like I’m getting a good cleansing on the inside. I love the fact that your recipes are quite simple but the result looks complicated, great way to impress mates
I can feel this saucy twang at the sides of my tongue every time I hear, look or even read about lemons! The tart looks gorgeous!
I’m dashing to the kitchen to make this tart. You inspire me. el
There’s something so dreamy about a lemon mousse. Then to match that with tart raspberry jam and sweet berries on top? This looks fantastic.
What a beautiful site! Great images and such attention to details. I would think even a kitchen novice can make this with such great instructions.
And what a great story. I work in advertising myself, but I cook for fun and stress release. My friends said I should do it for a living, but I thought if I cooking for a paycheck, it would probably take all the the joy away. But I admire your courage and tenacity. How many people can say that they walked away from their job and did what they loved for a living. Great site, thank you so much for sharing.
Oh, goodness, this is gorgeous! I’ve never made lemon mousse before, but I definitely want to now!
Perfect summer treat!
Just wondering- if i make the tart shells by hand, will it come out as well?
and wow, i never knew all that stuff was in lemon curd… i used to eat it by the spoon (i know, it’s a bit disgusting, but…)
Jess—oh, sure, absolutely you can make the tart shell by hand and it’ll be just as good. Just cut in the butter with a pastry cutter or forks, or even your hands, and mix in the rest of the stuff by hand.
I don’t blame you about the lemon curd. I’m guilty too 🙂
thank you so much for the step-by-step instruction! i made this for my future in-laws a couple of days ago and they enjoyed it. i was never brave enough to make my own tart shell but you made it so simple. thank you!
Sunny—Glad to help!
Woohoo! The tart was a hit! It tasted absolutely fantastic. I personally thought I over-worked the dough & that the side crust was a bit tough, but that’s what second chances are for.
Thanks for the beautiful write-up & instructions.
This is a really pretty tart! Tarts have always been my favourite!
Wow!!! I love this site!!!
Too often recipes are too poorly described, but here you get a step by step throrough walk through.
I just wish you had a facebook-thingy, so i could favourite/like the recipes or the site..
🙂
Omg.. Im so embarassed :(.. of course there was a facebook-thingy there.. well.. recipe shared 😀
Aw, thanks for spreading the word, Henrik. Hope to see you back here.
Hello! Thanks for your recipe! I live in southern mexico, and here what you call lemon doesn’t quite exist. What we call “lemon” is what you call “lime”, but kinda’ sweeter. And what we call “lime” you don’t have over there.
So, I made the mousse with our lemons and it got that sweet, sour flavor. Fantastic. Nothing wrong there.
Until I made the crust. I found that, by following the recipe by the book, it got too buttery, reminiscent of cookie dough, and for what I know crusts like this and the Pate Brisee should be crumpy. What could have gone wrong? Is it perhaps that the weather here is really hot? (btw. I made it by hand)
And thank you again, your step by step method rocks.
Hi Nelson — When I was in Mexico I tried your lemon/lime fruit and loved it. I’m thinking it’s what we call key lime? I agree, it sounds perfect for this recipe.
As for the dough, you didn’t really do anything wrong. It’s just a type of tart dough that is reminiscent of cookie dough because you add egg (adds tenderness), and a decent amount of sugar (also adds tenderness). From what I see, other brisee doughs don’t have much of either. I used this dough because it is more resistant to shrinking than other doughs, but feel free to use a traditional brisee recipe.
Thanks for reading the blog!
Could you please confirm what confectioner’s sugar is. Is it icing sugar, caster sugar or something different?
Also we dont have sticks of butter here in new zealand. Could you please tell me how many grams of butter that it?
Thanks,
Sophie
Sophie — Confectioner’s sugar is the same as icing sugar. That’s 125 g of butter for the crust. Each stick is 112 g if you need to make future conversions. Good luck!
Great thanks for your help! A friend of mine said that American measuring cups are a different size to ours, do you know how many grams or mls your cups are? Not sure if she is right or not but I guess it pays to check before I make the desert.
Thanks,
Sophie
Sophie — I don’t know about non-American cup sizes but, 1 cup = 240 ml.
i followed the entire instruction, and the result is great! thanks for posting this recipe!
the only thing is the lemon mousse looks a bit creamy, when i cut it into slices, the mousse will go out on two sides a little bit and it doesn’t look as good as the compete tart. and i also replace the berries with strawberries and i cut them into half, the juice even made the mousse worse. i think it might be nicer to use small tart mold to make individual small tarts, which will keep the shape in most presentable way. and also don’t cut the fruit to avoid juice soak in the mousse.
woosheep, I had the same problem with the mousse, maybe because I live in a really hot place. It lost all the texture 3 minutes after I took it out of the fridge. To stabilize it a bit, I used 1 tablespoon of flavorless gelatin hydrated with 2-3 tablespoons of water. Just let it soak for a bit, add it to the mousse and whisk well, then keep in the fridge for a while. Then you can cut the tart and it will all stay in place. Hope this helps you! This is an AWESOME pie.
Tart, sorry 😉
Nelson, thanks for your idea, i’ll try it next time 🙂
Hi!! This looks amazing!!
Question….I want to bring this to work tomorrow. If I fill the tart shell tonight and refrigerate it overnight, will it get soggy? Or should I just get up a few minutes early and spread the jam and fill the shell in the morning?
This will be my first tart ever!! And, if I make these individual size, does that change the baking time? Just wondering, I am a novice, but love to bake.
Thanks!! LOVE lemon curd!!
Nicole — If you fill the shell tonight, it won’t be full-on soggy, but it wont be crisp either — somewhere in between. If you have the ability to get yourself out of bed in the morning earlier than usual (I don’t!), then I recommend filling it then.
If you make individual sizes, it might change the baking time by about 5-10 minutes, but as I always harp on, take them out of the oven when they are well golden, regardless of time.
Thanks for baking this!
Thank you Irina!! My shell is baked off, cooled and wrapped, alarm set for 15 minutes early. Everything made and separate, to be assembled!!
I’ll try to post a picture, though I am sure it will not look s fabulous as yours!! 🙂
Excited to try many more recipes I found here!!
Nicole — How did it go?
Hey!! I completely forgot to tell you that it was a hit!!! I made all the components the night before and assembled it before work. My mousse was runny, but no one minded. Haha-it was literally GONE by 1030. AM. I also brought a cinnamon chocolate coffee cake which was gone by then too. 🙂 Love making people happy by baked goods!! Thank you, love this blog!!