Yes, you can make your own puff pastry (when the Daring Bakers tell you to)
September 27th, 2009 | 59 Comments
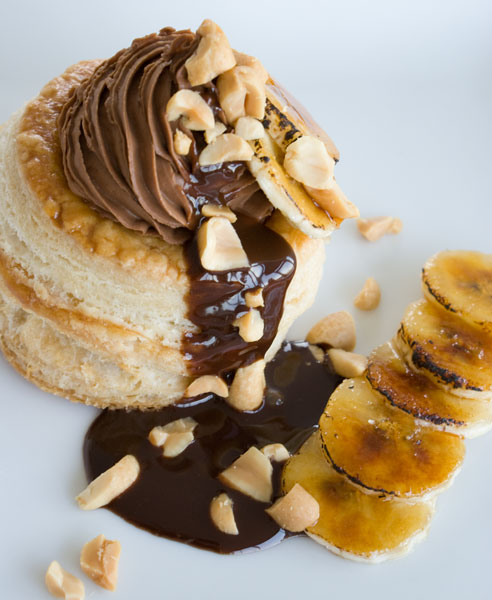
What is it about puff pastry? The mere mention of it sends shivers down every baker’s spine. Could it be the knowledge that it has 944 microscopic layers of dough and butter, which seem to break all laws of physics? You look down at your own two hands and think, “These two hands? All by themselves? No way,” before huffing off to the grocery store to buy the ready-made version. At the risk of sounding like Tony Robbins, I say “Yes way,” and this month’s Daring Bakers have laid down the law.
The September 2009 Daring Bakers’ challenge was hosted by Steph of A Whisk and a Spoon. She chose the French treat, Vols-au-Vent based on the Puff Pastry recipe by Michel Richard from the cookbook Baking With Julia by Dorie Greenspan.
Now please sit down. I have to break something to you. It might surprise you to learn that no restaurant I’ve ever worked in, no matter how fancy, ever made their own puff pastry (though surely there are some that I’ve never worked in that do.) If you peek in their freezer, you’ll find cases of stacked up sheets of dough, looking all guilty and unhomemade. Granted, it’s high quality, all-butter dough made by artisan vendors in our neighborhood and it saves the chef lots of hours and labor costs. I wouldn’t even know how to make enough puff pastry to feed hundreds of napoleon-loving patrons. Do you make lots of individual batches? Do you make one monster batch and pound out a dozen blocks of butter with a broomstick? The truth is, I’ve only made my own puff pastry a handful of times, and never in a professional setting, only at home.
It became obvious that if I wanted to have the priceless gift of knowledge, I was going to have to gift myself. So I tried to make this sultan of doughs on my own, with pretty good results. I checked off “make puff pastry” from the “Things to Do Before You Die” list, and carried on. Only half shamefully do I admit that over the following years I always bought it, since the all-butter products were pretty good and always rose. And so it went until this fateful month, when like a bear, I had to come out of puff pastry hibernation.
The not so secret thing that we all know but refuse to embrace, thanks to our 21st century impatience is this: other than following the recipe directions, the secret to making puff pastry is KEEPING IT COLD AT ALL TIMES. I know you know this. The key is to respect this. Whenever you have a smidgen of doubt about your puff pastry, shove it in the fridge. Don’t try to squeeze in just one more roll-out to save time. Think of this dough as a fish out of water. It can only be out of water for so long before death, and puff pastry is the fish. The fridge is its water.
Now that it’s clear I’m nuts, what with all these sea life metaphors flying around, we can methodically make the dough. The initial dough is very easy and should pose no problem for anyone. Even Chef Richard tells us not to worry about overmixing. And worry I didn’t. There was even some whistling while I mixed. Next, I needed to pound out the butter, and the tricky part was to not get all spastic and beat the butter into some amoeba shape. Mine looked like the Leaning Tower of Pizza and I had to coax it into a square shape with some poking. After that, it was all downhill. If you know how to roll dough, fold it over and carry it to the refrigerator, you can make puff pastry.
Here is a great video of Michel Richard with Julia Child demonstrating exactly how it’s done. If you’re reading this 3 years from now and the video is down, I’ve included the usual step-by-step how-to below.
Puff Pastry for Vols-au-Vents
(or any application)
From: Baking with Julia by Dorie Greenspan
Yield: 2-1/2 pounds dough
2-1/2 cups (12.2 oz/ 354 g) unbleached all-purpose flour
1-1/4 cups (5.0 oz/ 142 g) cake flour
1-1/2 teaspoon salt (you can cut this by half for a less salty dough or for sweet preparations)
1-1/4 cups (10 fl oz/ 300 ml) ice water
1 pound (16 oz/ 454 g) very cold unsalted butter
First make the puff pastry
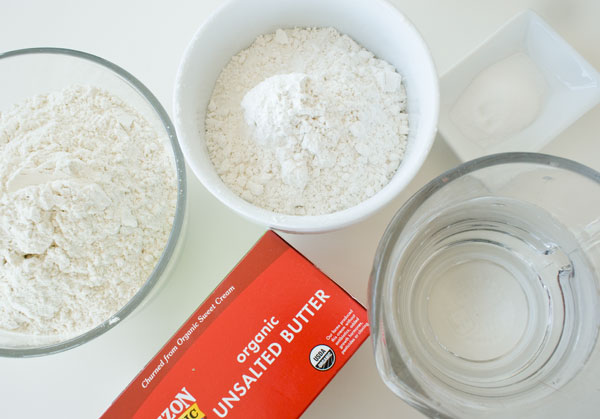
1. The ingredients. Keep the butter cold.
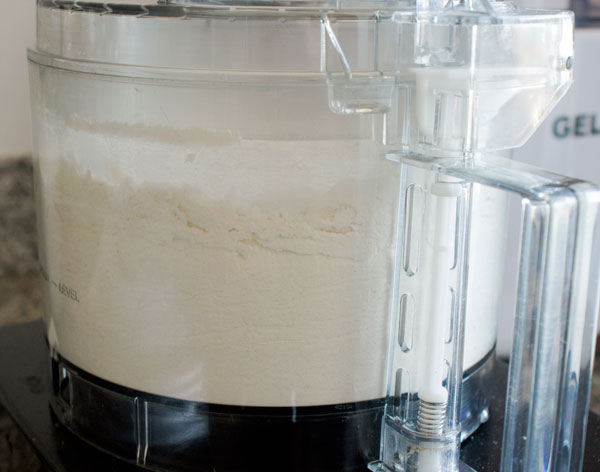
2. Place the all purpose flour, cake flour and salt into a food processor. Then pulse to mix. (You can also stir them together by hand.)
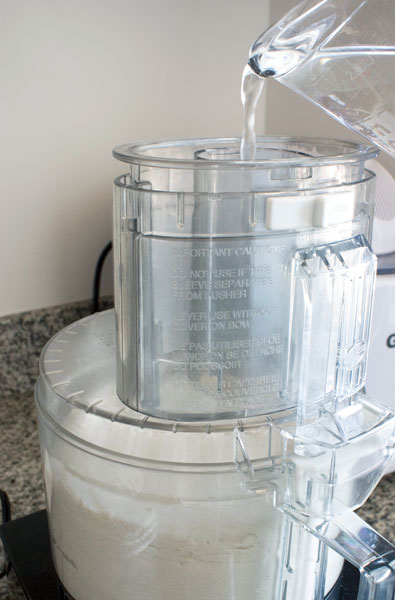
3. Add water all at once and process until a ball forms. Chef Richard says not to worry about overprocessing here.
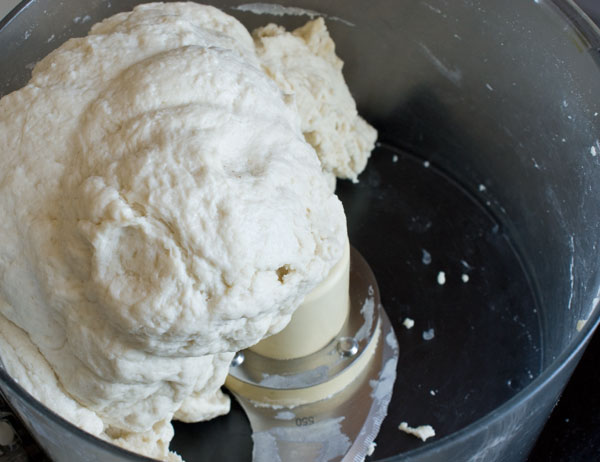
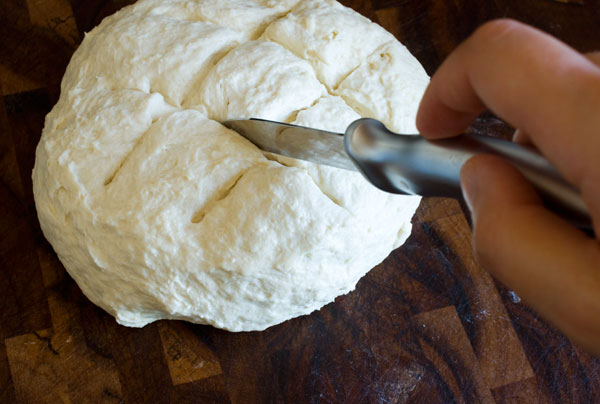
3. Form the dough into a ball, scratch a tic-tac-toe pattern on it (which helps relax the gluten in the dough), wrap in plastic, and refrigerate for 5 minutes.
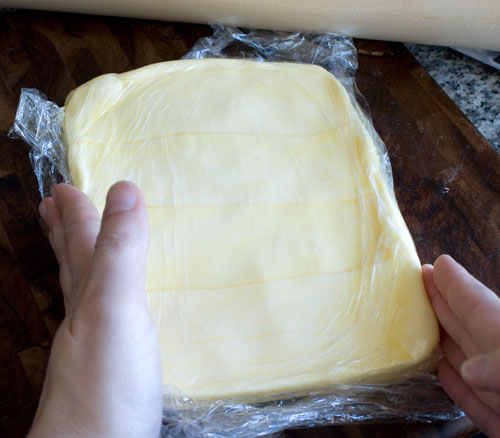
4. Meanwhile lay out your cold butter between two sheets of plastic wrap…
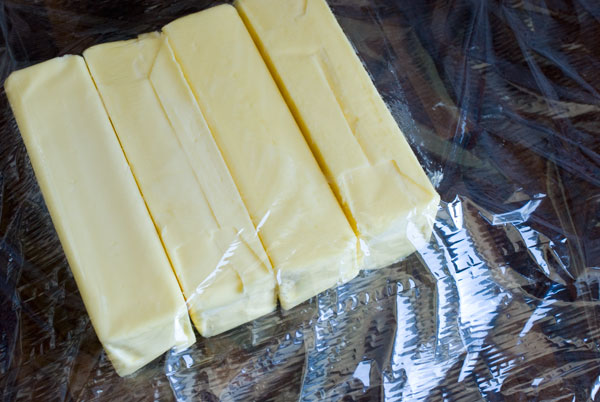
…and pound away with a rolling pin. You want it to be 1 inch high. Try to keep it rectangle shaped.
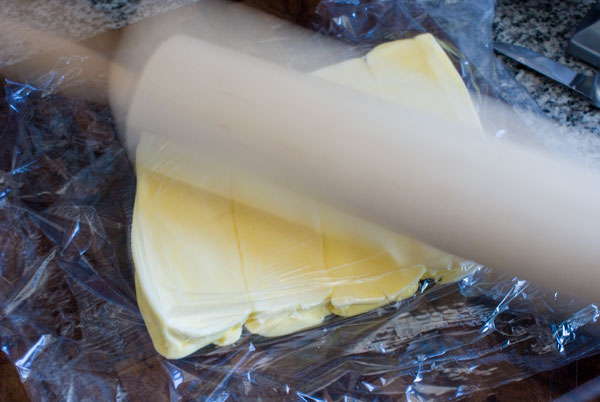
If it starts to morph into strange shapes, mold it back to a rectangle with your hands. If the butter looks like it’s melting or greasy, refrigerate it again until firm.
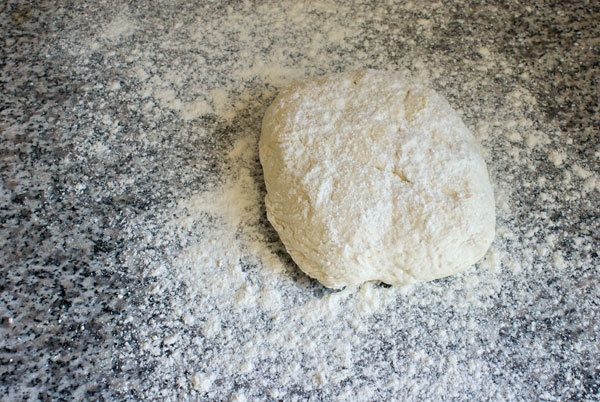
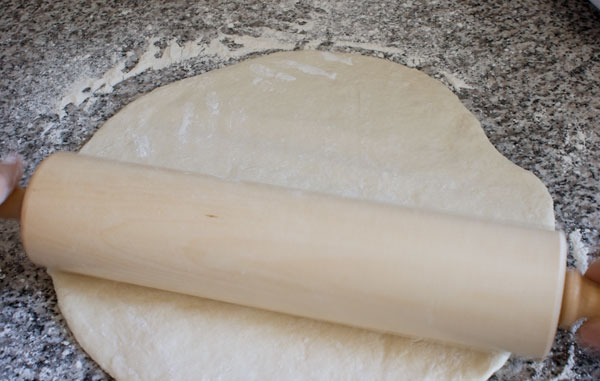
5. On a lightly floured surface, roll out your ball of dough into about a 12 inch shape, but be sure to keep the center 4 inches of the dough slightly thicker than the outer flaps. That will be the butter bed.
5. Place the butter in the center, and start folding the flaps over it.
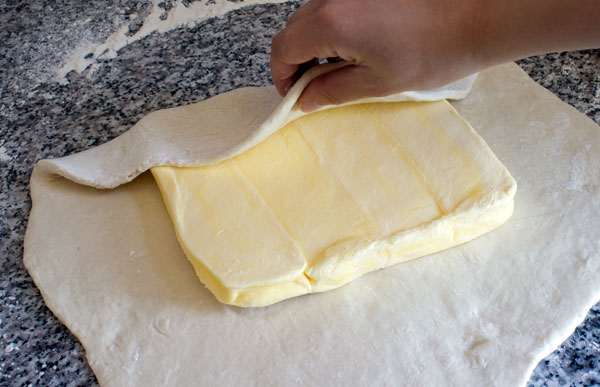
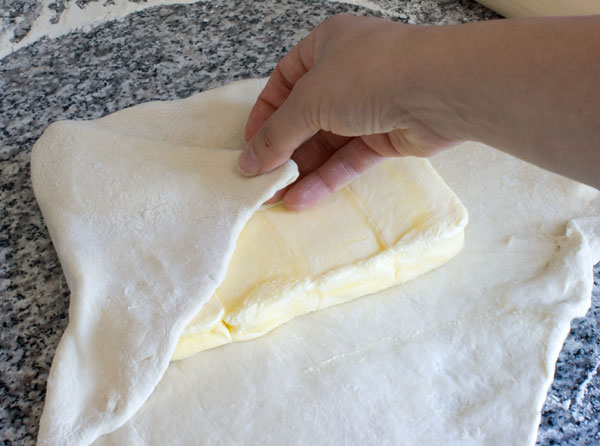
Until its all folded over the butter in a neat little package.
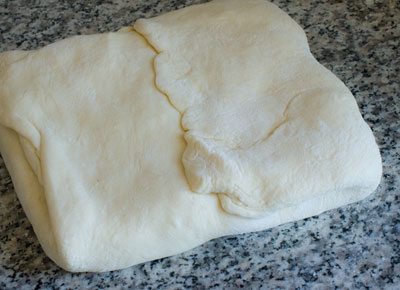
6. Flour the rolling surface again, and roll out the first rectangle. Try to manipulate the rolling pin so the butter rolls as evenly as possible inside the dough. It should be about 24 inches in length, but the exact size doesn’t matter. Width doesn’t matter at all.
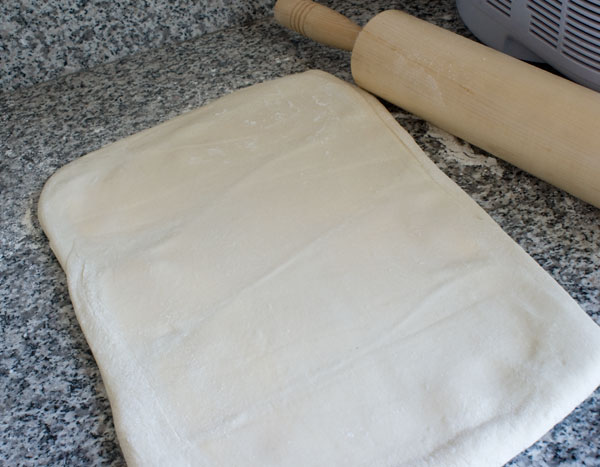
Fold the flaps over each other like a business envelope.
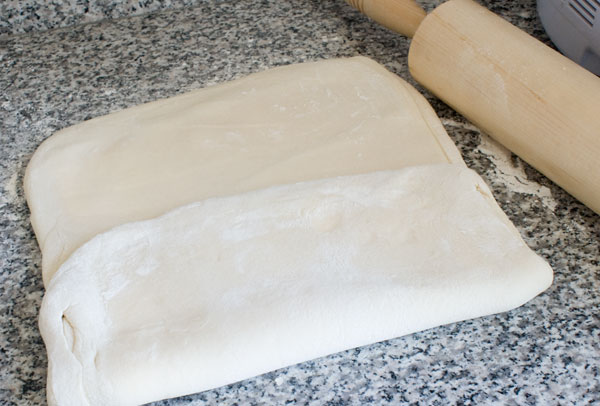
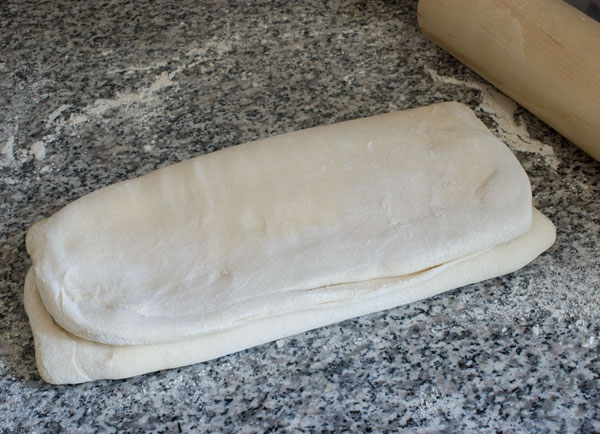
You’ve accomplished what’s called “one turn.” We need a total of 6 turns.
7. If your pastry is oozing butter out of the sides or seems greasy in any way, it needs to be refrigerated for at least 30 minutes. If it’s still ok and firm, you can do one more turn right now.
Rotate the dough so it’s folded opening is to the side and the dough is jutting away from you.
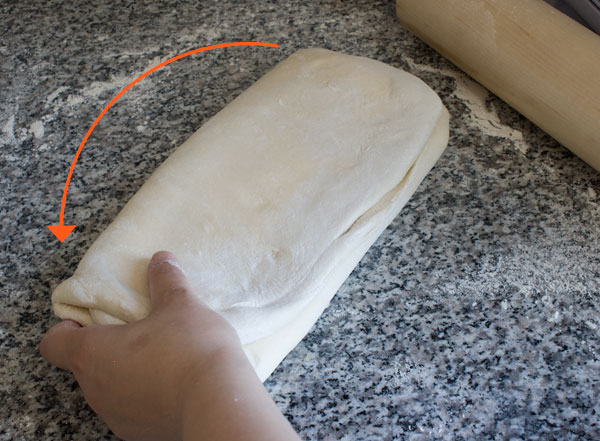
8. Now repeat the roll, going to approximately 24 inches, and fold the flaps over each other again. This is turn two.
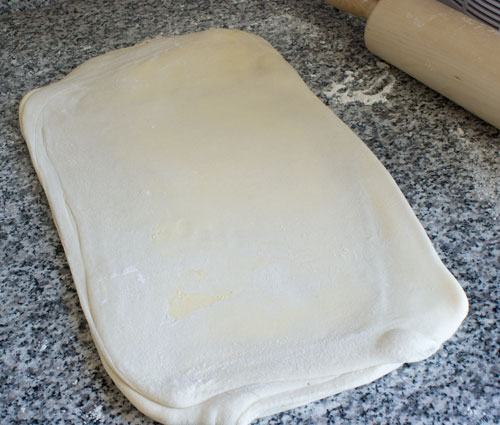
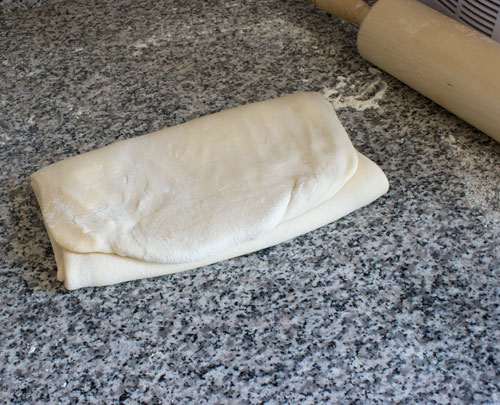
At this point, refrigerate the dough for 30 minutes to an hour, wrapped in plastic wrap.
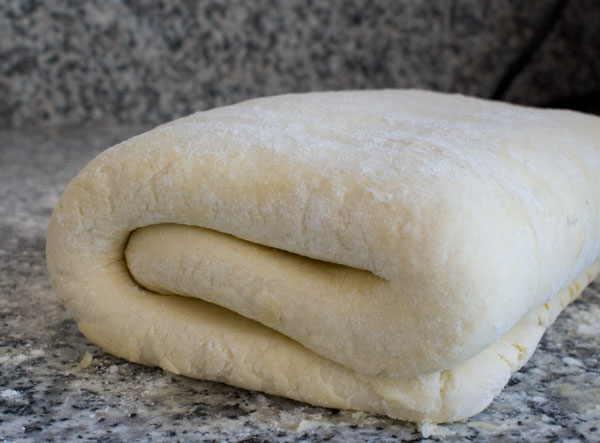
Do 2 more turns as pictured above, refrigerate again, then do the final 2 turns and refrigerate again. Final dough.
Here’s the cross section. You can see the hundreds of layers throughout. It looks like the earth’s core.
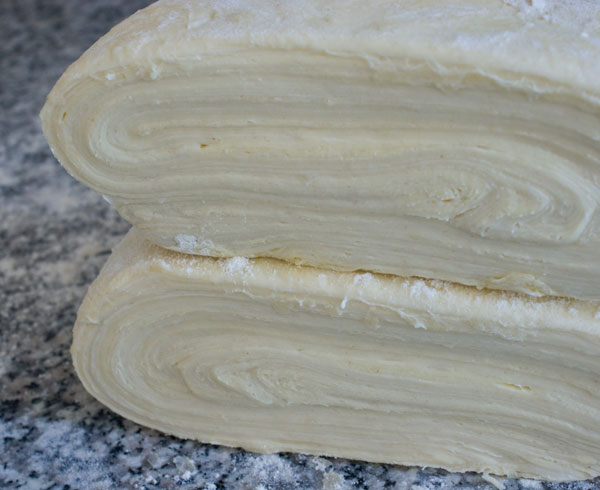
At this point the puff pastry can be rolled out and used for any application. Or frozen until the cravings hit.
To make the vols-au-vents
1. Cut off 1/4 of your dough, and roll it out about 1/4 inch thick.
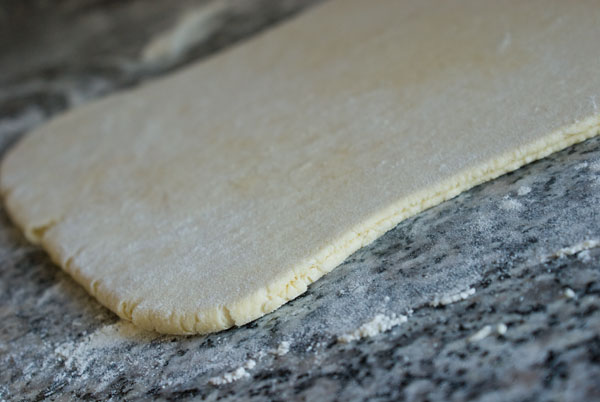
2. Cut out 4-inch circles. Then cut out holes from half of the available circles.
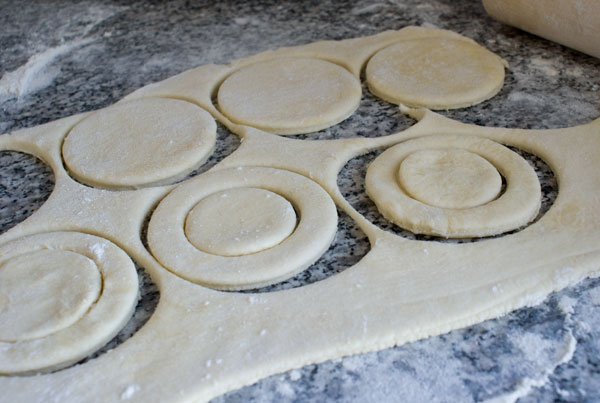
3. Lay them out on a parchment lined sheet pan, then dock them with a fork all over to let some of the steam out.
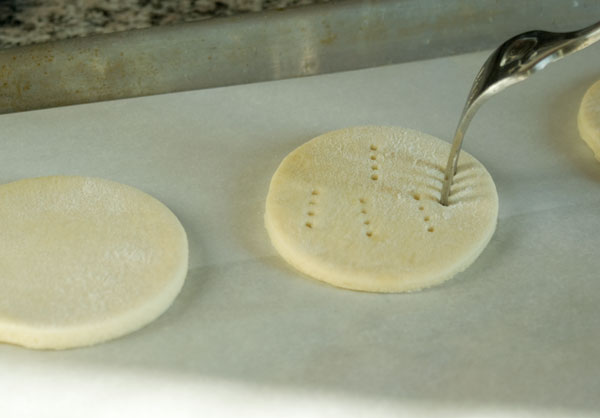
Egg wash the circles (egg wash consists of 1 egg whisked with 1 tablespoon water)
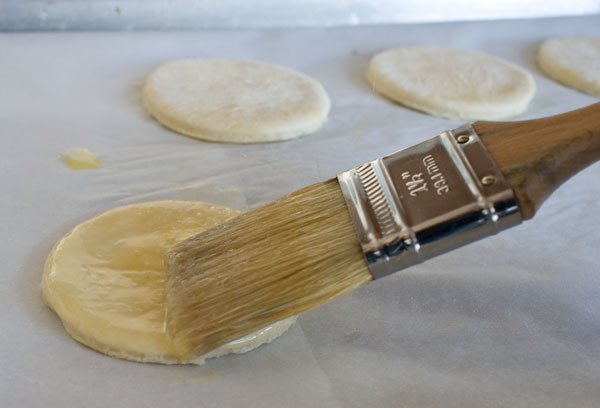
4. Glue circles on top and egg wash those.
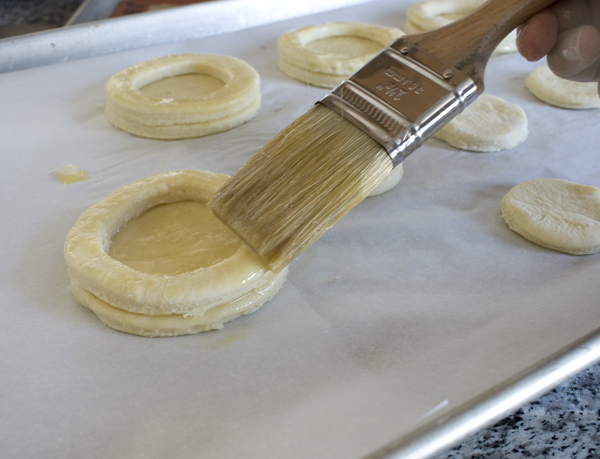
5. Preheat the oven to 400 degrees F and refrigerate the sheet pan while you wait for the oven. Bake until they are golden brown about 30 minutes.
Let cool completely before filling.
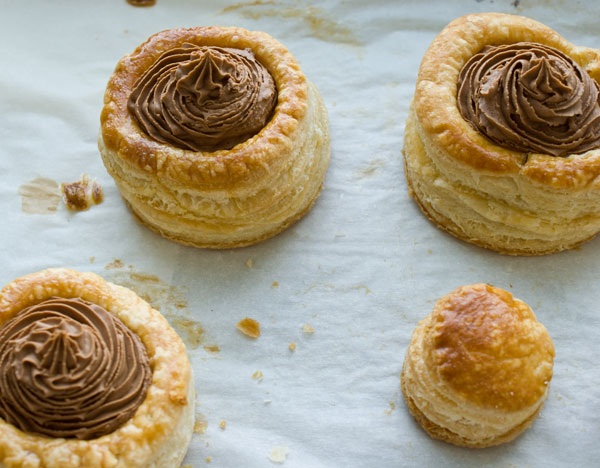
Next up: how to make a couple of different, easy fillings for some seriously elegant desserts.
Tags: butter, dessert, dough, pastry, puff pastry
59 Responses to “Yes, you can make your own puff pastry (when the Daring Bakers tell you to)”
Post a Comment
Your E-Mail will be kept private. * = required fields.


I’ve always thought making your own puff pastry is pretty crazy, but you make it look easy and approachable!
Great photos and step-by-step. It would have been nice to have this while I was making mine, just to check myself. I’m sure it’ll be a great help to anyone trying it for the first time.
They look great ands love the way you have filled them up and that sauce flowing .
Making puffpastry at home, i woudn’t dare, i guess that is why i am not a daring baker 🙂
Love all the photos. Hard to believe that big square of butter was incorporated so beautifully. Your dough is just perfect and I love the final product. Kudos to you!
Don’t tell anyone Irina, but I was actually waiting for your post to make this. The recipe scared me, and now it doesn’t thank you!
Beautiful results! I love how you piped the filling in and your great step-by-step photos. Nice work!
These instructions are so great, I wish I had seen them when I was working on my puff pastry. I think I figured it out alright, but I would definitely send anyone who needed help over to your site. Great job on this challenge.
Oh my god! They look scrumptious! I wish i could take such step by step clicks. Filling looks delicious! Good job.
they look heavenly…
I couldn’t wait to see your post about this challenge. I wanted to see your lovely photos. You did an awesome job, of course.
BTW I love your blog!
Hi Irina,
now I consider making my own puff pastry, it looks so easy!
Btw, any suggestions on how use those itsybitsy leftovers when cutting the round shapes.
Cheers from Seattle, Z.
I am so obsessed with your blog I can’t even express! Your photos are unbelievable, I love your writing style, I love everything about it! And I LOVE these puff pastries!
Elegant, beautiful and sinfully delicious. You did it again!
Beautiful Vols Au Vent Irina, I wouldn’t expect any less from you. Out of all the attempts, your one seems to be the only one that doesn’t have butter seeping out
your confession that professional restaurants tend to buy their puff pastry frozen is causing me to confess that for some reason, i am feeling sooo smug that on the evening i made *my* puff pastry, all the fine dining restaurants serving vols au vent and napoleans were serving theirs un-homemade. petty i know.
my other confession: i recently bought frozen puff pastry because i highly highly doubt i’ll ever make it from scratch again (even tho i halved the recipe and it wasn’t *that* bad).
yours, of course, looks gorgeous.
Irina, your vols-au-vent are simply perfect! And I love the plated dessert!
You are fabulous…am so glad you came out of puff pastry hibernation. Your post is inspirational & you vols-au-vent gorgeous!
I love that first picture with the chocolate, nuts and bananas! Great job! 🙂
Oh, you did something wonderful with yours! The bananas look so good with the puff pastry.
Wow, everyone, your comments are so sweet! Thank you!
Linda — Ha! All my photo-taking was definitely causing me butter problems, and I did worry about rise. Got lucky that time.
Zill.y — When you have scraps, don’t bunch them up into a ball. Stack them and reroll them. A couple of common ways to use up scraps are to make palmiers or cheese straws (or cinnamon straws). You’ll need to work around the fact that you wont have a neat piece of dough when you reroll. Just cut strips out of what you can. A few links:
http://www.joythebaker.com/blog/2009/01/how-to-make-palmiers/
http://www.bakingobsession.com/2009/09/29/lemon-honey-panna-cotta-with-lemon-fennel-puff-pastry-straws/#more-1388
http://www.foodnetwork.com/recipes/ina-garten/cheese-straws-recipe/index.html
Lan — Not sure if/when I’ll make puff pastry again either 🙂 Good thing I still have a hunk in the freezer.
hi.
your dessert and puff pastry looks amaizing. I hope once i’m moved into my new home and my kitchenware is unpacked to attempt this recipe. You make it look easy but I know all to well how easily making puff pastry can go wrong. I hope for this to be my first bakers challange as it will be nice to make something sweet and differnt. I’m used to making puff pastry for of sausage rolls or apple struddles.
amy
This is so awesome. I really want to try to make my own puff pastry. COngrats for winning on Brown Eyed Baker. Beautiful pictures.
wow complimenti!!! meravigliosi!!!
They look great! I love puff pastry, and I had so much fun with this challenge!!
Oh my gosh, this looks so easy!! Is it as easy as it looks? I watched the video with Julia as well. I want to try making it myself now! I’ve always heard it’s too hard and I shouldn’t try, but I now I want to!! Thanks so much!! Just in time for the holidays!!!
Madalena — Don’t let others talk you out of trying. If it looks easy to you, it probably will be easy. And you know, I think it IS pretty easy, so let me know how it goes 🙂
[…] Julia Child making the gluten version of puff pastry and followed another blogger’s (Irina at Pastry Pal) tutorial for making glutenous puff pastry. Okay, so as I am sitting here writing this post, and […]
think u so much
I have been searching and searching for a well explained recipe for making your own puff pastry and I felt like i was in heaven when i found your post. Thank you so very much!
Living in Norway, it isn’t so common to find ready made puff pastry in the food stores, you would have to go to a speciality food store. So I am forced to make my own because i am pregnant and seriously craving some good pastry dishes!
Thanks again!
Demi xoxo
Thanks So Much!
is this stuff healthy? that’s a lot of butter!
Anonymous — Absolutely not 🙂
Ahh, thank you for this tutorial! It totally demystifies puff pastry for me, and I have the confidence to make it myself now! 🙂
I actually did this a few months back and today I plan to have another go at it. It came out beautifully and honestly it was easy. Minimal active time, minimal clean-up, great results. You don’t have to be that precise in your rolling, either. What could be better? I have a stone counter top, which I chilled before hand with something from my freezer. I don’t know if this helped, but it couldn’t have hurt. Give it a whirl! Thank you, Pastry Pal.
Im so glad you did this. I like to make as much of my own foods as possible to cut out so many sugars and fats that they put in frozen and canned goods, now a days. Thanks for giving us beginners a good start to great baking.
CC Bloom — Processed food is pretty scary. I try to make mostly my own food, too, but sometimes convenience gets in the way and I end up buying prepared. At least more and more brands are becoming all natural these days.
It all started by bookmarking this very same page in hopes to wrestle with a huge block of butter one day. One topic after another and I found myself standing in front of my old electric stove with a violent personality that demands for every recipe to be cooked at least 50 degrees below suggested temperature. Then there were your heavenly chocolate chip cookies. Then I broke my leg, but didn’t stop baking. Somehow, just reading this blog over and over and over again gives me a sudden rush to crutch my way to the kitchen and go on a baking binge. For the first time ever, I subscribed to a blog and now patiently awaiting my destiny as a fat cow. Your witty charm and generously shared secrets give me hope that I’ve come a long way since sandbox pies with dandelions. Maybe tomorrow I will gain enough courage to buy a blow torch? =)
Blankie Monster — Your comment made me snort with laughter. I have to hand it to you, baking with a broken leg is serious dedication. I kind of know what you mean, though, because I was once obsessed with sewing, and even though I threw my back out and had to stay home from work, I still kept crawling over to the sewing machine. I guess if you really want to do something, there’s always a way. I appreciate that you’ve been trying my recipes. I can only encourage you to keep it up :). And don’t fear the blowtorch—it’s just a can of gas 🙂
Or you could walk to the store and buy puff pastry sheets… 2 for $3.50 US on sale.
No offense, but if it tastes virtually the same (and even high-end restaurants use frozen dough)… why bother? Call me crazy, but wouldn’t it be better to perfect the filling instead?
Hi Jo — Good question. Yes you can buy puff pastry, and though it is convenient, the boxes for $3.50 aren’t the same, as they are not all-butter products. Next time you’re shopping, take a look at the ingredients. They are made with a concoction of chemicals and hydrogenated fats and these products are a far cry from truly good puff pastry. What I meant to say is that the restaurants I worked in bought a top-notch artisanal product from a nearby vendor that didn’t skimp on quality. It was still made by hand and it was still relatively expensive, but at least it saved us the time. These days I’ll only buy it in a store if it’s all natural and made with all butter. It really is superior in flavor. Granted, it’s not cheap, around 10 bucks per pack where I live. If I can’t find it, I won’t bother. I want both the shell and the filling to be as good as I can make them. That’s just the way I was taught. I can understand your wish to save time, since I’m the same way, so I suggest you try out the all-butter versions. Good luck with your baking!
Hello Irina,
This weekend, I made the puff pastry dough, lemon curd (and mousse) and vols-au-vent(I modified it a little).
First, let me tell you a little about how each one of them turned out:
1) Puff pastry got the best review from my husband who doesn’t care much about desserts (yes, there are people like him on the same planet as us!!!!:) ). Even my 5 yr old seemed to like it.
2) The lemon curd that I made didn’t look as yellow as yours. It was a little too strong for our taste. However, once I folded whippped cream into it, it was quite delicious.
3) Vols-au-vent: Instead of passion fruit curd, I used lemon mousse as the filling and then made some mint syrup to drizzle on the top without any pinapple. Everything put together, it tasted good however I had trouble making the mint syrup. I think I didn’t blanch the mint leaves enough and then the blender refused to run properly with just the corn syrup and the mint leaves. I actually ended up adding about 1 tbs of water to the syrup to make it little runny so that blender could grind.
Also, I have a few questions for you:
1) With puff pastry, I have wrapped it in plastic wrap and kept it in freezer. Is that ok or I should store it differently.
2) Is it a good idea to roll it thin and then freeze so that it is ready to use right out of the freezer?
3) How long can I keep it in the freezer?
4) Any tips/corrections on making the mint syrup?
I also took a few pictures along the way but they are a far cry from what we see in your blog. 🙂
So long…
New-to-Baking, I’m clapping my hands in glee that you tried all these things! Puff pastry is such a fantastic recipe to have in your repertoire. As for the color of the lemon curd, it just may be the monitor giving a false impression of colors, yours probably came out just fine.
About your questions (and sorry for the delayed response, I was away on vacation :)):
1. Wrapping in plastic and freezing is perfectly ok.
2. Yes, you can roll it in sheets and freeze. Make sure they are tightly wrapped so they don’t absorb any freezer flavors.
3. If well wrapped, I’d say 1-2 months.
4. As for the mint syrup, I might guess that there were too many leaves-to-corn-syrup ratio, and perhaps the blender couldn’t get going. Maybe try less leaves? Mint is such a strong flavor, that it doesn’t take as much mint as you think to flavor the whole shebang.
I’d love to see your pictures if you want to send them 🙂 and hope to see you bake more stuff!
Thank you for your answers, Irina.
Most of the pictures I took were from my camera phone. Let me figure a way out to share them with you. Is there any email ID where I can email them ot you directly?
BTW, I also made chocolate truffles on Friday. May I say I absolutely loooooooooooovvvvvvvveeeeeddddddd them!!!! They almost melted in my mouth……yumm!
Take care…
Ah, yes, those addictive truffles. Sinful, they are.
If you can figure out the photos, I’m at irina@pastrypal.com. Later!
OMG!!!!! I just developed a serious love for baking in the last few months 😀 !! I was always intimidated by all the complicated steps and afraid of things going wrong. These step-by-step instructions with visuals just made my day!!!!
Thank you all!!!!!!!!!!!!!!!!!!!!!!!!!!! 😀
Hi, Good Evening. I have try to make the puff pastry 3 time. !st time good. 2nd time not so good 3rd time i fail. Don’t why? I do the same thing. Why? It is because i leave the pastry to long on the table it become soft. I cannot puff up. I want to make it all the same. But why it become like that. I still want to try it until i got it. My friends they all like the Curry pastry puff. But sometime i fail it. If i can make it all the time the same. They would like to buy from me. Please let me know what mistakes i make. God Bless. Thank You. Esther.
Oh, I’ve made this a couple of times at my school 😀 It’s fun. We didn’t have problems with keeping it cold though. And we used margarine made for rolling. I can’t translate it directly. But I’ll keep this tutorial in mind, since I don’t have the recipe anymore, so thanks!
I don’t understand this part:
Below the picture : Here’s the cross section. You can see the hundreds of layers throughout. It looks like the earth’s core.
Cut it 1/4 means cut according from left to right according to your picture rite?
Then just flatten it by rolling?
Rosamundwo — Yes, I think you understand. If you look at the “final dough” picture, all I did was cut it across, and then down to make 4 even pieces, and just rolled it out.
Thanks.. now i have a clearer understanding.. thanks