Quadruple Chocolate Cake
November 19th, 2009 | 84 Comments
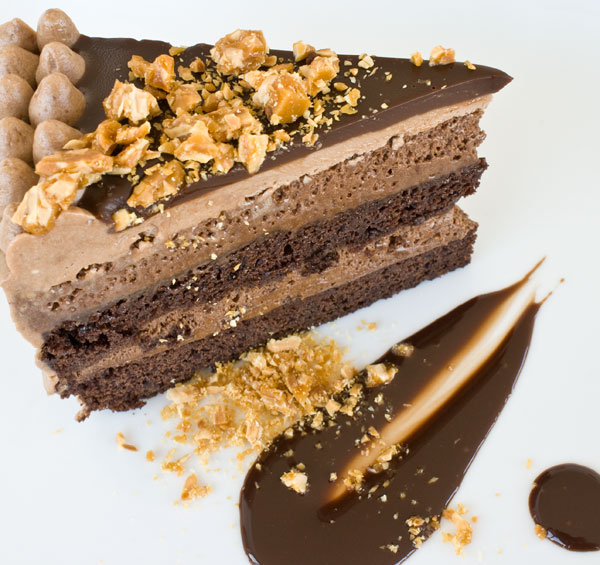
If you promise them chocolate cake, you better make sure they get it. Or there will be bedlam. I learned first hand. We ran out during one busy dinner service and there was so much uproar, the kitchen transformed into an urban Lord of the Flies. These cakes were more than just popular. People traveled to have them. Faced with no cake, they threatened to write letters to the mayor, or worse.
The waiters’ eyes were black with fury for being forced to break it to the guests. Some diners were so filled with denial, they sent their waiter back to the kitchen “to make sure we were really out”, as though we were peddling capri pants, and we simply had another size available in the back. All night, we argued, bargained, offered substitutions, freebies, savings bonds, to no avail. The people weren’t pleased. It was a dark day in history that I never wanted to repeat.
A few months later, when our restaurant’s mixing bowl groaned its last breath, we went into a panic not seen since the Barney’s sample sale. Mind you, this was not a KitchenAid-sized mixing bowl. It was an industrial model that occupied a vast corner of the restaurant floor and was, prior to that day, able to mash up a hundred pounds of dough at a time. Our daily agenda included mixing dozens of these “signature” chocolate cakes, most of which would sell out over the course of the night.
Making small batches was out of the question. We’d have needed to bend the laws of physics to coax more hours out of the day. Someone had to think quick. Without hesitation, one of the more accomplished pastry assistants jumped to his feet, ran over to the sink and started scrubbing up like a surgeon. I watched him wash his entire arms from wrist to shoulder. He grabbed the bowl, which stood waist-high next to his rather short stature, and dumped beast-bags of flour, sugar, and the usual cakey what-nots into it. Before I could protest, he plunged his tatooed limbs into the batter and started swirling his whole self around. I could see through the kicked-up cloud of flour dust that it was like working through quicksand, so heavy and resistant. But he did it. And even though he looked like he delivered a calf by the end, there were cake pans filled with batter all ready for baking. I sure hope for your sake you didn’t go to that restaurant that day.
Certain desserts can make such an impression, that they keep worming into your thoughts, day in, day out. This is what happened to Angelynn, a dear reader of this blog. A few weeks ago she dropped me a note describing her love for this cake, and asked me to try to recreate it. Now, I don’t know about you, but my fists are too tight to part with $44 plus shipping for a 7″ cake, so I decided to use it for inspiration only, rather than dupe the flavors. Mine would be good in its own right, and after a few tries, it became a cross between the “signature” cake I once served, and the cake Angelynn was dreaming of.
Admittedly, this project is a time-sucking doozy, since it’s based on a cake that has four separate components. We’ve got the the chocolate cake layers, the mousse layers, the milk chocolate frosting, and whew, finally, the ganache glaze. If you’re feeling ambitious, the whole bundle would indeed be a show-stopper, but allow me to suggest the following combinations for a much easier, though still tantalizing result:
— just the chocolate cake with a sprinkling of powdered sugar then served with a mound of whipped cream or ice cream
— the chocolate cake with just the mousse layers
— the chocolate cake with just the milk chocolate frosting
— the chocolate cake with just the chocolate glaze (which can be used as a chocolate sauce when warmed)
— or throw the cake idea overboard and enjoy just the mousse
Then, when you’re done, you can lick your elbows clean.
By the way, I scattered a little chopped peanut brittle from this entry over the top for some crunch.
Chocolate Cake
1 stick (112g) butter
1 1/3 cups (257g) sugar
1/2 cup + 2 tablespoons (56g) cocoa powder
2 large eggs
2 oz (56g) dark chocolate, melted
1 3/4 cups (210g) all-purpose flour
1 teaspoon (4 g) baking powder
3/4 teaspoon (3 g) baking soda
1/4 teaspoon (1 gram) salt
1/2 cup (118 ml) water
1/2 cup (118 ml) milk
1. Gettin’ ready. You can see how sweaty my eggs are in the photo. All cold ingredients should be at room temperature for better incorporation. Preheat oven to 325 degrees F.
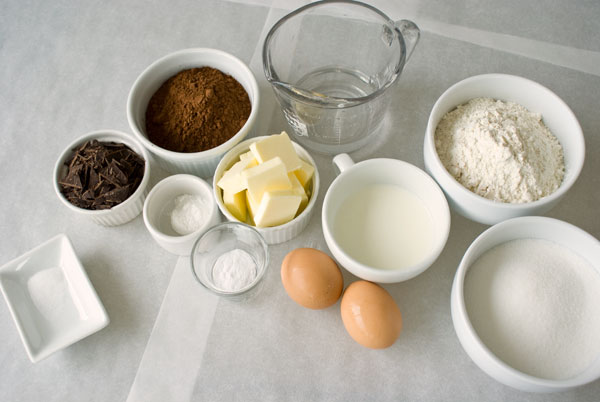
2. Melt the chocolate. I like to chop it up fine like in the “ingredients” photo above, and melt it in the microwave in 30-second intervals. Chocolate burns easily, so stir between every zap. Mine took about 60-90 seconds to melt. Keep on the side.
3. Using a tabletop or handheld electric mixer, beat the butter, sugar, and cocoa powder together on medium high speed…
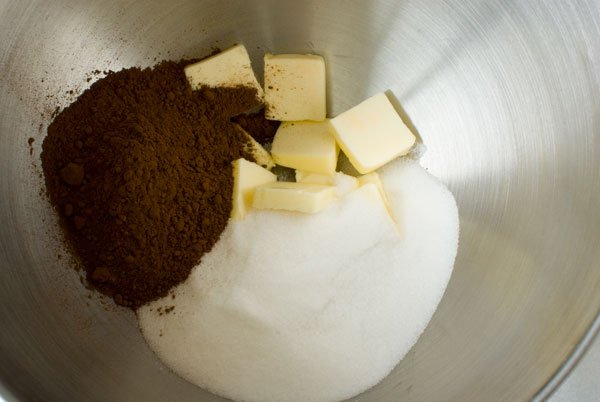
…until smooth, creamy and fluffy, about 3 minutes. Hard to see with the cocoa in the bowl, but it went for about 3 minutes.
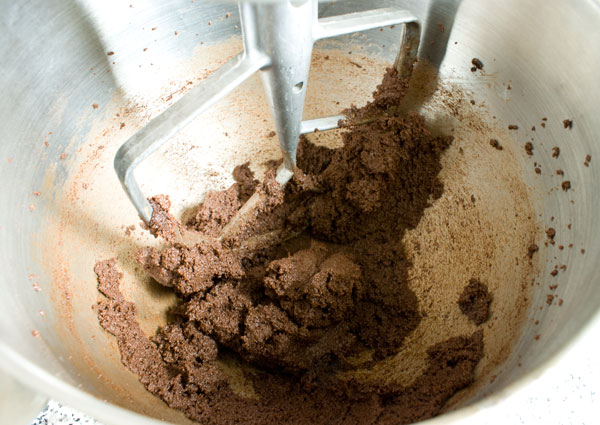
4. Add the eggs, one at a time, until each one disappears into the mix. Be sure to scrape down the sides and bottom of the bowl. Looks like a rising sun, no?
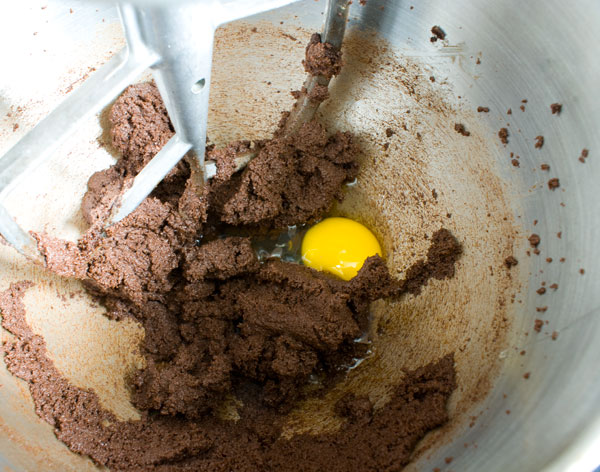
Getting liquidy here. Scrape. The dry, gritty stuff wants to collect at the bottom. Don’t let it win.
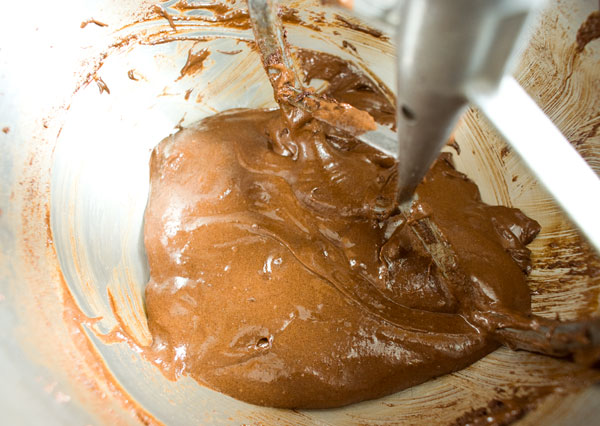
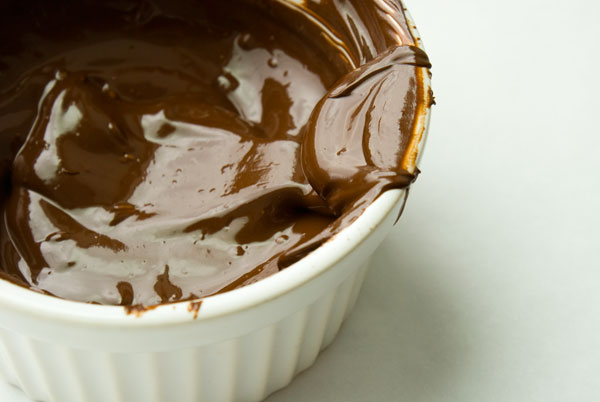
5. Pour in the melted chocolate. Hopefully, by now your chocolate came down in temperature a little. It should feel like a warm bath. If it’s too hot, it might melt the butter, and that’s no good. If it’s too cold, it might re-solidify into little bits when it hits the cold bowl. So, warm. We want it warm.
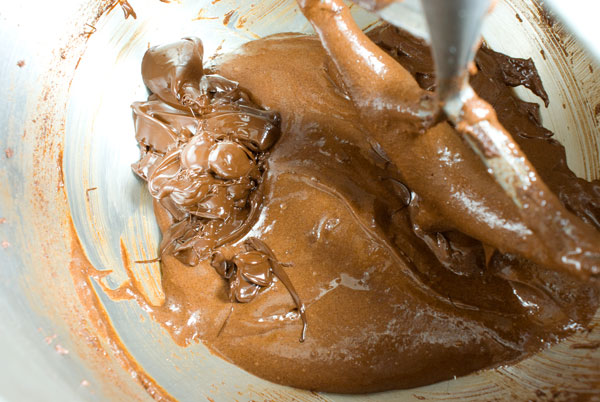
So far so good. Chocolate added.
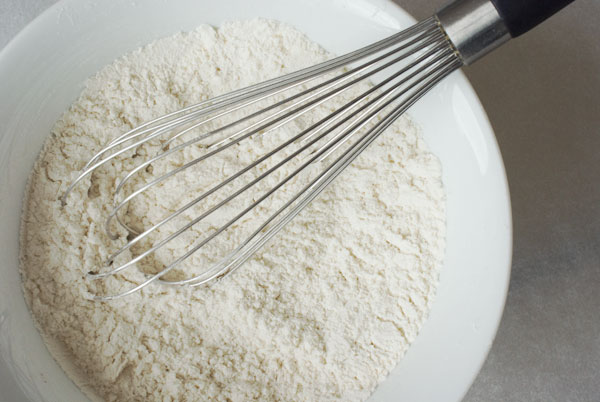
6. In a medium bowl, stir together the dry ingredients, which include flour, baking powder, baking soda and salt. Stir ’em up good.
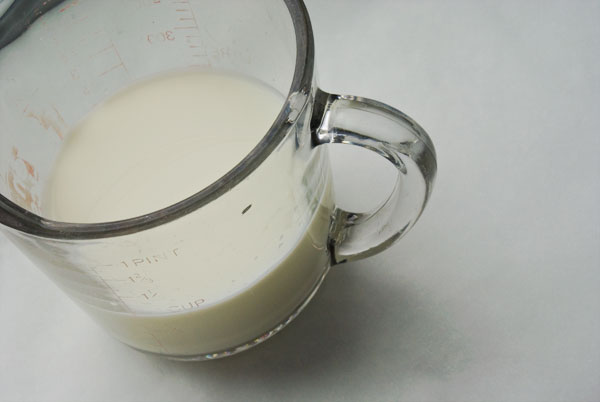
7. Combine the milk and the water and microwave them until hot, about 45 seconds. Like a “too hot” bath.
8. Drop the dry ingredients into the mixing bowl…
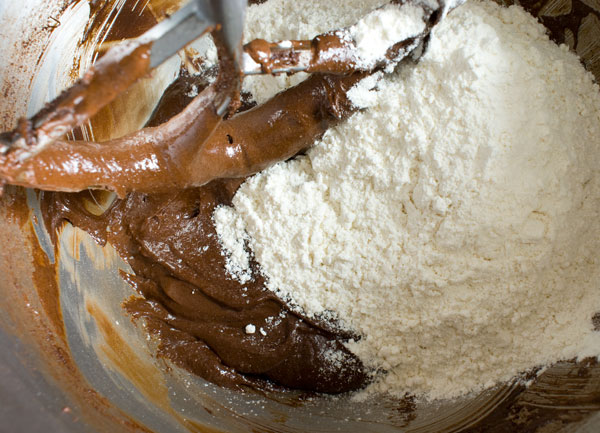
…and mix on low speed…
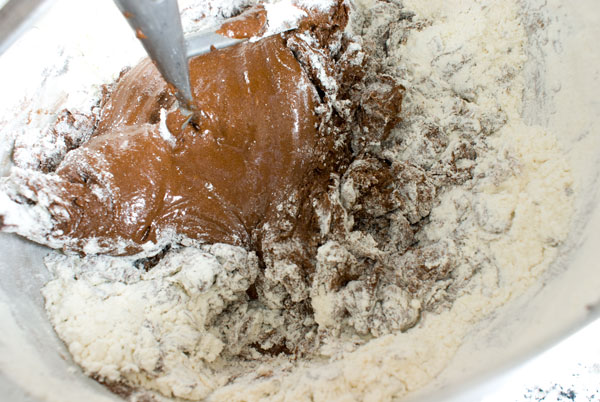
…until MOSTLY combined, and then, with the machine still running, pour in the hot water/milk mixture.
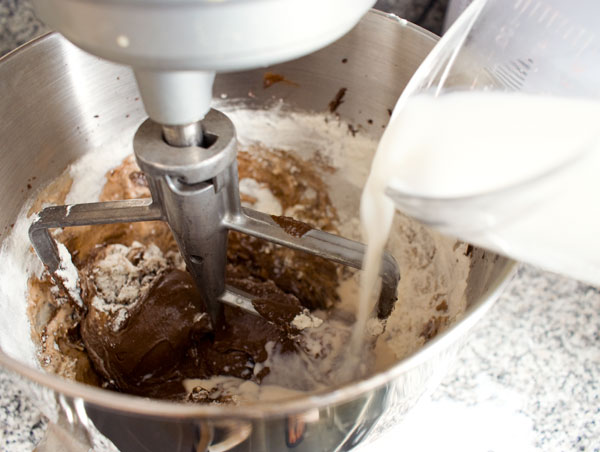
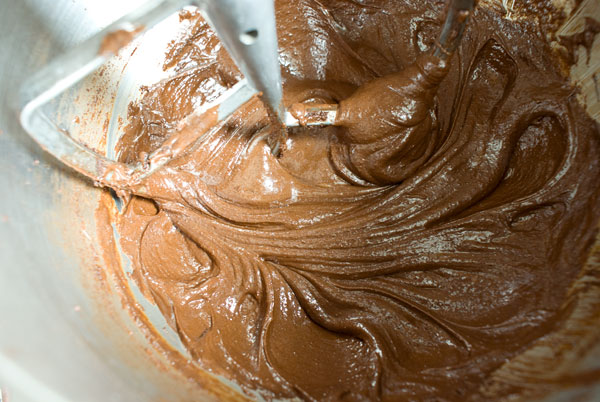
9. Be sure to scrape the bottom of the bowl again. The dry ingredients tend to hide there. Here’s the finished batter.
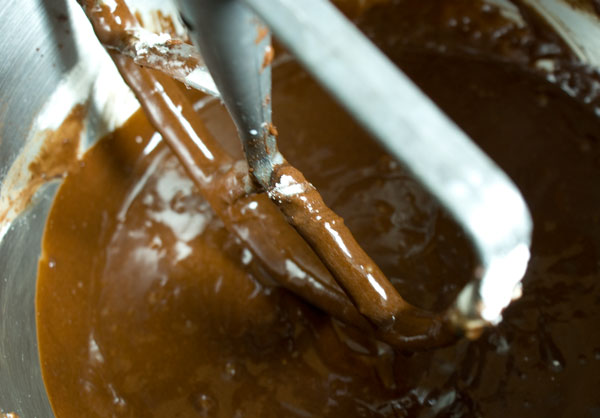
10. Pour the batter into a parchment-lined, 9″ round baking pan. (If you need a refresher on lining a round baking pan, see the carrot cake post.)
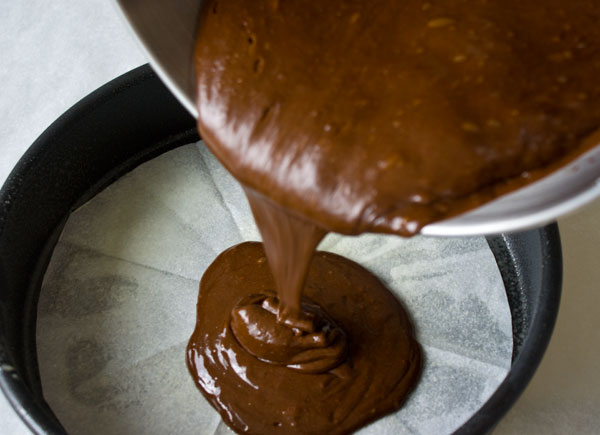
Then bake in the preheated oven…
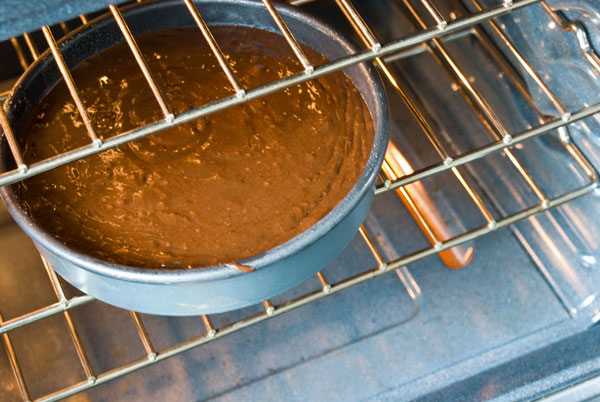
…until a toothpick inserted into the center comes out clean, or almost clean, about 40 minutes. Let the cake cool completely, even for several hours, to let the crumb firm up and be less delicate when slicing. I like to chill the cake in the fridge for a couple of hours, so that slicing goes more smoothly.
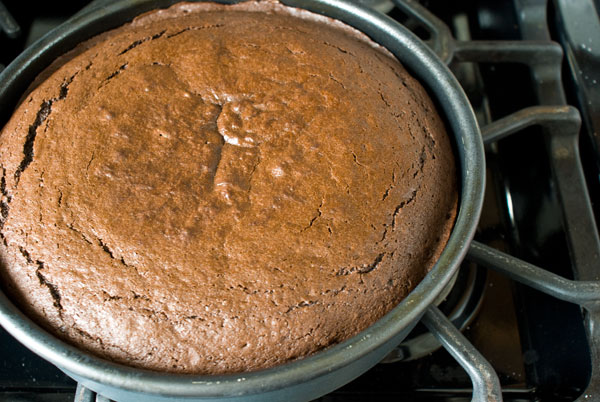
Next, make the Chocolate Mousse
8 oz (224g) dark chocolate (I used 61% El Rey brand)
1 stick (112g) unsalted butter
4 large eggs
6 (45g) tablespoons sugar
2 tablespoons water
2/3 cup (158 ml) heavy cream
1. The bits and pieces required. Can you spot where I blotted out the mascarpone that I didn’t end up using?
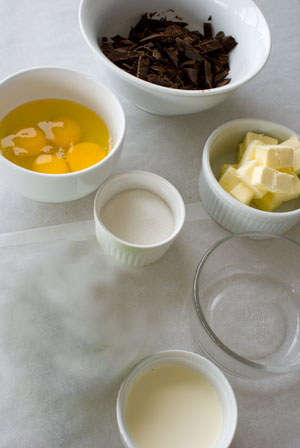
2. Working with a large bowl, melt the chocolate and butter in the microwave. Again, use 30-second intervals and stir every time between zaps to make sure the chocolate doesn’t burn.
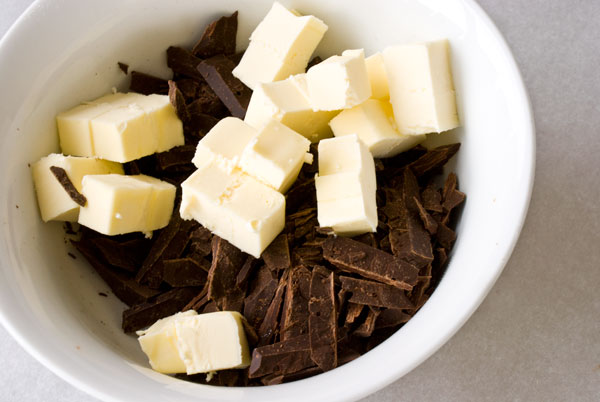
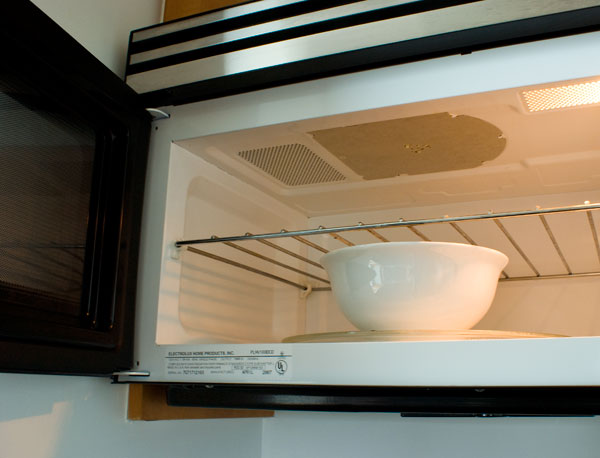
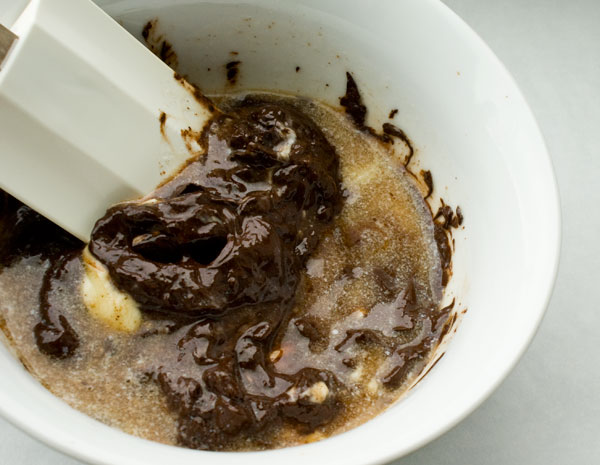
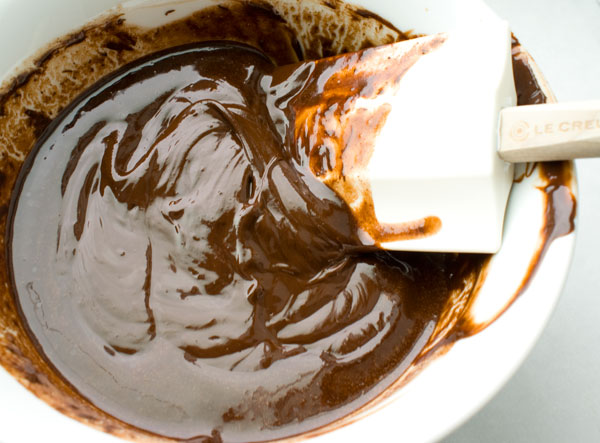
Set aside.
3. Whip cream to a loose peak consistency. You can do this with a mixer or by hand.
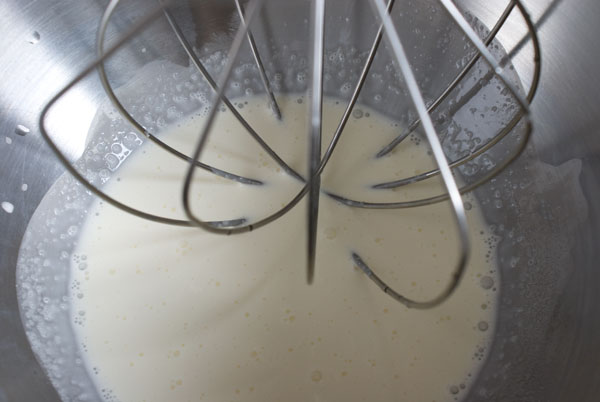
It’s not exactly liquid anymore, but it’s not stiff, either. It should just barely hold streaks.
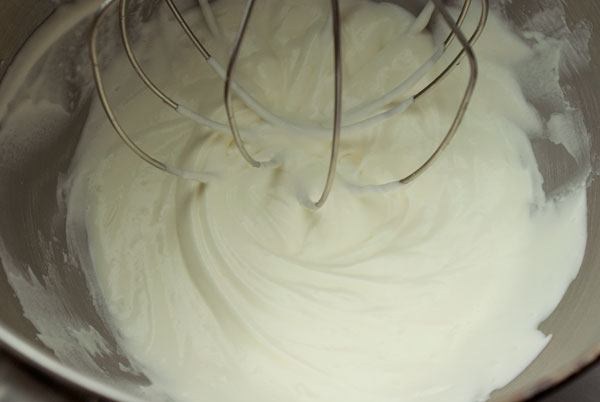
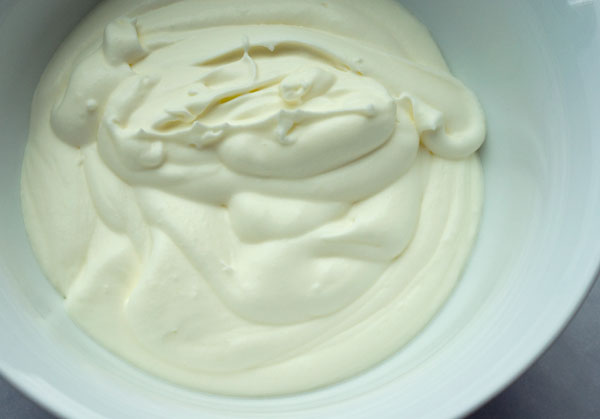
I scraped this into another bowl, so I could free up my Kitchenaid bowl for the rest of the mousse recipe. Refrigerate the cream until we’re ready for it.
4. Set up a double boiler: Fill a pot with water and bring it to a boil. Grab a bowl that’s big enough to fit over the pot without touching the boiling water and crack in the eggs, then pour in the sugar and water. Whisk it up and set it over the boiling water.
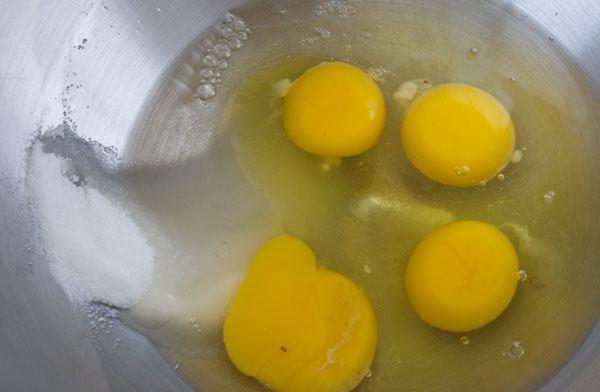
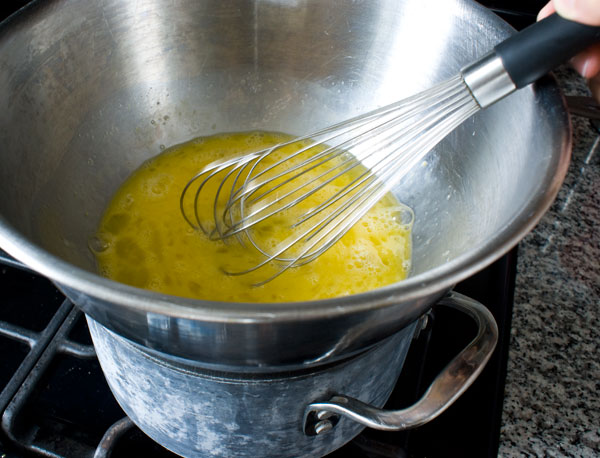
Our only goal here is to warm dem eggs. Whisk the whole time. They’ll start to get frothy. After a few minutes (about 3), move the bowl off the heat and stick your finger in it. Yes, you heard right. This is to gauge the temperature. Don’t feel like you’re after some exact degree of heat. It should feel like a very warm bath. We are about to whip the crap out of them and warm eggs whip well.
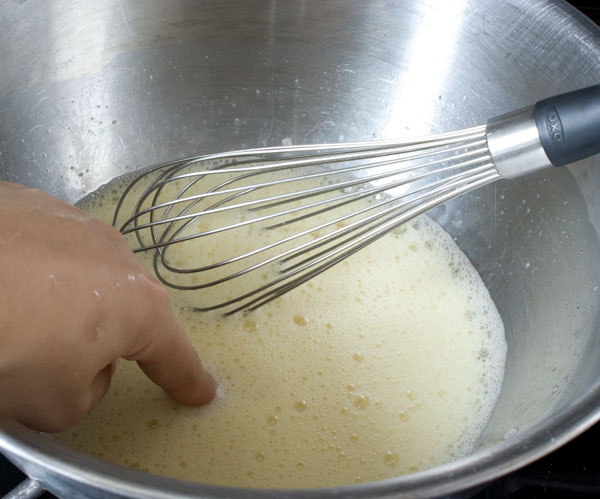
If they’re still cool, return to top of pot.
If they’re nice and warm, pour into the KitchenAid bowl, and whip on high for about 3 minutes. (If you have a hand mixer or you’re whipping by hand, go ahead and do it in the bowl you warmed them in.) The eggs will get very thick, pale and creamy looking, like so:
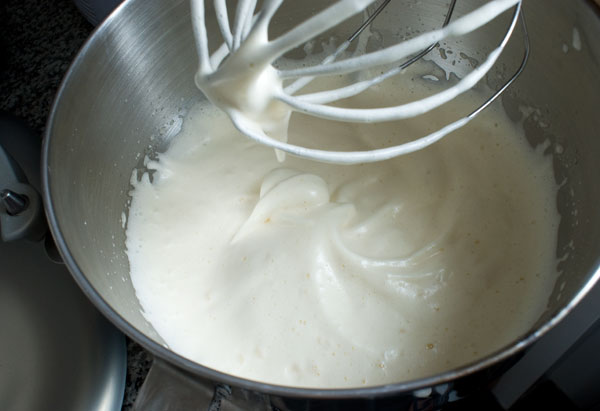
We’ll start by pouring about 1/3 of this fluffy egg mixture into the melted chocolate bowl. Carefully fold it in, scraping from the bottom of the bowl, over to the top. This will help lighten the very dense chocolate mixture, so when we fold in the rest, it won’t deflate.
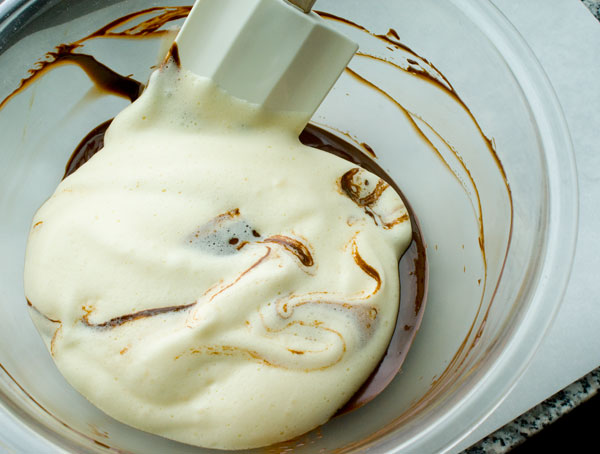
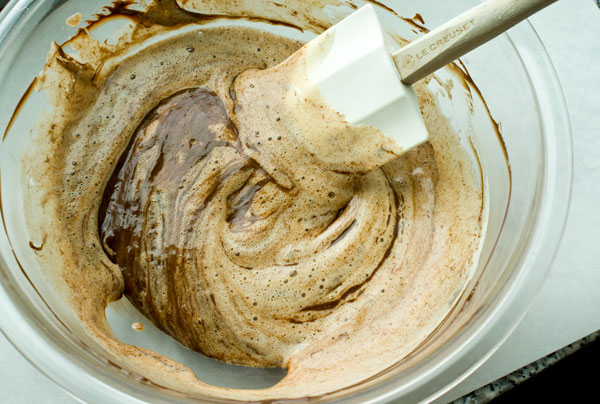
Pour in the rest of the egg mix…
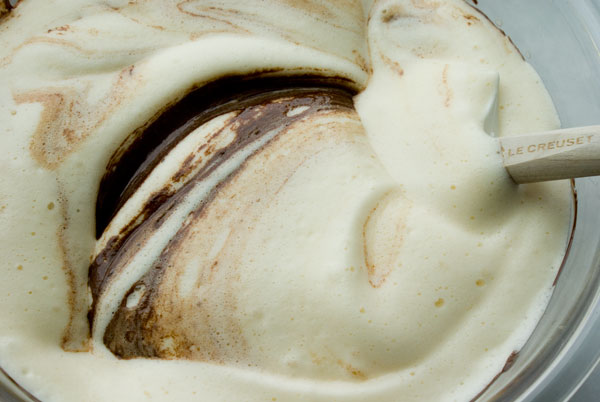
…and fold that in.
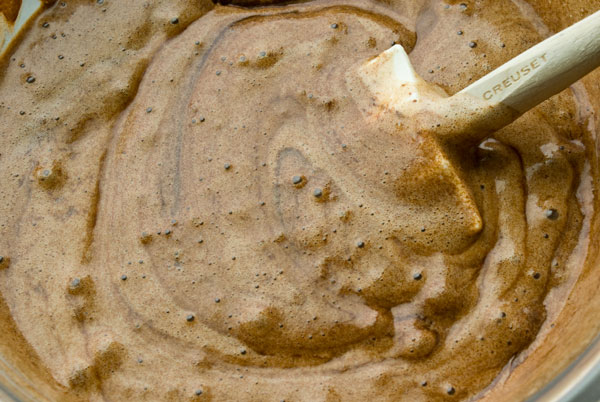
Then add the almost forgotten whipped cream.
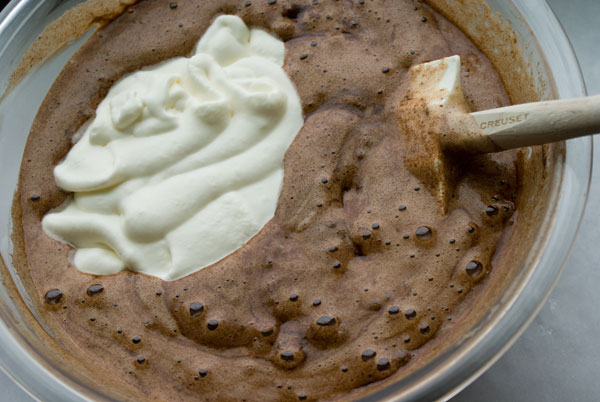
Fold again. So much folding, it’s like laundry day. Here’s the all folded, ready mousse.
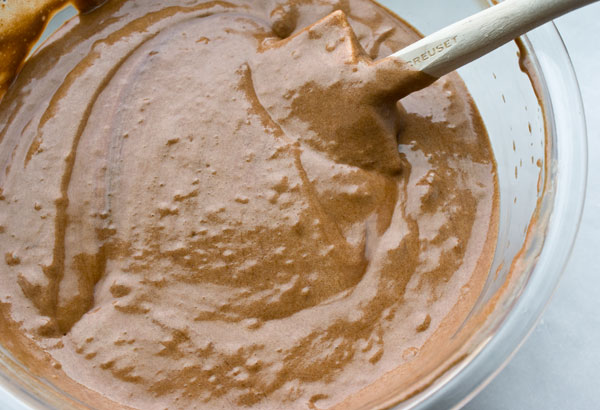
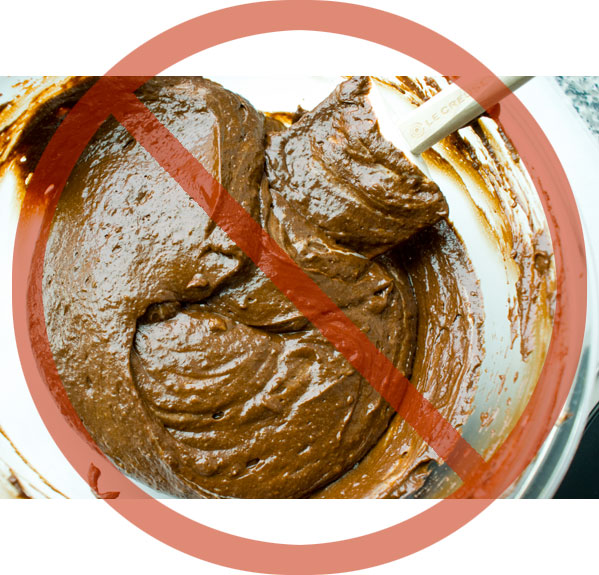
As an aside, here’s my earlier screw up — my first attempt at the mousse. You can see all the bits of scrambled eggs floating around. Gross, indeed. I must have let them get away from me when I was busy photographing and trying to whisk at the same time. I actually thought it wasn’t that bad until I folded in my chocolate and saw the truth magnified before my very eyes.
Now we can start the assembly:
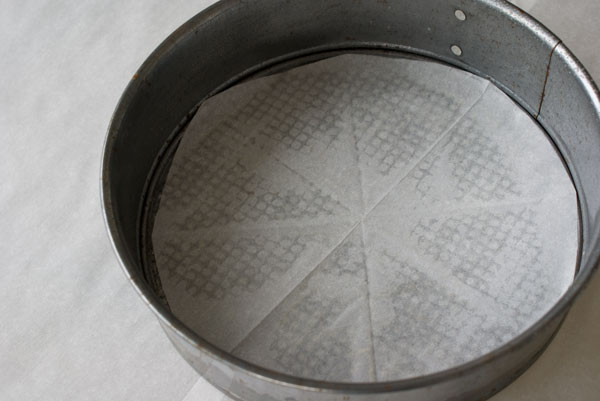
1. Line a 9″ springform pan with parchment.
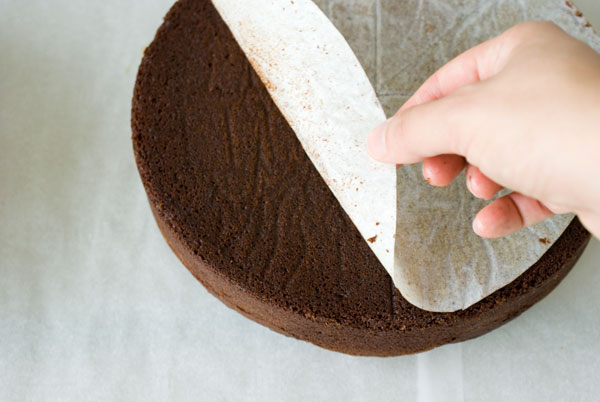
2. Peel off the paper that ended up on your cake.
3. Slice off the dome by holding a serrated knife parallel to the table and slowly sawing away.
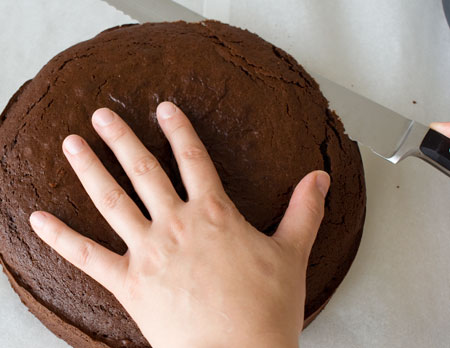
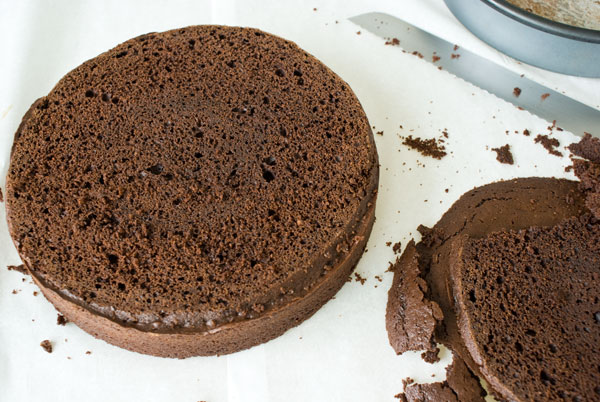
Dome sliced off. Snack on the rejected dome.
3. Now, we need to slice the rest of the cake in half, horizontally. I think it’s best to eyeball this, and you will get better with practice. What I like to do is find the center of the cake (from top to bottom, where my knife is) and mentally note the distance from the top edge of the cake as shown by the arrow. Run the knife around the edge, spinning the cake. Don’t force the knife, it will do it’s job slowly.
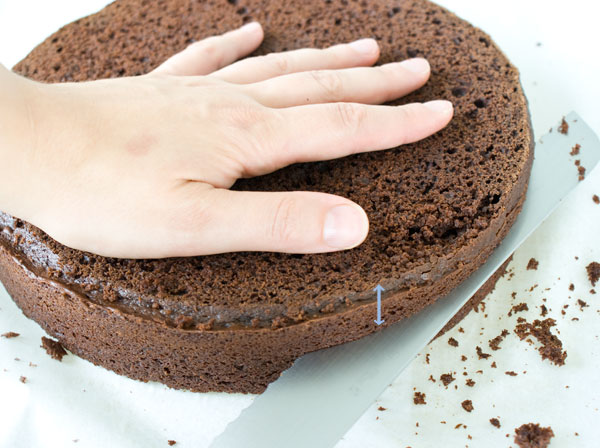
As you run the knife around the cake, it will cut deeper and deeper, until it slices through the center. As you can see by the arrow, I’m always looking at that halfway point to help guide the knife.
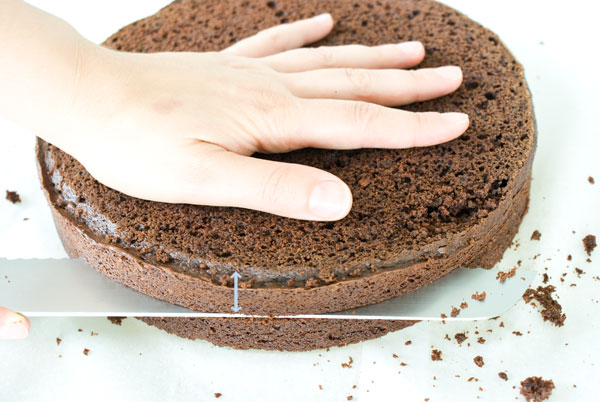
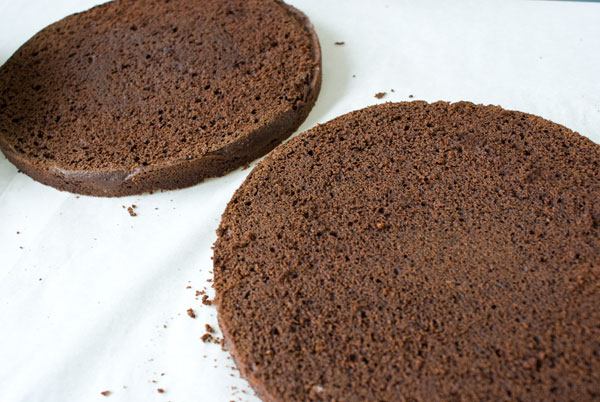
Two (mostly) even slices. If your slices aren’t perfectly even, no biggie. They’ll be hidden once the cake is together.
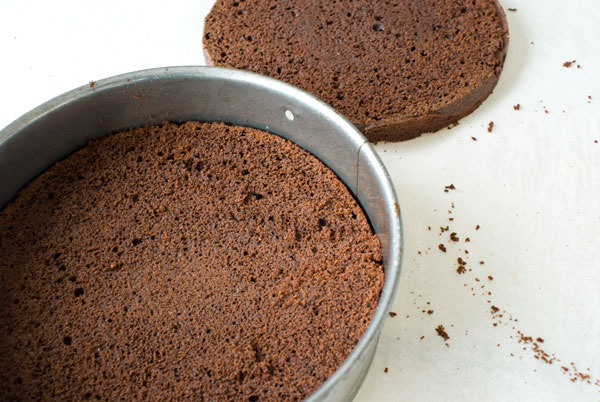
Set one slice into the prepped springform pan.
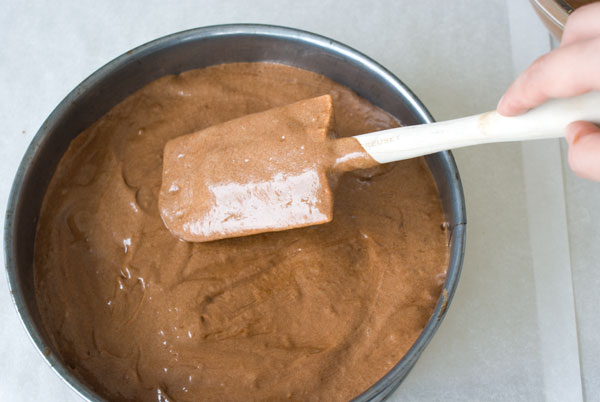
Pour in half the mousse and smooth it out to the edges.
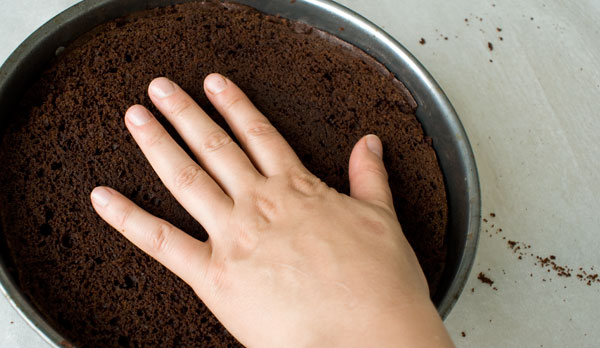
Carefully place the other cake layer on top and press it down gently.
Pour the rest of the mousse on…
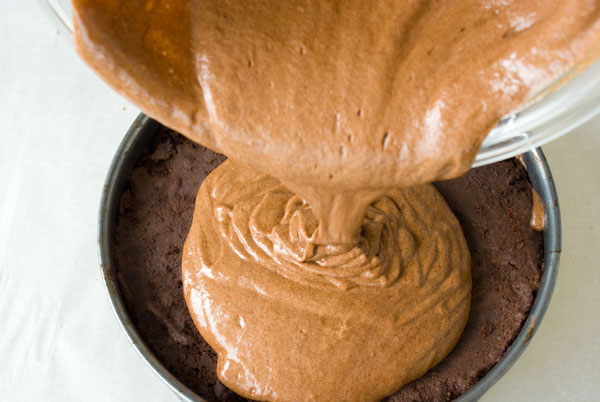
…and smooth that out over the top as uniformly as possible.
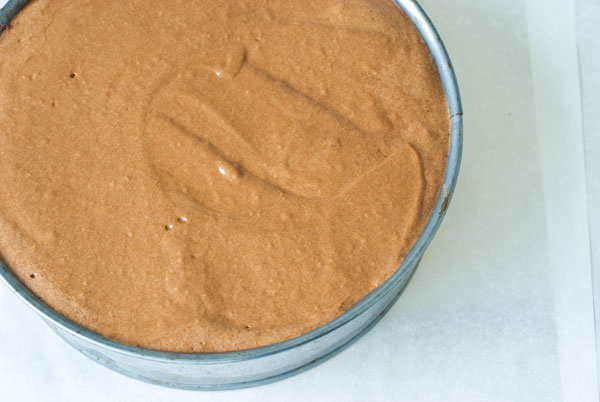
Freeze this on a flat shelf for at least 4 hours. Or overnight.
Make the milk chocolate frosting:
Take note that you have to start the frosting a few hours before you plan to frost the cake. Right when the cake goes into the freezer is a good time.
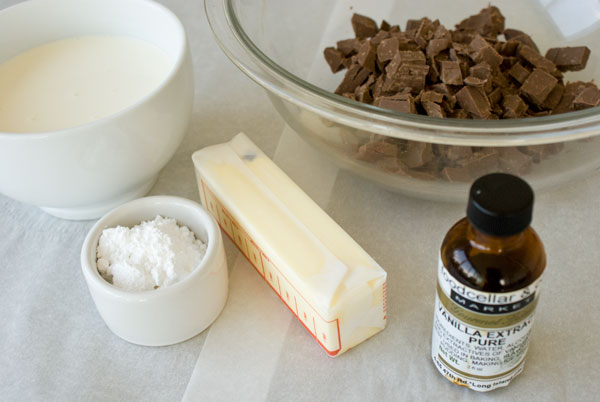
1 1/4 cup (300 ml) heavy cream
8 oz (224 g) milk chocolate, chopped into peas-sized bits
1 stick (112 g) butter
1/2 tsp (3 g) vanilla extract
1/4 cup (30 g) powdered sugar
1. Things we need:
2. Bring the heavy cream to a boil…
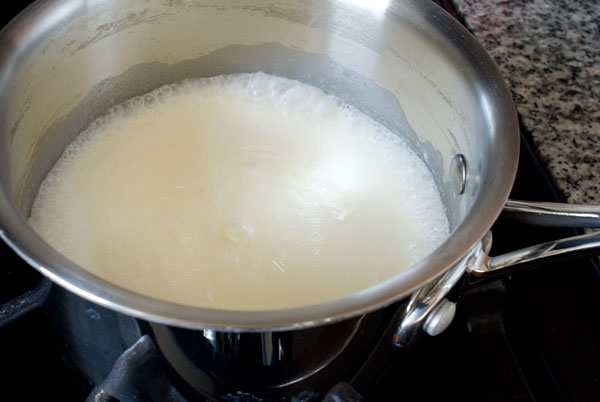
…and pour over the chocolate. Allow it to rest for a minute or two to let the heat melt the chocolate.
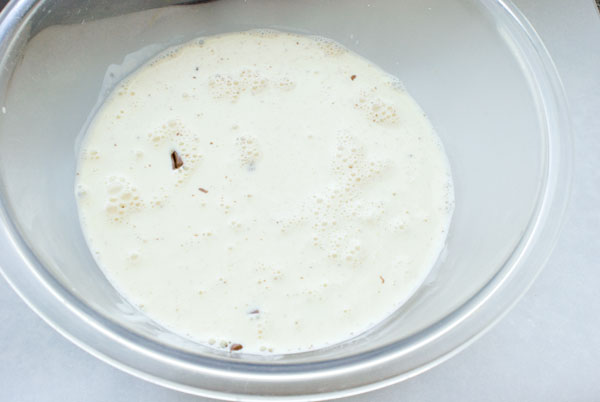
Then whisk it up into a sort of loose ganache.
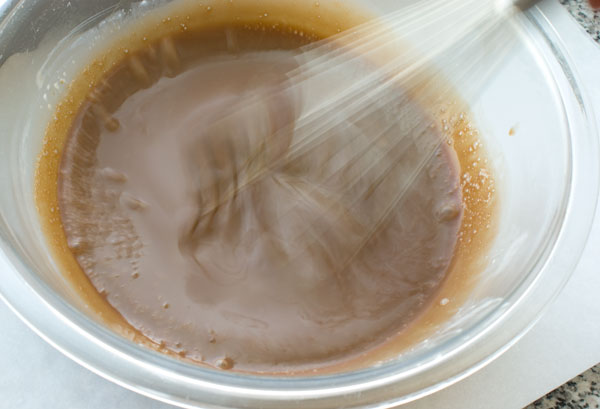
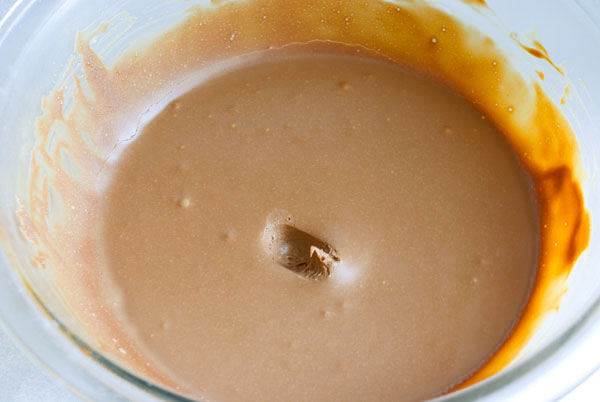
Refrigerate it until it sets to a soft solid, at least 3 hours (overnight’s ok, too.)
3. When you’re ready to frost the cake, whip your butter (which should be softened to room temperature) and vanilla until they’re very smooth and creamy, 3-4 minutes.
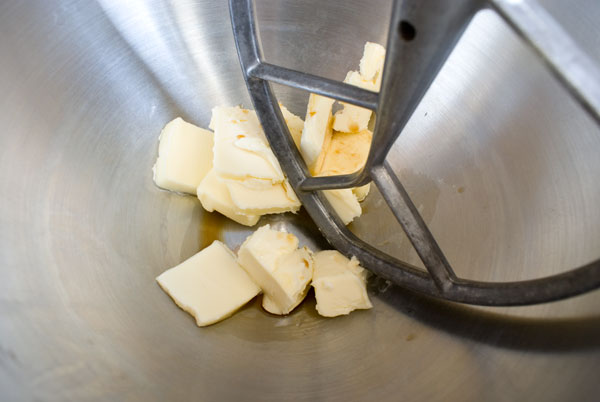
Scrape down the bowl.
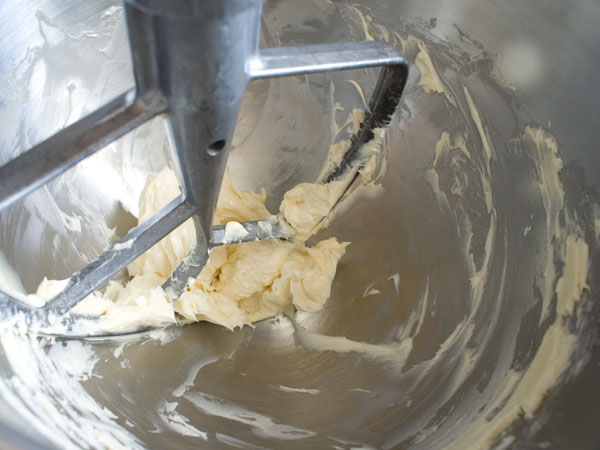
4. Add in the set up milk chocolate ganache and powdered sugar and whip until light and fluffy, 3-4 minutes. (I changed to a whip attachment ’cause it whips better. Who knew?)
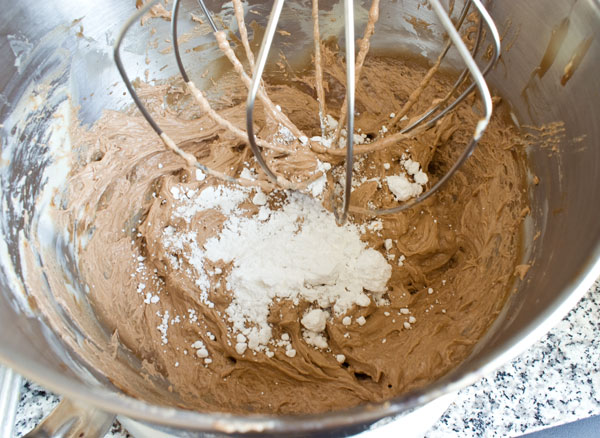
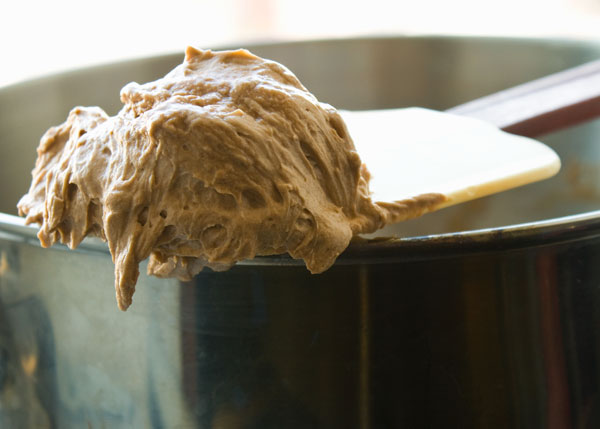
Finished frosting.
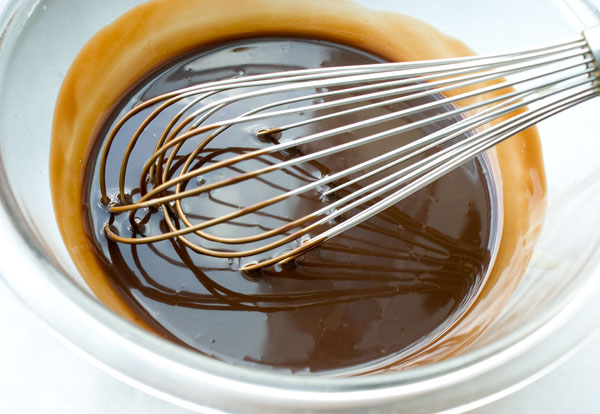
Now make the chocolate sauce as described in this post. This sauce is firm when cold and liquid when warm, so it can be used in lots of ways. This cake sports it as a glaze for the top, and a sauce on the plate. You can make it ahead and rewarm it in the microwave at 30-second intervals, stirring until you get the consistency you need.
Finish the assembly:
1. Grab the cake from the freezer and run a knife around the edge to release it.
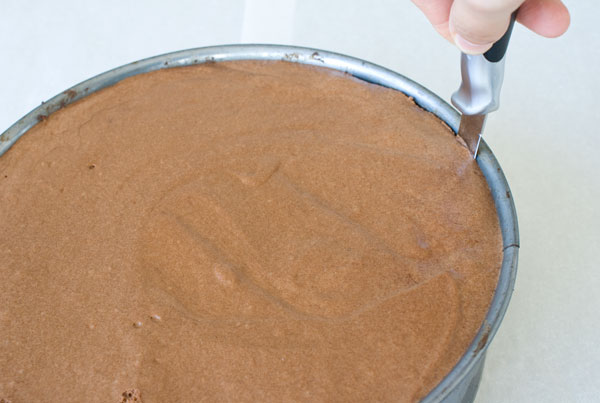
2. Carefully release the springform mechanism to free the cake.
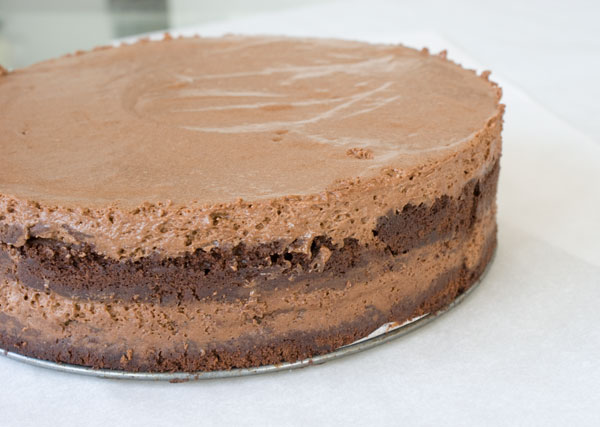
3. Frost. A large offset spatula makes the job easier. I have my cake set on some parchment sheets to control the mess.
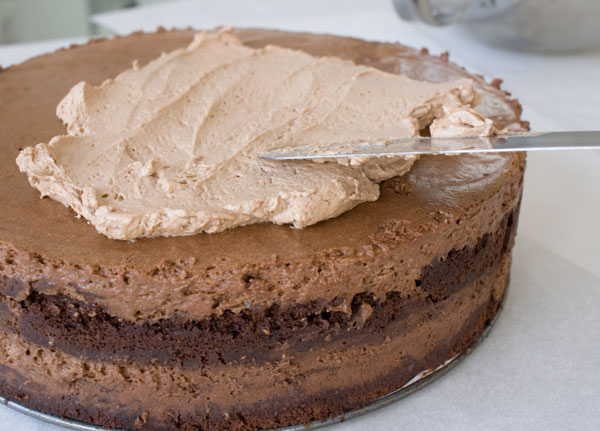
Good enough.
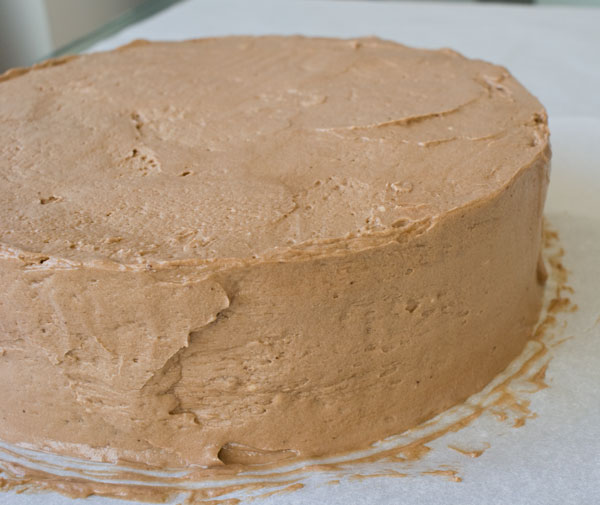
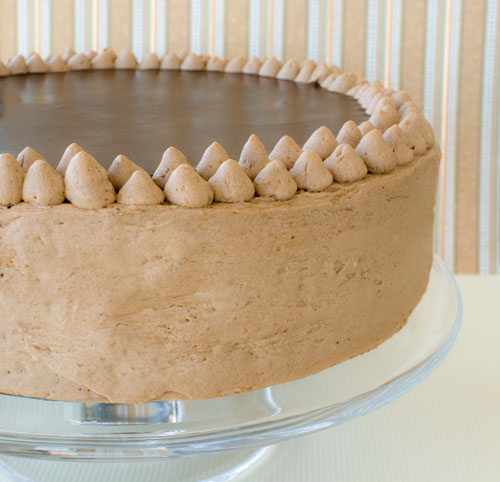
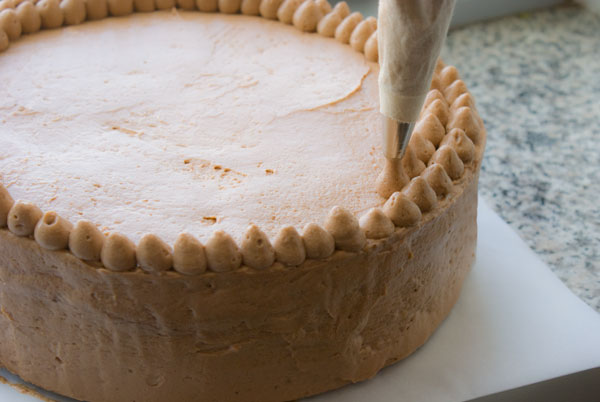
4. You can decorate in any way. Or leave the cake simply frosted. I scooped the rest of the frosting into a pastry bag fitted with a plain tip, and piped two rows of “kisses”. If you need a refresher on filling a pastry bag, see here.
5. When the chocolate sauce is lukewarm, and ONLY when it’s lukewarm, stir it up and pour it over the cake to glaze the top. If the sauce is too hot when you pour, it will melt the frosting underneath, making the top look muddled. It will probably set quickly because your cake is still giving off frozeness from within, so hop to it.
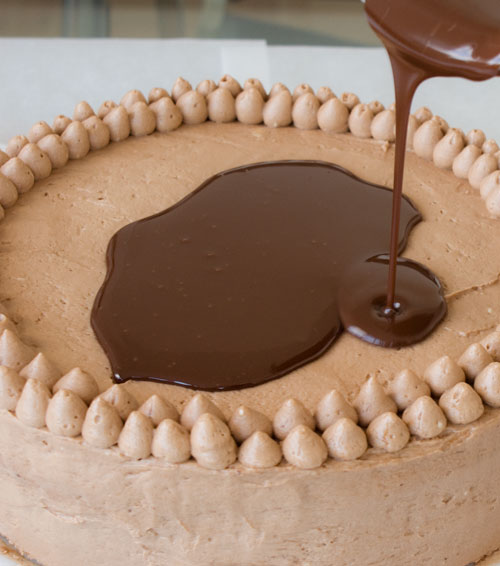
Viola! Refrigerate this until ready to serve, up to a day ahead. Make sure it’s fully defrosted before serving!
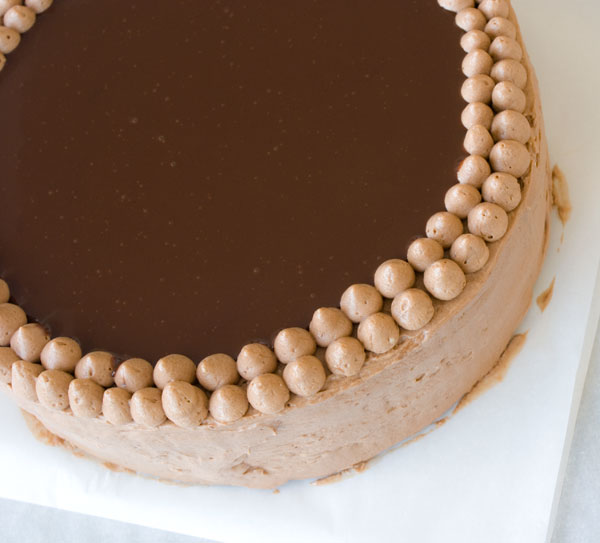
Happy Thursday to me.

Chocolate Cake
1 stick (112g) butter
1 1/3 cups (257g) sugar
1/2 cup + 2 tablespoons (56g) cocoa powder
2 large eggs
2 oz (56g) dark chocolate, melted
1 3/4 cups (210g) all-purpose flour
1 teaspoon (4 g) baking powder
3/4 teaspoon (3 g) baking soda
1/4 teaspoon (1 gram) salt
1/2 cup (118 ml) water
1/2 cup (118 ml) milk
1. All cold ingredients should be at room temperature for better incorporation. Preheat oven to 325 degrees F.
2. Melt the chocolate. I like to chop it up fine like in the “ingredients” photo above, and melt it in the microwave in 30-second intervals. Chocolate burns easily, so stir between every zap. Mine took about 60-90 seconds to melt. Keep on the side.
3. Using a tabletop or handheld electric mixer, beat the butter, sugar, and cocoa powder together on medium high speed until smooth, creamy and fluffy, about 3 minutes. Hard to see with the cocoa in the bowl, but it went for about 3 minutes.
4. Add the eggs, one at a time, until each one disappears into the mix. Be sure to scrape down the sides and bottom of the bowl. The dry, gritty stuff wants to collect at the bottom. Don’t let it win.
5. Pour in the melted chocolate. Hopefully, by now your chocolate came down in temperature a little. It should feel like a warm bath. If it’s too hot, it might melt the butter, and that’s no good. If it’s too cold, it might re-solidify into little bits when it hits the cold bowl. So, warm. We want it warm.
6. In a medium bowl, stir together the dry ingredients, which include flour, baking powder, baking soda and salt. Stir ‘em up good.
7. Combine the milk and the water in a microwave-safe cup and microwave them until hot, about 45 seconds. Like a “too hot” bath.
8. Drop the dry ingredients into the mixing bowl and mix on low speed until MOSTLY combined, and then, with the machine still running, pour in the hot water/milk mixture. Be sure to scrape the bottom of the bowl again. The dry ingredients tend to hide there.
9. Pour the batter into a parchment-lined, 9″ round baking pan. Then bake in the preheated oven until a toothpick inserted into the center comes out clean, or almost clean, about 40 minutes. Let the cake cool completely, even for several hours, to let the crumb firm up and be less delicate when slicing. I like to chill the cake in the fridge for a couple of hours, so that slicing goes more smoothly.
Next, make the Chocolate Mousse
8 oz (224g) dark chocolate (I used 61% El Rey brand)
1 stick (112g) unsalted butter
4 large eggs
6 (45g) tablespoons sugar
2 tablespoons water
2/3 cup (158 ml) heavy cream
1. Working with a large bowl, melt the chocolate and butter in the microwave. Again, use 30-second intervals and stir every time between zaps to make sure the chocolate doesn’t burn. Set aside.
2. Whip cream to a loose peak consistency. You can do this with a mixer or by hand. It’s not exactly liquid anymore, but it’s not stiff, either. It should just barely hold streaks. I scraped this into another bowl, so I could free up my Kitchenaid bowl for the rest of the mousse recipe. Refrigerate the cream until we’re ready for it.
3. Set up a double boiler: Fill a pot with water and bring it to a boil. Grab a bowl that’s big enough to fit over the pot without touching the boiling water and crack in the eggs, then pour in the sugar and water. Whisk it up and set it over the boiling water. Our only goal here is to warm dem eggs. Whisk the whole time. They’ll start to get frothy. After a few minutes (about 3), move the bowl off the heat and stick your finger in it. Yes, you heard right. This is to gauge the temperature. Don’t feel like you’re after some exact degree of heat. It should feel like a very warm bath. We are about to whip the crap out of them and warm eggs whip well. If they’re still cool, return to top of pot.
4. If they’re nice and warm, pour into the KitchenAid bowl, and whip on high for about 3 minutes. (If you have a hand mixer or you’re whipping by hand, go ahead and do it in the bowl you warmed them in.) The eggs will get very thick, pale and creamy looking.
5. We’ll start by pouring about 1/3 of this fluffy egg mixture into the melted chocolate bowl. Carefully fold it in, scraping from the bottom of the bowl, over to the top. This will help lighten the very dense chocolate mixture, so when we fold in the rest, it won’t deflate.
6. Pour in the rest of the egg mix and fold that in. Then fold in the whipped cream.
Now we can start the assembly:
1. Line a 9″ springform pan with parchment.
2. Peel off the paper that ended up on your cake.
3. Slice off the dome by holding a serrated knife parallel to the table and slowly sawing away.
4. Now slice the rest of the cake in half, horizontally into two even rounds.
5. Set one slice into the prepped springform pan.
6. Pour in half the mousse and smooth it out to the edges.
7. Carefully place the other cake layer on top and press it down gently.
8. Pour the rest of the mousse on and smooth that out over the top as uniformly as possible.
9. Freeze this on a flat shelf for at least 4 hours. Or overnight.
Make the milk chocolate frosting:
Take note that you have to start the frosting a few hours before you plan to frost the cake. Right when the cake goes into the freezer is a good time.
1 1/4 cup (300 ml) heavy cream
8 oz (224 g) milk chocolate, chopped into peas-sized bits
1 stick (112 g) butter
1/2 tsp (3 g) vanilla extract
1/4 cup (30 g) powdered sugar
1. Bring the heavy cream to a boil and pour over the chocolate. Allow it to rest for a minute or two to let the heat melt the chocolate. Then whisk it up into a sort of loose ganache. Refrigerate it until it sets to a soft solid, at least 3 hours (overnight’s ok, too.)
2. When you’re ready to frost the cake, whip your butter (which should be softened to room temperature) and vanilla until they’re very smooth and creamy, 3-4 minutes. Scrape down the bowl.
3. Add in the set up milk chocolate ganache and powdered sugar and whip until light and fluffy, 3-4 minutes.
Finish the assembly:
1. Grab the cake from the freezer and run a knife around the edge to release it. Carefully release the springform mechanism to free the cake.
2. Frost the cake on top and sides.
3. You can decorate in any way. Or leave the cake simply frosted. I scooped the rest of the frosting into a pastry bag fitted with a plain tip, and piped two rows of “kisses”. Refrigerate until you’re ready for the glazing step.
Make the chocolate glaze
4 oz (112g) dark chocolate, finely chopped
1/2 cup (80g) heavy cream
3 tablespoons light corn syrup
1 tablespoon vegetable oil
1/2 teaspoon vanilla extract
1. Pour the heavy cream, corn syrup and oil into a microwave-proof cup and nuke until almost boiling (you might be able to see it gurgling in the cup), about 45 seconds. It will look curdled but pay it no mind. Stir it up to blend.
2. Pour over the chocolate and allow to sit for a minute to melt it all. Whisk everything until completely smooth.
3. When the chocolate sauce is lukewarm, and ONLY when it’s lukewarm, stir it up and pour it over the cake to glaze the top. If the sauce is too hot when you pour, it will melt the frosting underneath, making the top look muddled. It will probably set quickly because your cake is still giving off frozeness from within, so hop to it.
4. Viola! Refrigerate this until ready to serve, up to a day ahead. Make sure it’s fully defrosted before serving!
84 Responses to “Quadruple Chocolate Cake”
Post a Comment
Your E-Mail will be kept private. * = required fields.


Your description of that day in the restaurant made me feel like I was right there! I really enjoy your accounts of your restaurant days. I’ve never made mousse that way – it’s moving to the top of my to-try list!
Hello, baby! That looks hella delicious! Also, “panic not seen since the Barney’s sample sale” – LOL!!!
I took my time reading through this post to savor every single step and to pretend I was making it myself. What a beautiful cake. I hope to make this one day for a very special occasion. Thank you for your lovely process photos.
That looks absolutely divine! I really like your step by step photos. I don’t think there’s a better chocolate filling than mousse.
Thank you so much! It looks fantastic! You did a great job! And you made it look so easy too. Thank you again for all your hard work.
This looks like a huge project but the cake cooks fantastic! I am sure it is all worth it!
This looks like heaven in a cake! The cake I obsess over recreating is the Albemarle Baking Company’s (in Charlottesville, Virginia) Chocolate Praline Crunch Cake. But I bet yours is even better and make me forget all about the old one.
this is certainly death by chocolate – it just killed me. i love the rich chocolatey laters and the nuts. you present it so beautifully – i’d love a slice pls!! 🙂
This is so delicious to be eaten. Congrats!!!!
Loved this. a true labor of love. Here’s a quick way to warm eggs for any recipe. Remove eggs from the refrigerator. Fill cups with hot tap water and place eggs, still the shell, inside the hot water. after 5 minutes, they’re room temp and ready to roll, er rock ro fly through the air with the greatest of ease.
you’re my hero pastry pal.
Wow. I’m stunned and delighted by all the step by step instructions and photos. Even better than a video, because you can zip by the parts you know and slow down for the parts you don’t know. And your story in the beginning was wonderful. Thank you!
I want a slice! that looks so decadent!
That looks yummy and tasty! i wish i could taste it!
Are folks also sending the waiters back for seconds? That’d be me. : ) This looks phenomenal. Just gorgeous.
OH MY! These look so good!!!
Holy moly, what a cake, Irina! Talk about irresistible. Your post is fantastically detailed with such great photos. Truly incredible!
🙂 Jane
Wow, what amazing detailed photos! That cake sounds like lots of work but it is definitely worth it.
I bought 90% cocoa dark chocolate thinking that the more cocoa would be better, am I wrong?
Always a fantastic read, and always learn something new. I think I would have been one of those patrons who sent the staff back into the kitchen to check they weren’t fibbing the first time that the cake was all out. I would have had a pout for sure!
I have never made anything like this before, but I know it sure is something I’d like to try. Once it starts to cool down here, I’ll definitely give it a go. But question – how do you get that slice looking so perfect. I’d be afraid it’d all collapse around me!
Alicia — The more cocoa in your chocolate bar, the less sweet it is. 90% chocolate is quite bitter, and for most people, is hard to eat on it’s own. If you try making desserts with it, you’ll probably need to add more sugar. Of course everyone’s preferences are different, but I prefer to work with 60%-70% chocolates.
Hi Julia — Thank you once again! My slices aren’t always perfect and I picked the nicest piece to photograph, but the best way I’ve found to slice cakes is to make sure the cake is cold (slices more evenly) and then use a sharp, thin knife that’s been dipped in very hot water (quickly wipe off the water with a towel) before slicing. Glide the knife through the cake in one motion, rather then using the “cutting back and forth” motion. Can’t wait for your next post!
This looks divine! I am not a big chocolate-cake fan myself altought I adore chocolate, somehow tortas are not my thing, but I showed this post and picture to my boyfriend, we looked at each other and said immediately: “We’re gonna make it”. I’m on a diet now (because of the lotta cooking) but soon I will make this recipe for sure.
BTW your carrot cake was a big hit at my birthday, I found every ingredients. It was absolutely amazing, I have never had such a wonderful cake in my entire life! Thank you for that!
Keep up the good work, you are a genious!
This cake looks sooo good, there are simply no words to describe it.!!
P.S- Any chance of getting the ‘signature’ cake recipe, for times when I don’t want to go all out?
I will be attempting this for xmas! Wish me luck!
Hi Irina,
I have made the chocolate cake part of the recipe and I will be making the mousse tonight. When I first made the cake using a 9″ silicone round cake pan, the cake domed so much it resembled a pyramid. I could only get one decent cake layer out of it and ate the peak as scrapes. Then I whipped up another batch of the cake batter and baked it in a 9″ spring form pan, it still domed but not as bad as when I used the silicone cake pan. However, it still domed quite a bit more than yours. Should I reduce the leavening agents to reduce the “doming” effect?
Hi Mrs Ergül — I guess you can give that a try. It’s up for experimentation if you’re in the mood. You can try reducing both baking powder and baking soda by 1 gram. You might also try baking in a heavier cake pan, because it’s possible the outer cake part sets up too fast in a thin pan and the inner batter has nowhere to rise but up. Sounds like that could be the problem if the spring form pan got a better result. You might need something with heavier sides. Hope it works!
Hi Irina,
Thank you so much for your prompt reply and for shedding some light on my doming issue. I will stick with the spring form from now on! By the way, will there still be enough chocolate sauce to glaze the cake if I half the recipe for it?
Mrs Ergül — You’re welcome! Yes, there should be enough. Though, if you make the whole batch, you can freeze the leftovers, or use it to drizzle over ice cream.
Thank you! I made the full recipe and drizzle the leftovers on the cake scraps 😉
I made this for Christmas and while it was delicious (devoured within 2 days by everyone), my frosting was strangely wet. Any idea why this happened? I let the chocolate portion set over night and it was a there was some condensation on top and at the bottom. It was really difficult to frost the cake as a result because the frosting kept sliding off. I managed to do it, but chocolatey water began to accumulate at the bottom of the cake after a few hours…
Laura — Thanks for your report. I’m glad it was delicious despite some technical difficulties. Yes, that is strange. I can only guess that the frosting was overwhipped a little and the cream started to separate. Also, because it is a whipped cream-style frosting, it is normal for whipped cream to start to get sad after a couple of days. I like this frosting because it’s got a light texture, but you could try a richer, butter-based frosting, like the one on this cake.
I’m in the process of making this cake for my moms birthday tomorrow. So far, so good. The only trouble I’ve come across is I couldn’t get the eggs for the mousse to peak, so I finally gave up and substituted eight egg whites instead. It still turned out yummy, but maybe you have some suggestions for why that didn’t work out? I also seem to be having the same problem as Laura. I started making my frosting to the point where you put it in the fridge. But it’s been in the fridge almost five hours now, and it’s not even remotely solidified. It’s completely a liquid. Do you think it’ll be okay once I whip it tomorrow? Or did I do something wrong?
Otherwise, your cake is superb. And you make it so easy to make 🙂
Kyli — Hmm, tough one…
First the eggs. Your solution was a good one, with the use of just whites. Did you beat the eggs along WITH the sugar? That gets it to aerate. Also, the warm temperature helps get them fluffy, so that could have been an issue.
Now the frosting. You’re referring to the point after you pour the cream over the chocolate, whisk, and refrigerate? It should have firmed up into a soft ganache after 5 hours in the fridge. If it’s still completely liquid, the ratio of chocolate could have been off, because it’s the fats in the chocolate. It’s a little over a cup of cream to half a pound of chocolate. Is that where you ended up? If its liquid, it still may whip up when cold, because the mixture is essentially heavy cream, and heavy cream whips up to be whipped cream.
What a masterpiece of a choclate cake.
Thank you for the directions and the pics.
Super yum, delicious and sinful:-)) Thanks fort the detailed pics!!
the cake looks delicious….can i make this cake one night before and serve it the next morning?
Konain—Thank you and sure you can make it the day before. Keep it refrigerated until you’re ready to serve.
I love this cake! I’ve made it twice and both times it was a blast to make! Although yours always looks so much better 🙂
Hi :).
I love your website! That cake looks so delicious! I will have to try it! With your pictures and description I found it easy to make.
Thank you for everything :).
Btw I am accountant and i want totally change my life. From September I am going to pastry chef course 🙂
I like it soooooooo much every one in my family like it ,it was soooo tasty please go on and write more recipes thank you
I made this cake yesterday and it is THE BEST chocolate I ever had or made! The mousse is just amazing an every layer of it in itself is fabulous, but together it just makes a cake to die for!!!
This cake is the most delicious thing ever! I asked for it as a birthday present from my boyfriend. He’s not my boyfriend anymore now – because he used the cake to propose to me!
On a different note – how much of your Caramel Chocolate Mousse do I need to use as layers for this cake? There are some more birthdays coming up, and I would like to make different versions, as this cake is my one and only special cakes of all times now.
All the best from a very happy little girl!
Laura — Congratulations! That’s amazing! I wish I could say there was something in the cake…
As far as the chocolate caramel mousse, my estimate would be to make a batch and a half, or even make a double batch, and once you pour it in the cake layers, if there’s any left over, pour it into glasses to enjoy alone.
Wow….that cake looks so yummy….i’m going to make it for my sons birthday party…But i need some help I’m also making some mango mousse cake with mirror glaze.Does it taste good if i make mirror glaze instead of chocolate sauce..and is the milk chocolate same as semisweet chocolate..please help me..
So… I’m in the process of making this cake.. however, the first part of the Chocolate frosting recipe isn’t working for me, it’s been like 5 hours in the fridge and it’s still liquid… It should have stiffened up by now, right?
Asbjorn — Normally it would set up by now, yes. All I can think of is that perhaps the brand of chocolate you’re using is different and it sets up differently in the fridge. You can still try creaming the butter, and pouring in the liquidy stuff. Then whip all of it. It may still become fluffy because you are essentially whipping the cream.
Thanks PastyPal… I tried it and it kinda got messed up 🙂
It turned into two things in the end… One was chocolatebutter and the other was chocolatecream. One was firm and the other pure liquid. I managed to drain the liquid from the firmer part and coat the cake. It didn’t look even slightly as good as yours, but it tasted great 🙂 I’m going to make this cake again tonight, going to try it with a different chocolate.
Does cream whip well when it’s been heated up and mixed with chocolate?
btw, the cake tasted GREAT 😛 (The parts I didn’t ruin at least 😉 )
Abnjorn—I’m glad you were able to salvage at least most of the cake. Even if the cream was heated, then cooled, it should still whip. Hope the next go-around works. You’re using full-fat heavy cream, right?
Just have had a slice of this cake! Been doing it all day but it is quite simple because you don’t cook the whole thing all at the same time but divide into several stages. The mousse didnt come out stiff but rather runny coz I overheated the eggy cream but the cake is delicious anyway! And so rich i could not eat all of my piece ))))
Thank you for your work! The pics are wonderful and the instructions are clear and easy to follow.