Farmer’s Bread
January 13th, 2010 | 27 Comments
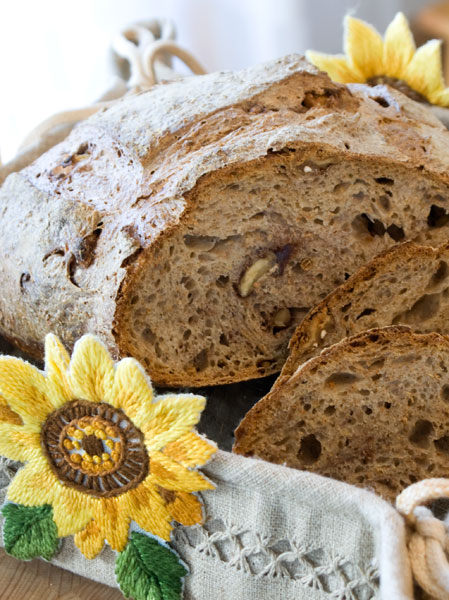
Bread seems to be a category of its own. True, it falls under the “baking” umbrella, but artisan bread bakers snatched up the craft and dragged it to their own specialty bake shops. These people are bread whisperers. They can speak to the dough, smell its needs, and anticipate its every gurgle. They “feed” it starters, and know when to poke and prod it and punch it down, so it doesn’t get too moody. They have a symbiotic relationship with dough that takes years to develop. I confess, I’m jealous.
Even though I worked in some lovely fine dining establishments, almost none of them baked their own bread. Instead, the bread orders arrived at 5AM from reputable bread bakers, and were quickly ushered in to the kitchen before the light of dawn revealed this shameful secret to waking New Yorkers. I’m not sure why things worked that way, since chefs typically pride themselves on making everything from scratch. Some even hang their reputations on this.
No other task was too painstaking. I watched the chefs take days to make stocks and sauces — roasting bones, simmering liquids, straining, reducing and straining, then straining again. Hours were spent putting together terrines, baking them gently for hours, and letting them rest over night, so they could be sliced with neurosurgeon precision. Even most of the desserts took multiple sets of hands and several moon cycles to put together. So what about the bread?
Did the chefs feel like they didn’t have the mad skillz, like some of the baking-challenged Top Chef contestants? Were the labor costs not worth it, since the bread basket was a freebie for every diner? Perhaps there wasn’t enough room in the walk-in fridge to accommodate rows of rising baguettes? Or was it a task best left to those who weren’t likely to screw it up?
Though I was learning all manner of pastry technique, I was deprived of the bread making experience. It left a hole in my heart the size of an air pocket in a crusty sourdough loaf. I felt like a ballerina studying without pointy shoes. This missing knowledge nagged at me, so I signed up for some bread-making classes at the Insitute of Culinary Education.
There, we made as many beginner’s breads as time would permit — easy breads that used packaged yeast and had one or two rises of a few hours each. These breads were considered simple in the eyes of a seasoned bread baker, but if, like me, you were making these for the first time, all you could do was blindly follow the recipe and hope you got some edible bread. All my breads came out okay, but that’s as enthusiastic a description as they deserve. I had no idea what signs I was looking for. I was just a clueless tourist in the city of Bread.
And this is my general problem with culinary school. The instructors only show you how to make everything once. You try it, and get the general idea, and then move on to the next thing. If you mess it up, tough. You’re still moving on to the next thing. The essense of any recipe can’t seep deep into your marrow unless you make it a hundred more times. Then, and only then, do you know that dough inside out. You know what it’s supposed to look like the second you start dissolving the yeast. You know if it gave off enough foam, and if its alive and kicking. You know if you really do need to add all that flour today because it happens to be a dry day. You just KNOW it like its your twin brother. You can read its mind. And this can only come from exhaustive repetition.
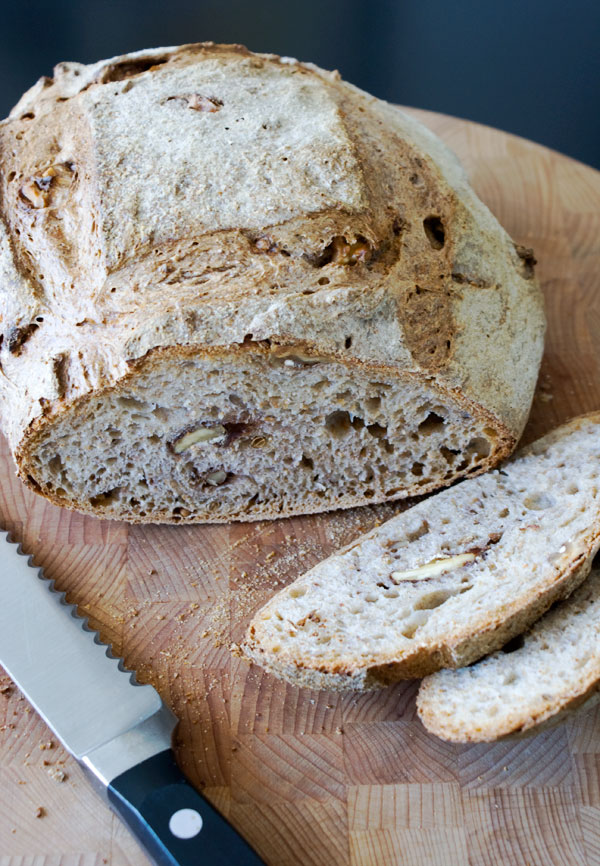
My father had a natural instinct for this concept. Having no experience with bread baking, he woke up one morning and decided that he wanted to bake bread. After browsing his cookbook collection, he landed on Jaques Pepin’s Farmer Bread, and assessed the recipe to be easy enough to follow as written. The resulting bread was decent, yet he noticed a few areas where he could try some experimenting. And the obsession began.
Over the next few weeks, he made the same bread over and over. Sure, he could have tried baking other breads, but he was a dog with a bone and he wouldn’t let go. He tinkered and toiled. He watched the dough rise every time, on all weather days, and saw what happened when he forget to add salt. He tried using different amounts of flour. He tried using baking sheets and stones. Some days he spritzed the oven with water, and other days he didn’t. He became the master of this one particular bread recipe.
Now, when I go visit, he makes this bread and it is the most magnificent peasant loaf imaginable. The giant boule commands attention at the center of the table, and I can’t wait to hear the crust snap as I break off a hunk, ready with my butter-loaded knife.
Farmer’s Bread
adapted from Jacques Pépin’s Table, by duh, Jacques Pépin
makes 1 big fat loaf
4 cups (454 g) all purpose flour plus 1 teaspoon for sprinkling
1/2 cup (84 g) rye flour
1/2 cup (14 g) wheat bran
2 1/2 (12 g) teaspoon salt
1 teaspoon (4 g) granulated yeast
2 1/3 cup cool tap water (about 70 degrees F, a comfortable room temperature)
1 cup walnuts (optional)
1 tablespoon coriander seeds (optional)
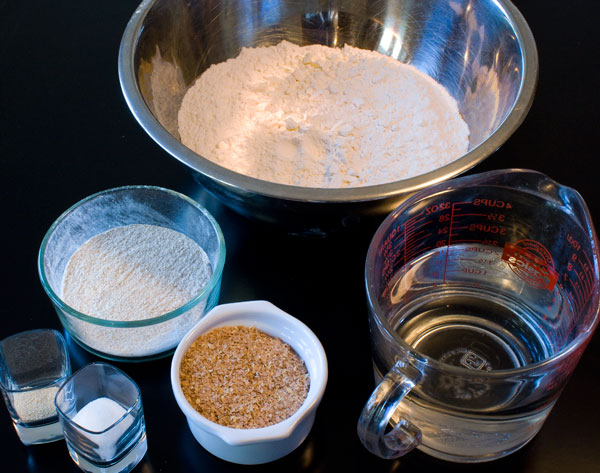
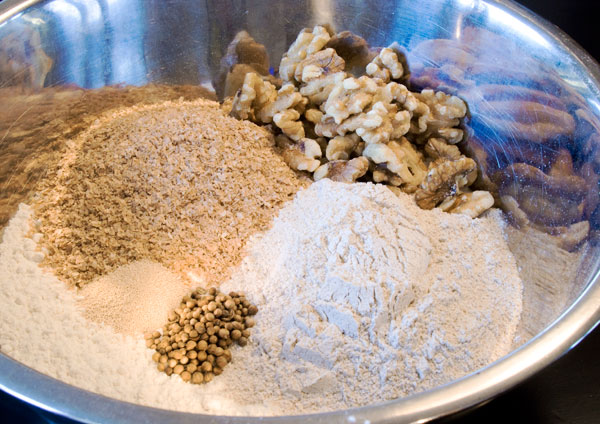
1. Ingredients. These are musts.
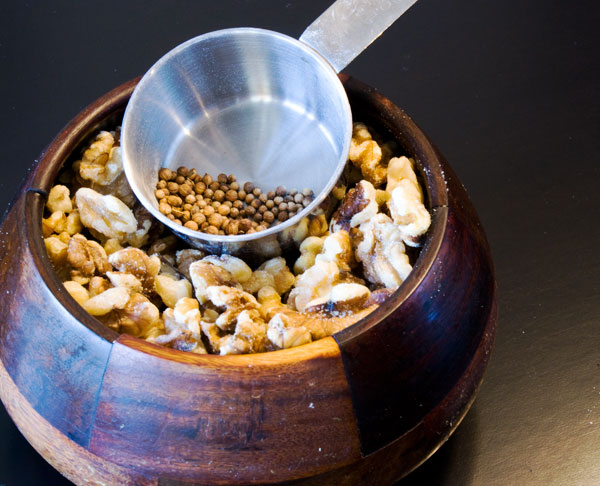
2. Ingredients. These are optional.
3. Stir up the flours, bran, yeast and salt (and walnuts and coriander, if using).
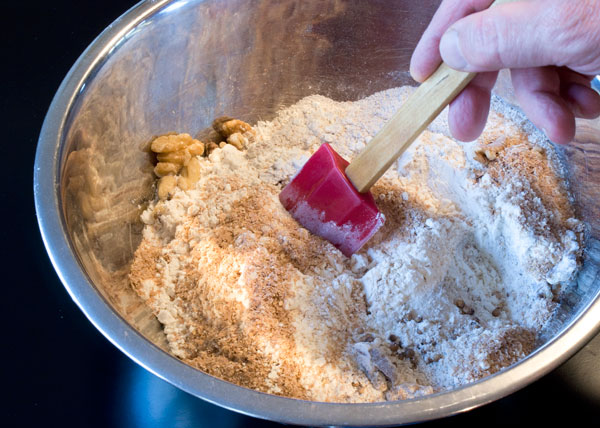
4. Add the water a little at a time. You may not need all of it. I certainly didn’t. You are looking to moisten all the dry ingredients so a dough can come together. Here I started with about 3/4 cup.
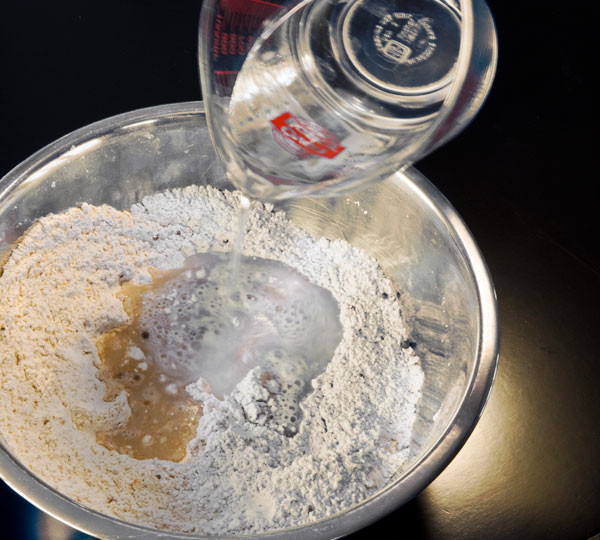
Start stirring.
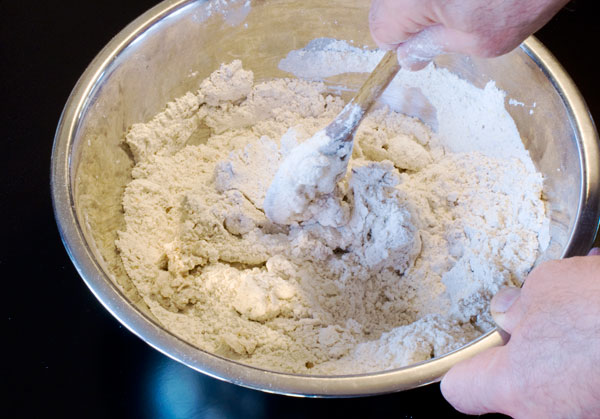
Add more water as needed.
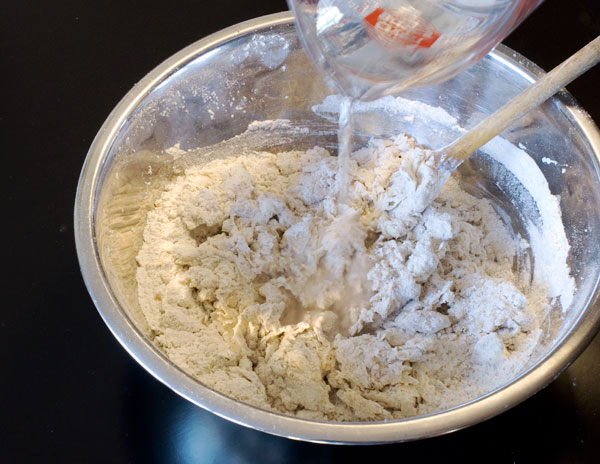
Stir that in.
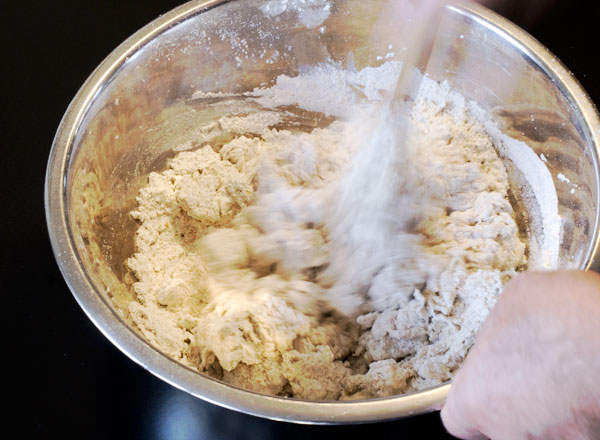
If you’ve been reading this blog, you know that I prefer to get in there with my bare man-hands. (Kidding. Those hands are my dad’s.) You can feel what’s going on better.
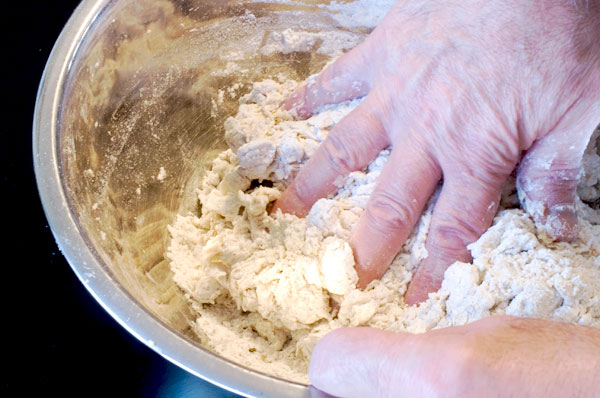
Knead the mess until it comes together into a soft, sticky ball.
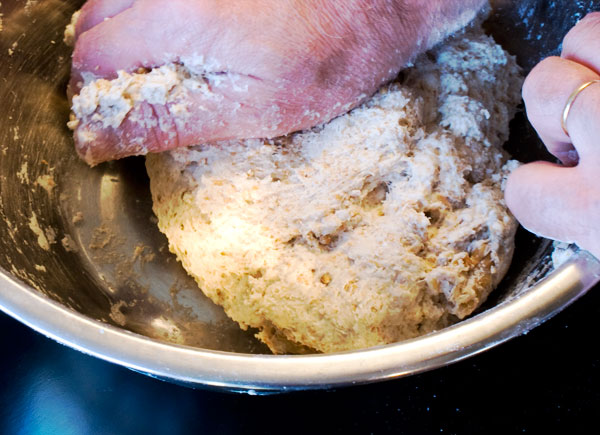
Then have some quiet zen time kneading peacefully, working the dough under the heel of your hand, folding it in on itself, pressing it down. After 5 minutes, the dough will get more elastic and supple.
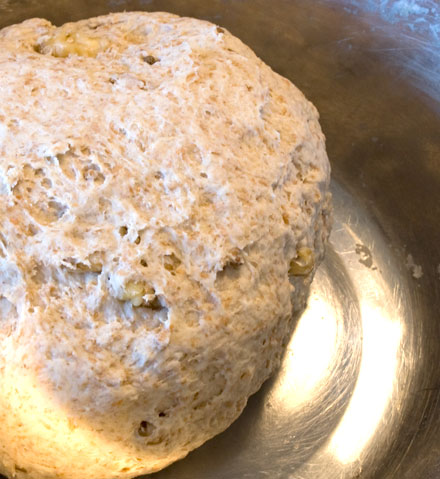
5. Lightly spritz a large container or bowl with nonstick spray. Pop in your dough ball, cover tightly, and let rise at ROOM TEMPERATURE for 12-14 hours or overnight.
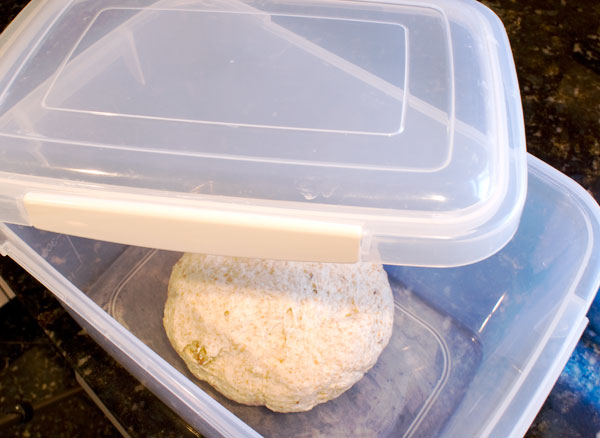
It will double in size and get airy and pillowy.
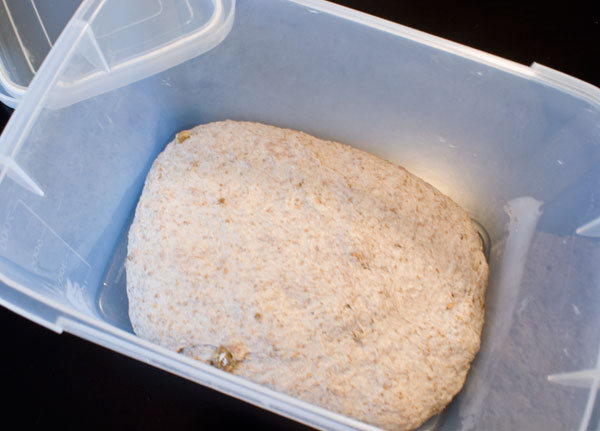
My favorite part: punch it down. It will deflate and release some of its gases.
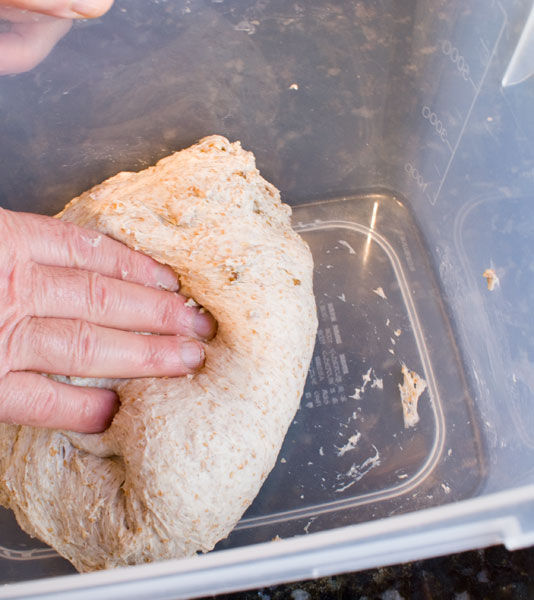
Shape into ball. Place it on a parchment lined paddle or inverted baking sheet. Spray lightly with non-stick cooking spray…
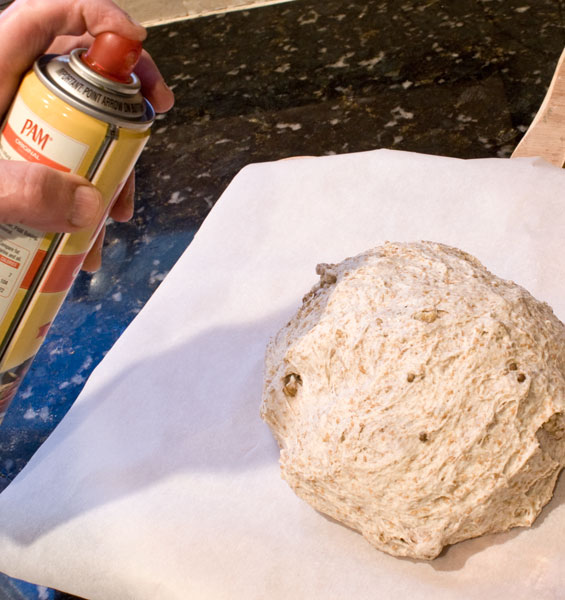
…and cover loosly with plastic wrap. This way the plastic won’t stick to the dough. Let rise again at room temperature for 1 1/2 hours.
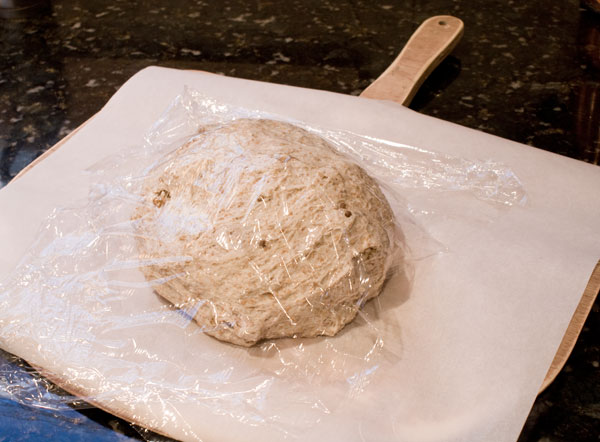
While dough rests, preheat oven to 425 degrees F. If you have a baking stone, place it in the oven to preheat, too. If you don’t, preheat an inverted sheet tray. The dough should double in size again. Here it is ready to bake.
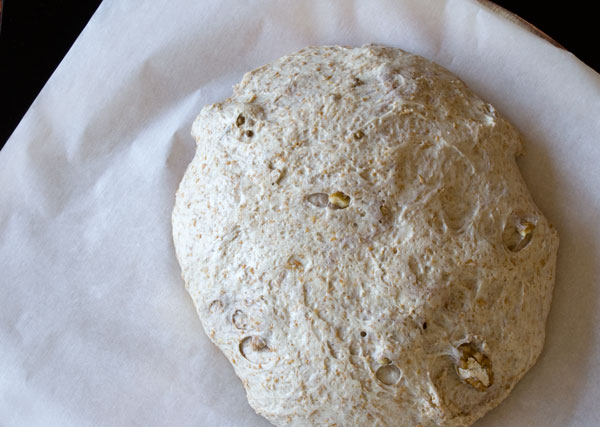
Sprinkle loaf with remaining teaspoon of flour.
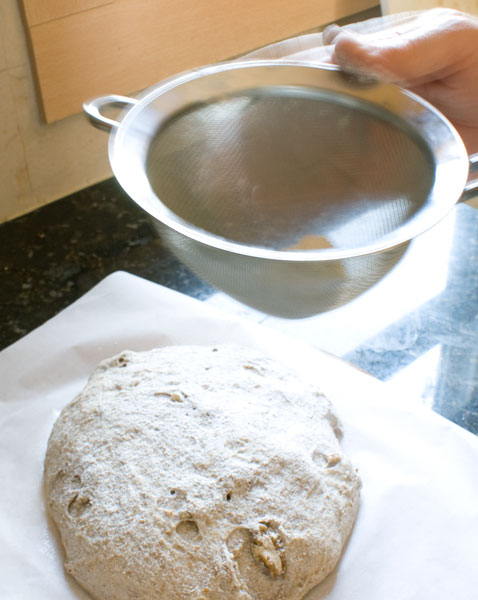
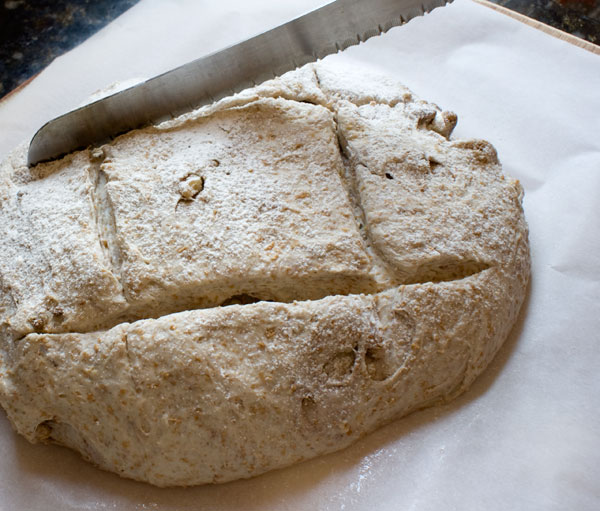
Gently, GENTLY, without pressing the air out, slash a tic-tac-toe shape on the bread to give it that peasanty character. A small, sharp paring knife will work better than this giant serrated monster, but we use what we’ve got, right?
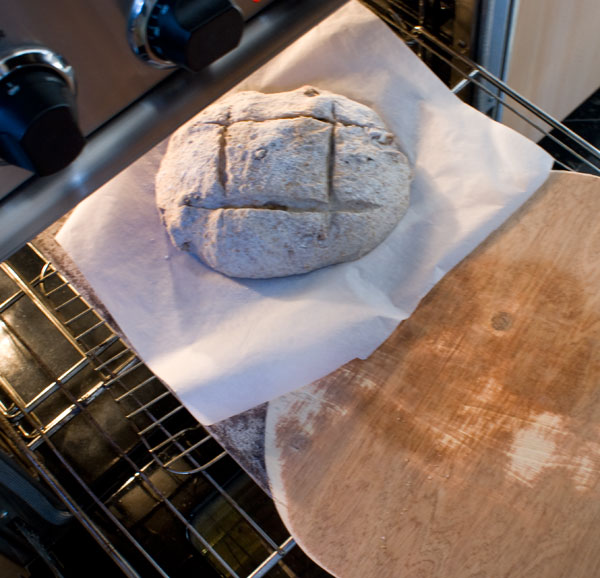
Slide bread into the oven, parchment and all, on to your stone or inverted baking pan. Creating a humid oven environment in the oven at this initial baking stage helps the crust get crustier.
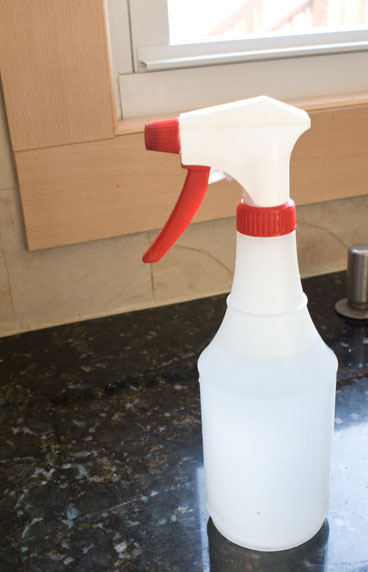
This can be achieved by spritzing some water directly into the oven a few times (using a spray bottle), and then quickly closing the oven door to trap the moisture. (Or you can place a shallow pan filled with an inch of water on the floor of your oven. This water will evaporate as the bread bakes.)
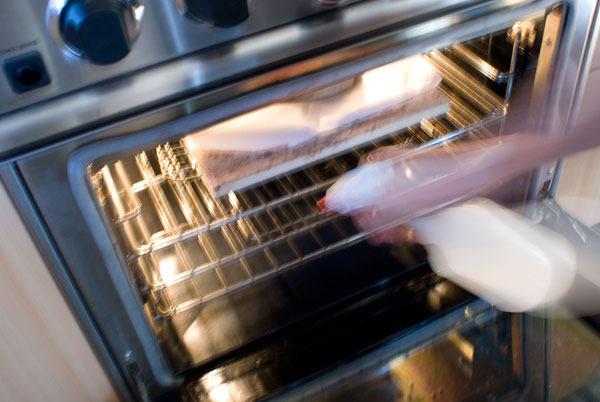
QUICKLY, spray some water into the oven, around the bread. Don’t worry if some gets on the bread. Don’t let much heat escape from the oven. I tried to do it so quickly that I couldn’t even get a clear shot. You get the idea, I hope.
Bake for 15 minutes at 425 degrees F. The high heat will help set the crust. Reduce the heat to 400 degrees F. Now the interior of the bread can bake through more gently. Bake for another 45 minutes to an hour. The top will become deeply golden…
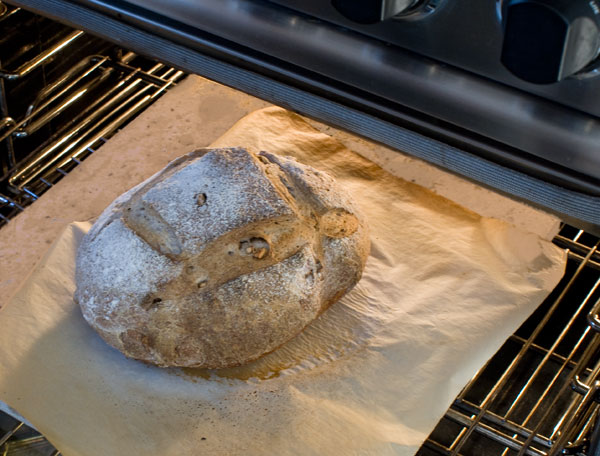
… and so will the underside. If you tap the underside, it should have a hollow sound.
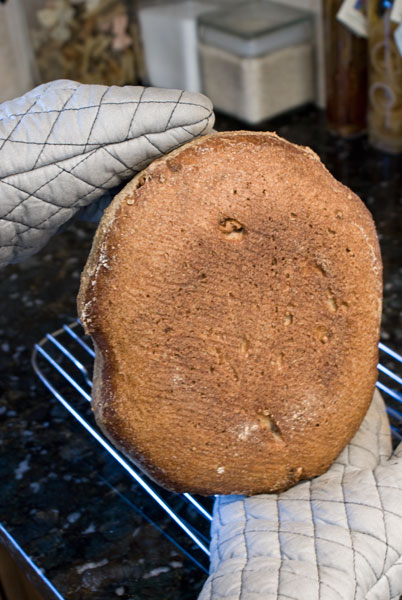
As tempting as it is to slice into it right away, let the bread cool. It needs a chance to settle. NOW slice. Try not to eat half the loaf in one sitting, like I did.

Farmer’s Bread
adapted from Jacques Pépin’s Table, by duh, Jacques Pépin
makes 1 big fat loaf
4 cups (454 g) all purpose flour plus 1 teaspoon for sprinkling
1/2 cup (84 g) rye flour
1/2 cup (14 g) wheat bran
2 1/2 (12 g) teaspoon salt
1 teaspoon (4 g) granulated yeast
2 1/3 cup cool tap water (about 70 degrees F, a comfortable room temperature)
1 cup walnuts (optional)
1 tablespoon coriander seeds (optional)
1. Stir up the flours, bran, yeast and salt (and walnuts and coriander, if using).
2. Add the water a little at a time. You may not need all of it. I certainly didn’t. You are looking to moisten all the dry ingredients so a dough can come together. Start with about 3/4 cup. Stir, and add some more as needed. Start kneading with your hands to get a sense of if the dough is coming together, and has enough moisture to form a ball. Once you have a sticky ball, knead the dough until it becomes more elastic and supple, about 5 minutes.
3. Lightly spritz a large container or bowl with nonstick spray. Pop in your dough ball, cover tightly, and let rise at ROOM TEMPERATURE for 12-14 hours or overnight. It will double in size and get airy and pillowy.
4. After the long rise, punch it down. It will deflate and release some of its gases. Shape into ball. Place it on a parchment lined paddle or inverted baking sheet. Spray lightly with non-stick cooking spray, and cover loosly with plastic wrap. This way the plastic won’t stick to the dough. Let rise again at room temperature for 1 1/2 hours.
5. While dough rests, preheat oven to 425 degrees F. If you have a baking stone, place it in the oven to preheat, too. If you don’t, preheat an inverted sheet tray. The dough should double in size again.
6. Sprinkle loaf with remaining teaspoon of flour. Gently, GENTLY, without pressing the air out, slash a tic-tac-toe shape on the bread to give it that peasanty character.
7. Slide bread into the oven, parchment and all, on to your stone or inverted baking pan. Creating a humid oven environment in the oven at this initial baking stage helps the crust get crustier. This can be achieved by spritzing some water directly into the oven a few times (using a spray bottle), and then quickly closing the oven door to trap the moisture. (Or you can place a shallow pan filled with an inch of water on the floor of your oven. This water will evaporate as the bread bakes.) QUICKLY, spray some water into the oven, around the bread. Don’t worry if some gets on the bread. Don’t let much heat escape from the oven.
8. Bake for 15 minutes at 425 degrees F. The high heat will help set the crust. Reduce the heat to 400 degrees F. Now the interior of the bread can bake through more gently. Bake for another 45 minutes to an hour. The top will become deeply golden, and so will the underside. If you tap the underside, it should have a hollow sound.
9. As tempting as it is to slice into it right away, let the bread cool. It needs a chance to settle. NOW slice. Try not to eat half the loaf in one sitting, like I did.
27 Responses to “Farmer’s Bread”
Post a Comment
Your E-Mail will be kept private. * = required fields.


I have been waiting for a new post for so long 😉
Since I already have rye flour, I just need to get the wheat germ. This is a very handsome loaf!
I’ve been waiting for a new post as well. I love your style of writing. Great loaf of bread you have there!
thanks for showing all the steps in preparing the yummy looking bread loaf. there is a chinese saying, a picture is worh a thousand words, now all the doubts and anxiety are gone, cos the pictures tell it all. thanks again for sharing your yummy steps and receipe.
best regards
laura
Been craving good bread! This looks terrific!
I can smell it now as it exits the oven, and I’m right there with you, glob of butter in hand. I might need to bake some bread this weekend! Thanks Irina!
OMG, this looks amazing. Will make Saturday/Sunday. Thank you 🙂
This looks so perfect! My dad has been asking me to bake this kind of bread – apparently, his mom used to do it when he was young – so I’m going to attempt it this weekend. One question – where do I find wheat bran? Would Whole Foods have it? Thanks so much for posting the recipe and the instructions, I can’t wait to make this! PS If you have a recipe for dark Russian bread that doesn’t involve 300 ingredients, please post!!!
Hi Irene — Yes, do try it! Wheat bran is common enough that you should be able to easily find it, either at Whole Foods or a supermarket. Bob’s Red Mill makes it, and I know my local Whole Foods carries that brand. Look in the baking aisle. And I will add the Russian dark bread to my list.
Gal, you have a huge fan club here keep it up!! what took you so long? I miss you so much:)
I wish I had the patience you described your father having. I have struggled…and failed with many a bread recipe, but I so want to be better at it. But I don’t know if I could bake the same thing day after day. But to get some good looking bread, perhaps it would be worth it. Thanks for the inspiration!
Mrs Ergul — I know, I know, sorry. I have to get on the ball.
Memoria — Thank you. I’m working the next post as we speak.
Laura — Yes, I have an easier time with pictures, too. Hope they inspire you to try the recipe.
Deanna — Thanks!
Elizabeth — Maybe it’s really the glob of butter we both crave. 🙂
Kate — Let me know how it goes if you do.
Sunny — I miss you too. Hope you’re doing well, over there.
Christina — I’ve failed at a few bread recipes myself, but sooner or later, you hit on one that makes you wish you never had to eat store-bought again.
Wow great job on the bread it looks perfect, and like always I love the pictures 🙂
Bread baking is something that has always alluded me. I simply can’t get the hang of it.. though ofcourse that’s because I haven’t ever tried, I’m too scared of it 😛
As always, just a pleasure to read through your detailed description to take the fear out of baking. I really don’t make enough bread…..but hopefully I will be changing that soon.
This loaf looks so crunchy good on the outside, and deliciously soft and complex on the inside.
Interesting point you made about most places buying their bread in. Seems to be a split between pastry and bread to the outsider…..
I absolutely enjoyed your intimate description of missing, then experiencing bread making. How neat that your dad shared his findings with you…ENJOY. I have begun to toss in a handful of the last of the old dough into the new with the yeast, salt, warm water and 2 cups of flour, mix and let it “age” for 2-3 hours in the kitchen before finishing it up and I get incredible activity and the SD comes through stronger each time (I use ABin5 and tweak it). I tried to get away from baking sweets all the time and this was the answer as you can embellish; Easter bread had 3-olive tapenade smeared over bit of bacon grease, cheese on top and it was a hit (in the shape of a Lamb done with cinnamon roll shaped body, separate tail, feet head, ears-Pepper Jack on top!). No end in sight…………
Just baked this bread! Changes made were omitting the walnuts and coriander seeds as i had none but i did add in some dried cranberries…Waiting for bread too cool now…as instructed i baked it for 15 at 425 F but then when I turned it down to 400F it seemed to be done after only 35 minutes! I did the tapping test and even inserted a knife just to make sure it wasn’t undercooked but it seemed to pass both those tests. guess we shall just have to wait till morning when its sliced for breakfast..will post tomorrow with an update on the final review!
Kind Regards,
Paola
Paola — Yeah, that’s why I hate to give baking times. The variations can be huge! Anyway, cranberries sound great, and please tell me how it turned out.
The Update- my my PastryPal this is one mighty fine bread recipe! Tell your father he has admirers all the way in the UK 😉 the cranberries were an excellent addition i must say but next time I will definitely be adding some walnuts cuz I like my bread with a bit of crunch!
The only fault I could find was when it came to cutting the bread, as I had to cut the slices quite thick in order to keep them from tearing/crumbling slightly, but perhaps I should use a sharper knife? Or wait for it to cool overnight completely- then again I haven’t the best bread cutting skills! Anyways I found it was best enjoyed after toasting and my flatmates and I’ve enjoyed it with both savory and sweet toppings. 🙂
Thanks again,
Paola
Paola, I’m always glad to hear that a recipe worked out! What kind of toppings have you tried? As far as the slicing, have you tried using a serrated knife? I get pretty good slices using a sawing motion, back and forth, like cutting a piece of wood. No need to press down on the bread because the serrated teeth do all the work, and a few zips should do the trick without tearing.
Hi Irina, I began making this last night and the dough was on the sticky side even after kneading. After the overnight proofing it turns out more sticky and the dough is pretty limp. I used 1 3/4 cups of water and used wheat germ instead of wheat bran. Could any of this be the problem?
Pei Lin — I don’t think the wheat germ would do it. What kind of flour did you use? The all-purpose flour we have around here has a high protein content and absorbs a lot of water. If your flour is light and can be used for cakes, it may not be the right kind. Also, you mention that the bread is limp. Perhaps the yeast was dead? Does it rise at all?
The last thing I always ask about is whether you’re sure everything was measured out correctly? You used a lot less water than I did and you still ended up with a sticky dough, so I’m wondering if some flour was left out. You also added in rye, right?
In this case, I’d say to just bake it and see what happens. It’ll probably be too dense but perhaps still edible. If you try it again, try it with bread flour.
Hi Irina! Thanks for your response! I weighed everything according to the recipe but next time I’ll be trying with bread flour. It did rise after the initial proofing but not much for the second proof. I still baked it in the end and you are right. it is too dense but edible. in fact i love the fragrance from the coriander seeds! I will keep you posted on my next attempt.
farmer’s bread is one of my fave breads in town…
Hi there,..this looks beyond great,..can’t wait to try it!
I do have a question I’m so hoping you could answer for me…..I’m working on a food storage closet and was wondering if I could premix the dry ingredients for bread recipes (instant yeast and all) and store these premeasured amounts in individual zip-lock bags for future use???? If so,…should i freeze, refriderate or closet shelf it?
Thanks so much!
Hi Madeline — I appreciate the time-saving initiative. Are you asking about this specific recipe or any bread recipe? Some recipes require that the yeast needs to dissolve in water before adding to the rest of the ingredients, so I’d keep the yeast separate in that case.
For this recipe, I think you could premix ingredients, but you’ll have to take into consideration that each ingredient has a different shelf life. If the yeast deactivates at some point, all the rest of the unbaked bags are as good as ruined. I suggest keeping the premeasured yeast in a smaller ziploc bag that you throw into the larger bag with the rest of the dry ingredients, so it’s together but separate. This ensures that the yeast doesn’t start feeding off the flours if any amount of moisture got in there as well.
This mix wouldn’t last too long in a storage closet (maybe 6 months, as flours can go rancid), but might keep for 1 or 2 years in the freezer. The one thing to be aware of is to avoid getting any condensation of moisture in there, or it might prematurely activate the yeast, and then your bread wont rise when you bake it.
Hope that helps!
Hi! I made this bread yesterday and oh goodness how tasty and moist it is. And oh the crispy crust… It’s definitely the best bread I’ve ever tasted! Mine ended up having some flax seeds, since I had no other seeds/nuts at home and they really added a nice touch.
I will definitely make different variations of this bread in the future. Thank you so much for sharing this recipe and having this gorgeous site in the first place!
Thank you very much for the recipe and all details and pictures.
I try this recipe, that your father gave to me at our friends Lucy and
Leon Guzman house. It is an absolutely great recipe, even if my bread
did not come that good as your father, when we try it. I definably going
to try to do this again and follow all instructions of your recommendations.
Thank you again,
Maryana Sherman