Still here with offerings of Cherry Pie Tart Squares
October 3rd, 2010 | 30 Comments
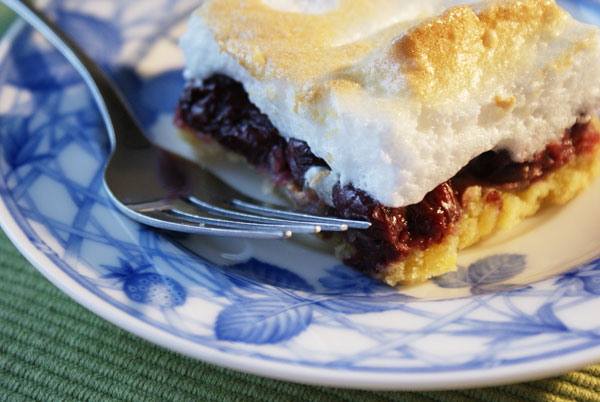
Jeez, did she forget she has a blog? Did she come down with a case of perma-flu? Did she exhaust her whole baking repertoir already?
Alas, nothing monumental happened that kept me away from all the keyboards in the world. I simply never realized how much actual WORK blogging is. When I first started, I threw myself into it full force, then I burned myself out. So I took a little break. And by a little, I mean a couple of seasons worth. Long enough to make you wonder if I dropped dead.
If, by some miracle, you’re still with me, I thank you. I sure have missed you. What’s new with you? Let’s shoot the breeze.
A couple of new things have happened here over the last few months. Scott and I got back together. Yay! We bought a new house in suburban New Jersey. Yay?
Just kidding. It’s a yay. It’s gorgeous here, but I got a vision of you raising your eyebrow in wonderment of why anyone would move to Jersey with with these two running loose around here.

One thing that makes me happy about the new place is the all-white counter. This may not mean much to you, but it’s a huge deal. The counter we had in the last apartment, seen in many recipes, such as this cannoli post, looked like a bird splat all over it. It’s a wonder you can see where the food is. I kept losing my knife in that pattern.
I’d love to feature some local desserts, but is there such a thing as a Jersey themed dessert? “Industrial” Crackers? “Big Hair” Crumble?
Anyway, I brought you some Cherry “Pie Tart” squares in honor of our reunion. I didn’t know what the hell to call these, so there you have my Franken-name.
Did you know that one day cherries are readily available for purchase and one day they’re not? Practically overnight. That quickly. I once had a cherry dessert on a menu over a summer season, and September was looming ahead. I knew I would have to switch the dessert out for something else soon, but thought I had a little buffer time while I tested out some replacements.
Um, no. On a Tuesday I was able to order a case of cherries, on a Wednesday, the cherry delivery ceased to exist. I grabbed my purse and went to the store a few blocks away. No sign of cherries. I went to the deli. No cherries. I walked even further, to another supermarket, all the while getting more and more stares from people wondering what a person dressed in chef’s garb was doing in a supermarket. Not a single, not even sad looking cherry.
After about an hour, and a couple of miles of hoofing later, I found an outdoor fruit vendor with some cherries. They must have been the last ones in the city, and cost me $18. Rat bastard. At least this bought me enough time to come up with some other game plan.
Cherries happen to be my favorite fruit and over the course of the summer, I eat them as though I’m being sent to the electric chair. I mourn a little when they’re gone. So what’s a girl with cherry withdrawl to do?
Sniff around for alternatives, I say. And you know what? These jarred sour cherries ain’t half bad. They’re comparable to a compote in light syrup, good for spooning on yogurt, ice cream or if you’re desparate, like me, gobbling them up straight out of the jar with a slotted spoon. Baking them into a cookie crumb bed and a meringue blanket makes me forget they’re extinct for a while.
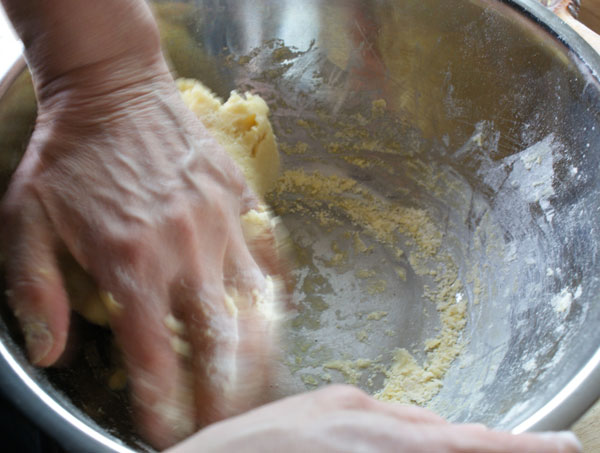
In the photos, you’ll see my mother’s great, lived-in hands. That’s because this is her recipe and she’s been making this since the day I was born.
I’ve never had a problem finding sour cherries in a supermarket—usually with the canned fruit, but sometimes they’re in the ethnic aisle. They come in a jar. Something like this:
Amarena di Cantiano – Sour Cherries in Syrup
or this:
Zergut Pitted Sour Cherries in Light Syrup 24 oz.
Cherry Pie Tart Squares
makes about 24 squares.
These are best the day they’re made, but I wouldn’t refuse them the next day. They survive well enough left out at room temperature.
For the dough base:
2 sticks (225 g) unsalted butter, cut up into chunks
2 large egg yolks
2 tablespoons (25 g) granulated sugar
1/4 teaspoon (2 g, or a pinch) salt
2 cups (294 g) all-purpose flour
1 tablespoon (14 g) lemon juice
1 teaspoon (5 g) baking soda
3 tablespoons (40 g) breadcrumbs
2 24-oz jars (672 g each) pitted sour cherries in light syrup
For the meringue:
4 large egg whites
1/3 cup (75 g) sugar
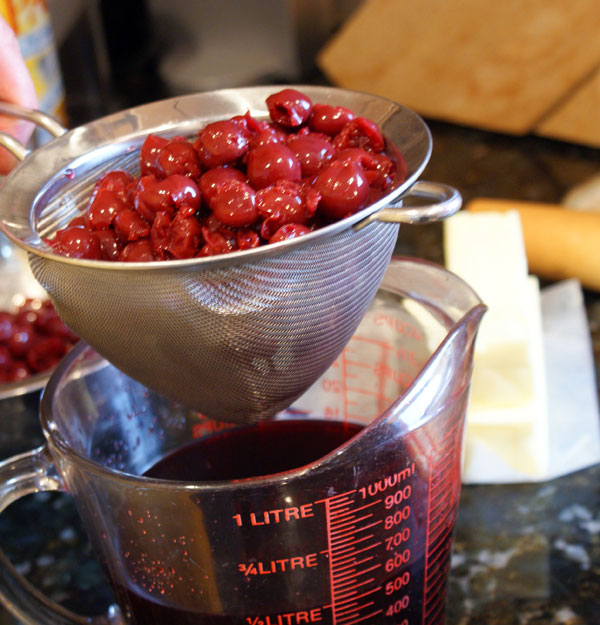
1. Drain the cherries as well as you can. (You can save the syrup or toss it. I like it added to iced tea, or I just drink it straight up.)
All the players.
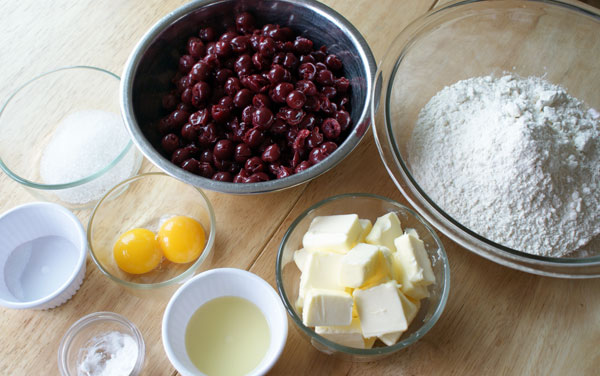
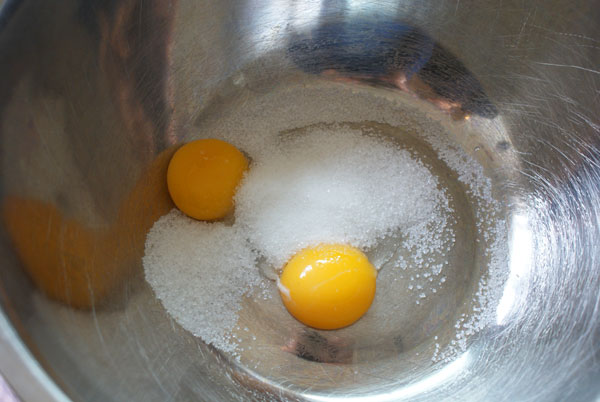
2. In a large bowl, whisk the yolks and sugar together just to mix.
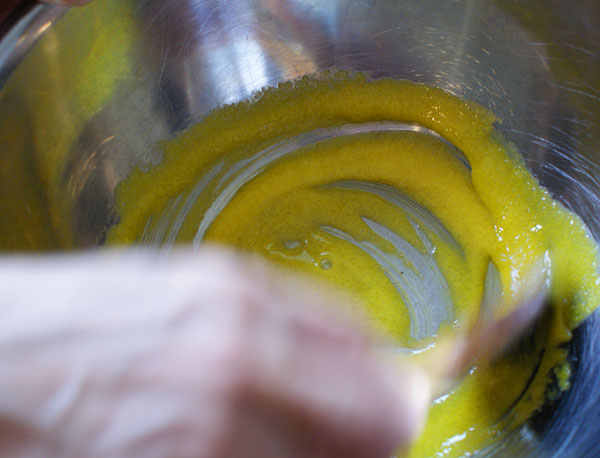
3. Toss in the butter…
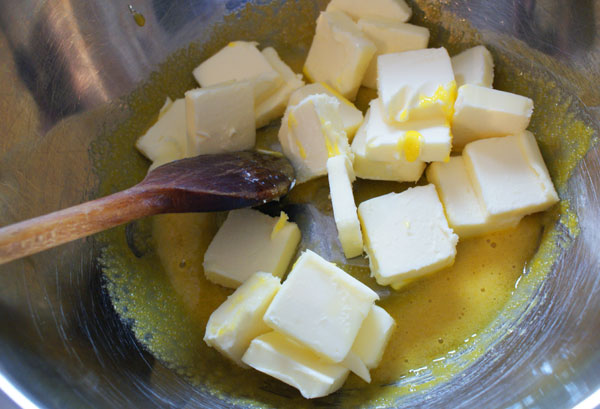
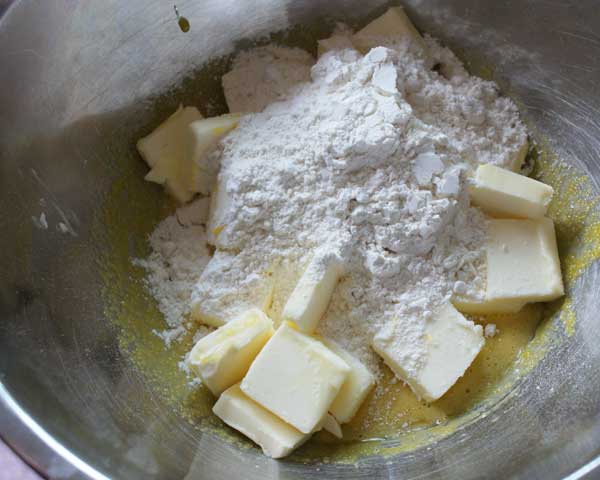
…then, the flour. Stir it up just to get the mixing started, but the bulk of the mixing will happen in a second.
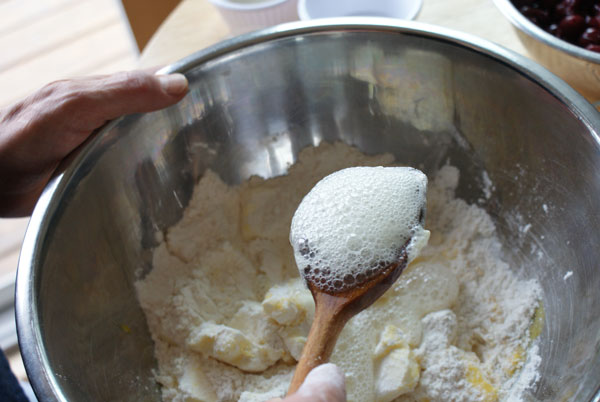
4. Ok. This is a weird step, but bear with me. Take your baking soda, and put it in a big spoon. All at the same time, pour the lemon juice over the baking soda, and…
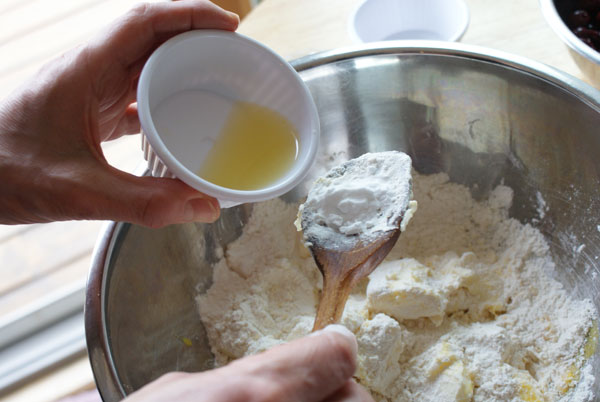
…as it activates and foams up, let it run off the spoon over the stuff in the bowl. The acid from the lemon juice reacts with the baking soda and starts the leavening process right there in the bowl! I feel like I’m in high school chemistry.
5. Then my favorite part: getting the hands dirty. Start mixing the dough. Knead it, and turn it, and work it. Break up the butter into it as you go.
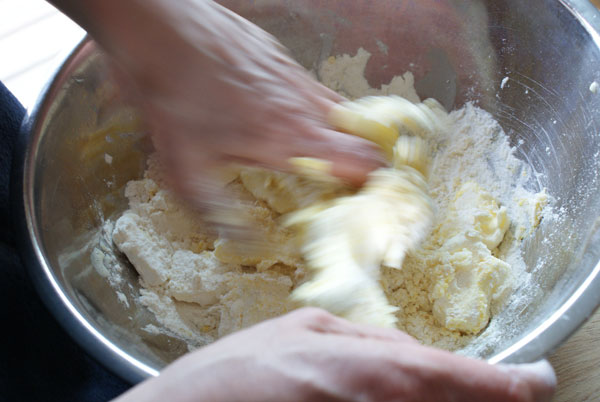
A little progress.
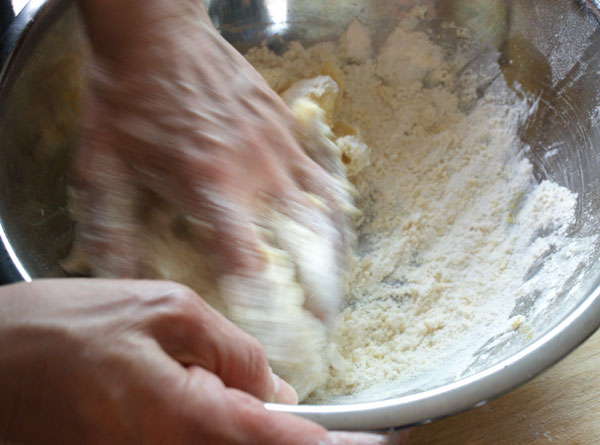
Aaaaaaaalmost.
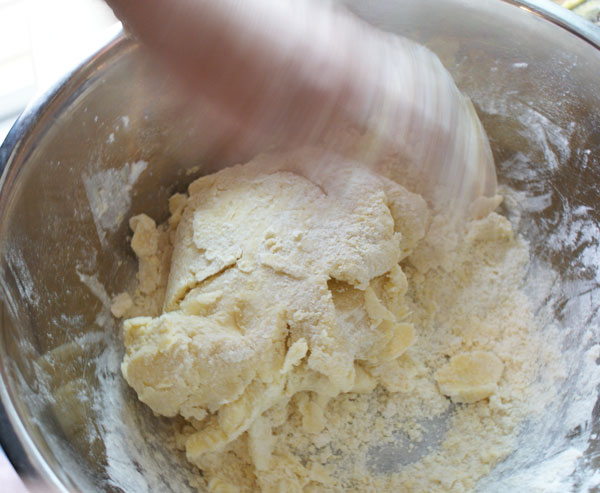
Ok, here we go. The sides of the bowl are just about crumb-free.
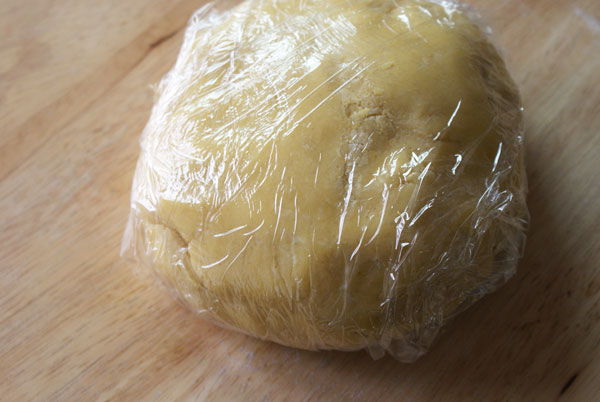
Wrap the piece in plastic, and let it rest in the fridge for at least 2 hours or overnight. We want butter in the dough to get cold and firm up.
6. Preheat the oven to 350 degrees F. Prepare a high-sided baking pan by spritzing it with some non-stick cooking spray (or grease the sides with a piece of butter). Mom used a roasting pan, about 10″x14″. (I use a glass baking dish, ’cause that’s all I got!) Somehow I forgot to take its picture, but you can see it in action in the upcoming photos.
Flour a tabletop with a light dusting of flour, and roll the piece out to about 1/2 inch thickness. No need to be neat about it. If it’s rough around the edges, that’s no biggie.
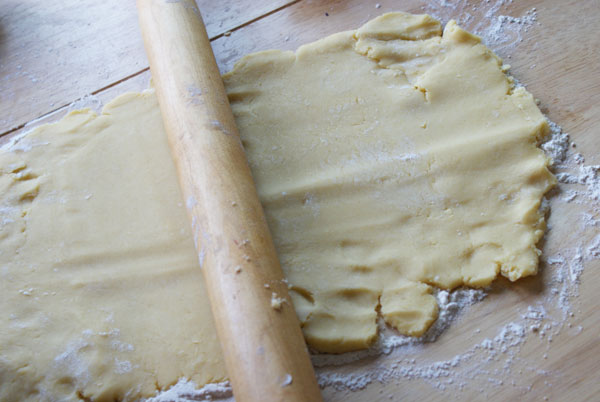
7. Wrap the dough around the pin for easier transport from the table to the baking pan. If it rips, it doesn’t matter, because…
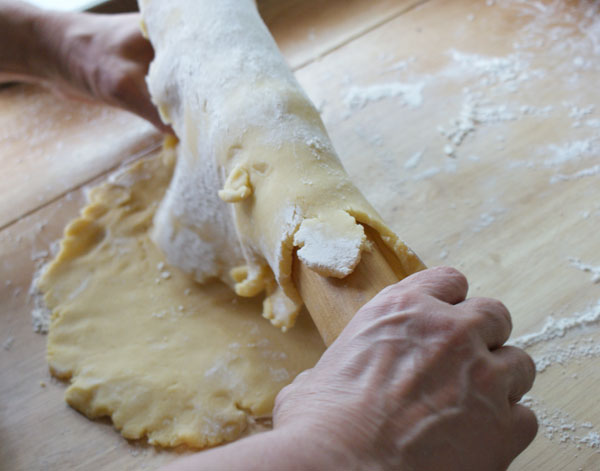
…it get’s pressed in to the pan, all rustic-style, like in the old country.
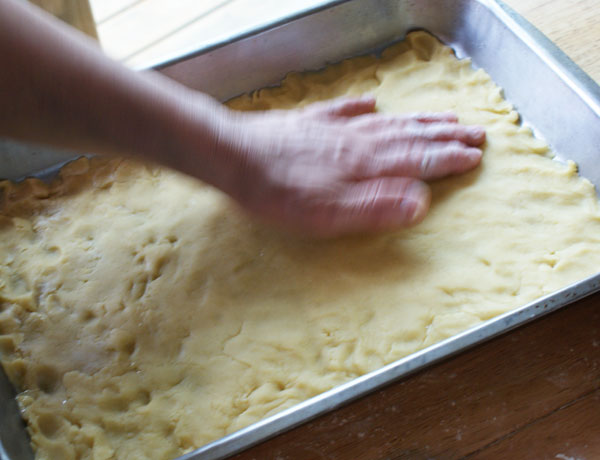
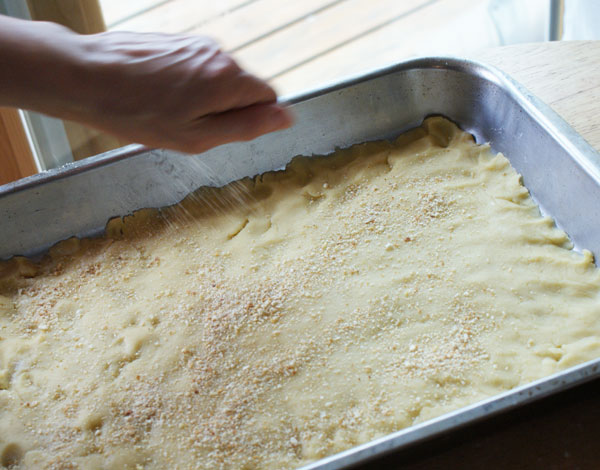
Once the even-ness is satisfactory, sprinkle the breadcrumbs over the surface. Hopefully, some of the extra moisture that oozes out of the cherries will be absorbed, and the base won’t get soggy.
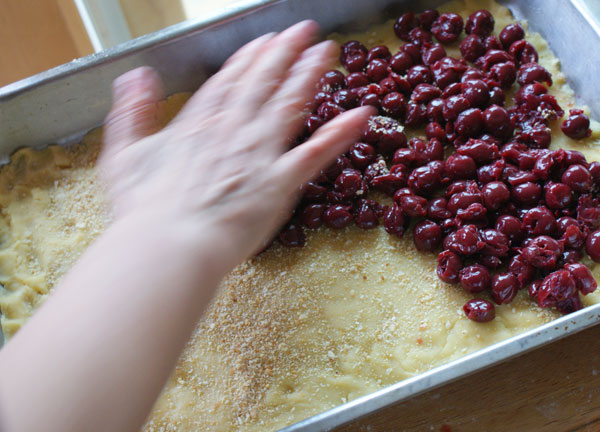
8. Spread the cherries over the surface. A single layer is ideal, but dense is best. Pack ’em in there!
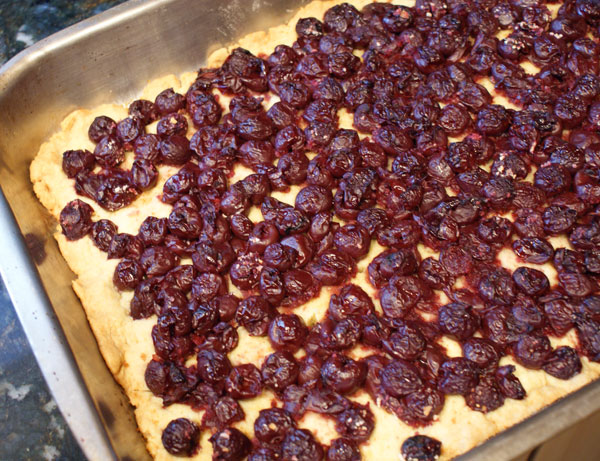
Bake! About 25-30 minutes, just until the dough part is golden. Remove the pan from the oven, let rest on the side, and heat up the broiler.
9. Once it’s baked, and only when it’s baked, start the meringue:
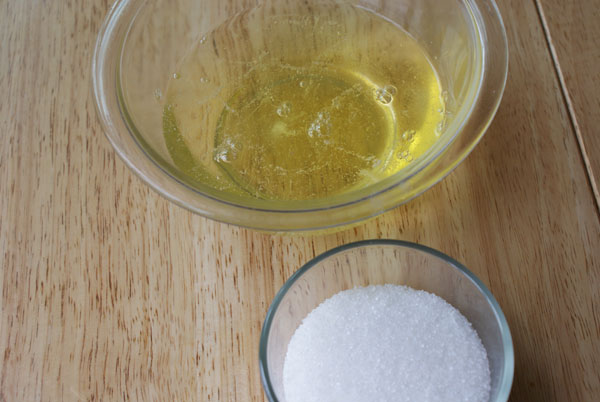
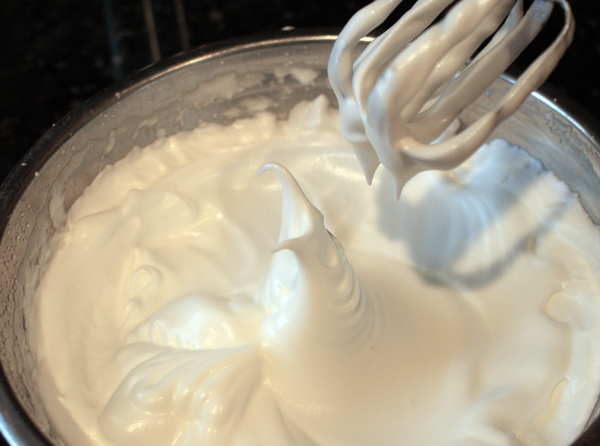
Slowly, at medium speed, start beating the whites. (You can use hand-held electric beaters, a standing mixer with a whip attachment, or manually, with a hand-held whisk.) When it starts getting frothy, like this, slowly start pouring in the sugar, all the while whisking.
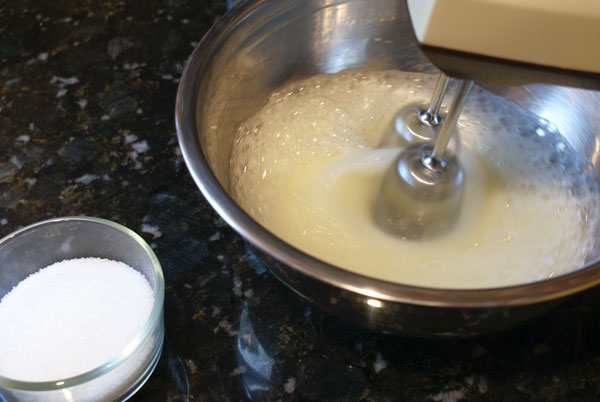
The sugar should all be in by now. Increase the speed of the beaters to medium-high, and continue to whisk until the consistency is a pretty firm peak.
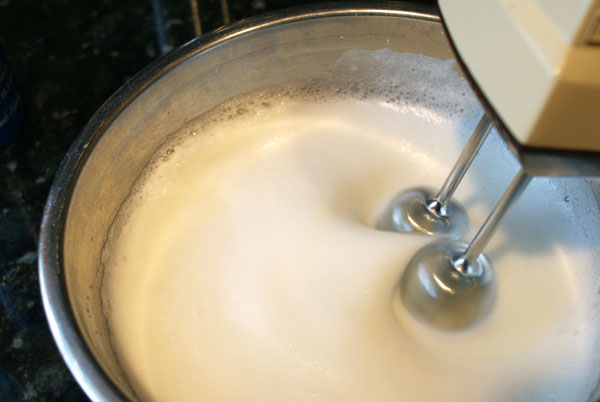
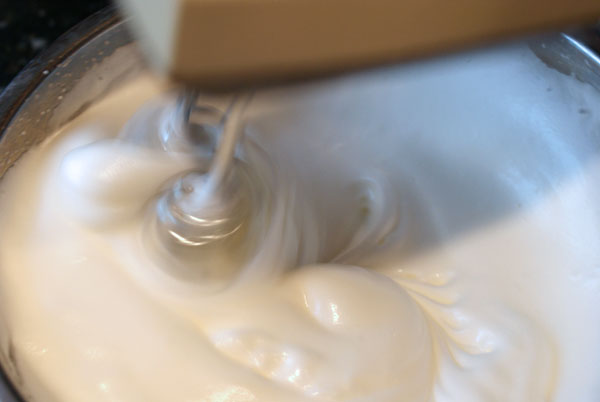
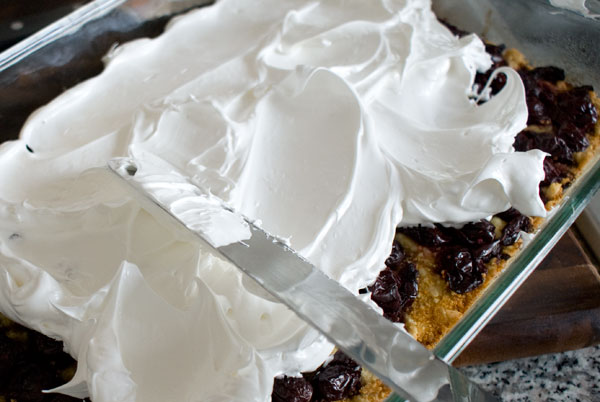
Quickly, spread the mixture over the baked cherry base. If the base hasn’t completely cooled from baking, that’s ok. I like to keep the top rough and full of personality, with peaks and valleys.
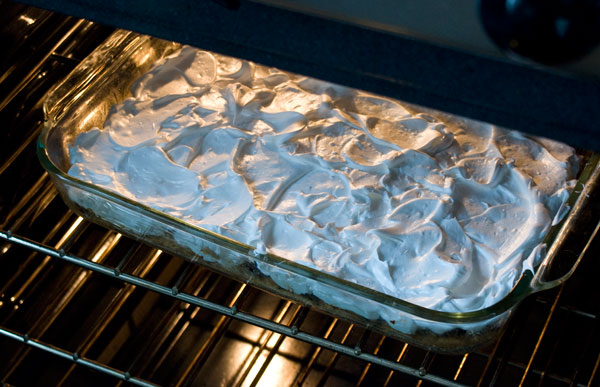
Stick the pan under the broiler, about 6 inches away. Watch it carefully! This will just take a minute or two. It’s a good time to finally make use of the window of your oven door.
Once the top becomes golden, it’s done! It’s a matter of a minute between nicely browned and burned, so keep that watchful eye.
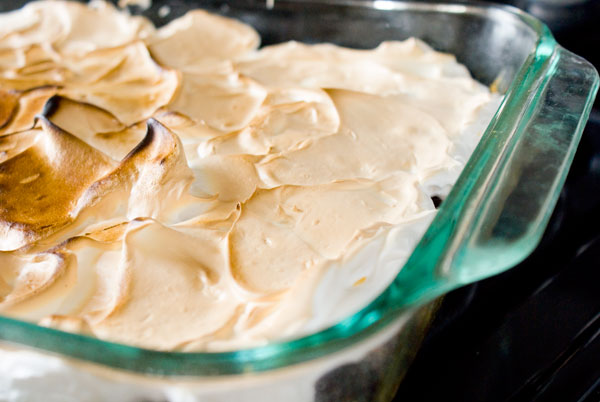
It’s best to slice it before it cools. The meringue tends to stick to the knife for dear life, so run the knife under hot water, dry with a kitchen towel, then slice. It does help make a cleaner cut. I get about 24 pieces, but I suppose 16 BIG pieces wouldn’t be bad either (wink.)
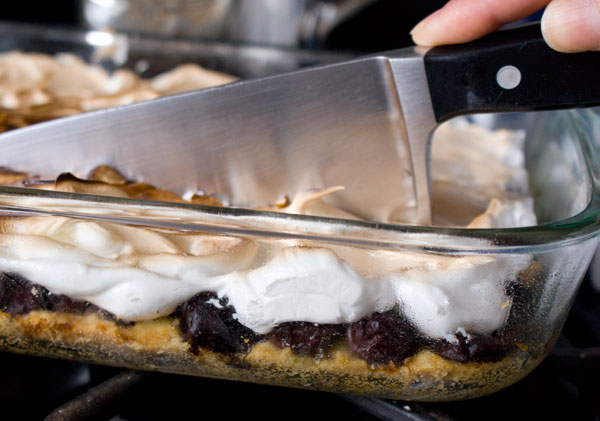
And out of the pan they go.
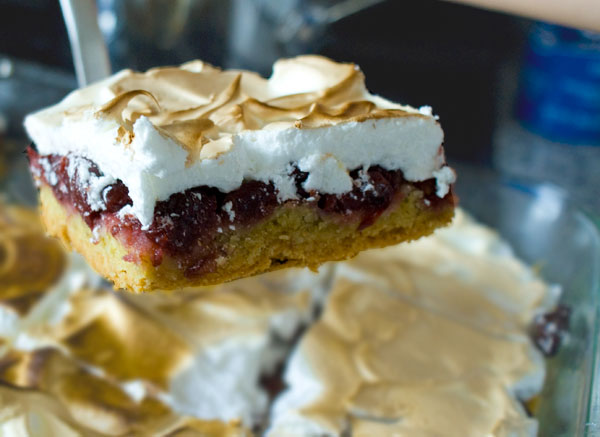
Cherry Pie Tart Squares
makes about 24 squares.
These are best the day they’re made, but I wouldn’t refuse them the next day. They survive well enough left out at room temperature.
I’ve never had a problem finding sour cherries in a supermarket—usually with the canned fruit, but sometimes they’re in the ethnic aisle.
For the dough base:
2 sticks (225 g) unsalted butter, cut up into chunks
2 large egg yolks
For the dough base:
2 sticks (225 g) unsalted butter, cut up into chunks
2 large egg yolks
2 tablespoons (25 g) granulated sugar
1/4 teaspoon (2 g, or a pinch) salt
2 cups (294 g) all-purpose flour
1 tablespoon (14 g) lemon juice
1 teaspoon (5 g) baking soda
3 tablespoons (40 g) breadcrumbs
2 24-oz jars (672 g each) pitted sour cherries in light syrup
For the meringue:
4 large egg whites
1/3 cup (75 g) sugar
Directions:
1. Drain the cherries as well as you can. (You can save the syrup or toss it. I like it added to iced tea, or I just drink it straight.)
2. In a large bowl, whisk the yolks and sugar together just to mix.
3. Toss in the butter, then, the flour. Stir it up just to get the mixing started, but the bulk of the mixing will happen in a second.
4. Ok. This is a weird step, but bear with me. Take your baking soda, and put it in a big spoon. All at the same time, pour the lemon juice over the baking soda, and as it activates and foams up, let it run off the spoon over the stuff in the bowl. The acid from the lemon juice reacts with the baking soda and starts the leavening process right there in the bowl!
5. Start mixing the dough. Knead it, and turn it, and work it. Break up the butter into it as you go. Eventually it will form a firm dough.
6. Wrap the piece in plastic, and let it rest in the fridge for at least 2 hours or overnight. We want the butter in the dough to get cold and firm up.
7. Preheat the oven to 350 degrees F. Prepare a high-sided baking pan by spritzing it with some non-stick cooking spray (or grease the sides with a piece of butter). Mom used a roasting pan, about 10″x14″. (I use a glass baking dish, ’cause that’s all I got!)
8. Flour a tabletop with a light dusting of flour, and roll the piece out to about 1/2 inch thickness. No need to be neat about it. If it’s rough around the edges, that’s no biggie.
9. Wrap the dough around the pin for easier transport from the table to the baking pan. If it rips, it doesn’t matter, because it get’s pressed into the pan, all rustic-style, like in the old country. Once the even-ness is satisfactory, sprinkle the breadcrumbs over the surface. Hopefully, some of the extra moisture that oozes out of the cherries will be absorbed, and the base won’t get soggy.
10. Spread the cherries over the surface. A single layer is ideal, but dense is best. Pack ’em in there!
11. Bake. About 25-30 minutes, just until the dough part is golden. Remove the pan from the oven, let rest on the side, and heat up the broiler.
12. Once it’s baked, and only when it’s baked, start the meringue:
Slowly, at medium speed, start beating the whites. (You can use hand-held electric beaters, a standing mixer with a whip attachment, or manually, with a hand-held whisk.) When it starts getting frothy, like this, slowly start pouring in the sugar, all the while whisking.
13. Once the sugar is all in, increase the speed of the beaters to medium-high, and continue to whisk until the consistency is a pretty firm peak.
14. Quickly, spread the mixture over the baked cherry base. If the base hasn’t completely cooled from baking, that’s ok. I like to keep the top rough and full of personality, with peaks and valleys.
15. Stick the pan under the broiler, about 6 inches away. Watch it carefully! This will just take a minute or two. It’s a good time to finally make use of the window of your oven door. Once the top becomes golden, it’s done! It’s a matter of a minute between nicely browned and burned, so keep that watchful eye.
16. It’s best to slice it before it cools. The meringue tends to stick to the knife for dear life, so run the knife under hot water, dry with a kitchen towel, then slice. It does help make a cleaner cut. I get about 24 pieces, but I suppose 16 BIG pieces wouldn’t be bad either (wink.) Serve em up!
30 Responses to “Still here with offerings of Cherry Pie Tart Squares”
ABOUT ME
![]() I had a career going in advertising when one day I got the crazy idea to start over and become a pastry chef. Now I'll show you what I learned working in fine dining restaurants all over NYC right here with step-by-step photos. So grab your rolling pin and join in.
I had a career going in advertising when one day I got the crazy idea to start over and become a pastry chef. Now I'll show you what I learned working in fine dining restaurants all over NYC right here with step-by-step photos. So grab your rolling pin and join in.


Yayyy you’re back!!! For good??
These bars look amazing. Off to look for some canned cherries to make these with!
Hi Avanika — Thanks for that! Yes, for good!
Hooray, you’re back!
While you were gone I made *all* your recipes – not kidding! I’m hungry for new ones! 🙂
Love from the Netherlands!
Hi Ilona! Wow, really? I hope a couple of them worked 😉 I have a list of some good ones I want to post, so I’m glad you’re ready to take on some fresh baking.
YAY…welcome back! I was so glad to see the (1) in my reader today!!! Stay long with new recipes will you?
Love from Argentina
Hi Sil BsAs—Thanks for the big welcome back! I plan to stick around for a while.
Finally you are back!!!
I really missed you!
Good luck with all new (old ) beginnings and … please…more new recipes.
Batia
Thank you Batia!
Welcome Back! I was just wondering last week what you were up to!
Deanna—Thanks! I’m up to no good, as usual 😉
Lovely! I’m bookmarking for next season right now. No reason not to get a headstart on next summer’s cherry season, right? 🙂
Hi Michelle — As you can see, I can’t even wait till next season 🙂
Oh, so glad to see you back! This “pie-tart” looks fantastic. I’ll bet a blueberry filling would be nice under that meringue, too. Pace yourself and enjoy your new digs!
Tracy — You’re right. Blueberry sounds great. My mother also makes a version with grated apples.
Glad to see you back. Your blog inspired me to start baking again and your recipes are always a great hit at my parties!
Nana — The fact that you break out these recipes at parties inspires me to bake, so thank you.
oh wow this looks really good. Cant wait to try this out soon. Thank you for sharing.
Hi blackbook — Thank you for stopping by.
I’m so glad you’re back! I knew it would be hard for you to keep posting regularly given the quality of your posts. They must take a long time to write and document with all your fabulous process photos. It’s wonderful that your life got so busy in a good way that you had less time to blog. But if and when you post again, we’ll always read what your publish with great pleasure!
Woohoo! Was so excited to see the blog’s name in bold in my google reader! What a great post to start things off again too…that crumb looks just perfect!
Hi Astrid — Thanks for understanding. I’m hoping to find a happy medium, so I can post at a reasonable clip without making myself a slave to my own blog.
Hi Zo — Yep, it’s good to be back! Thank you for still being here!
Were you missed…YEAH!!! I’m doin the happy dance over here girl!! So glad to hear about your reunion and the new house! And look what you made us!! It looks fantastic!! And I know I’ve said this before but I still love your how to pics! Welcome back!!
Hi Bunny! Thanks! Can I join in on the happy dance?
Hi Irina,
Just found your blog and so happy that I did! Judging by your name, I have a feeling that we both hail from the same part of the world 🙂 I have wanted to recreate a sour cherry cake that my Russian grandma was famous for. The tattered recipe I found lists kefir. Do you have any tips on how to work with that? Is it what we find in the supermarkets here? Is buttermilk a safer bet? Thanks so much!
Anna
Hi Anna — Yes, it looks like we both come from Russia. Sour cherries as an ingredient seems to be a biggie with us Russians :). Kefir is kind of new in my stores, and I’d describe it as a thick, tangy yogurt drink. If you live near a Whole Foods or the like, you might find it there. If you can’t find it, I think a plain yogurt, mixed with a tablespoon or two of milk to loosen it up would make a great substitution. And yes, buttermilk would probably work well, too. Let me know what happens. I’d love to see this cake.
hello,
how long does the meringue last ? Ps i love your strawberry garnish!
Dipsterlil — The meringue holds up well for a day. The few minutes of “cooking” at the end help to set it up. It’s still pretty good for another day or two after that, but it does start to weep and get little beads on top. Having said that, it’s not so noticeable. We have them sitting on the counter for 2-3 days and still enjoy them.
ok, so counter – does that mean dont refrigerate? and how about a flash to re warm, or would i be better keeping the meringue uncooked and just cooking when i wanted it?
No, I do not refrigerate the baked bars. They’ll absorb too much moisture in the fridge and get soggy.
You’ll need to cook the meringue right when you make it, or it will break down very quickly.
You can try and reheat if you like, but it could have an undesirable effect on the meringue. Try a low oven (300 degrees) for just a couple of minutes. Even that small amount of time might not heat it all the way through, but the meringue might dry out too much if you heat longer. Try testing just one, and see if it reheats to your liking. We’ve always eaten these at room temperature, though.
Let me know if you have more questions…